
A garden that looks carefully composed during the day can disappear into an undifferentiated dark space after sunset. Adding more fixtures does not necessarily solve the problem. If every tree, wall and path is illuminated equally, the result can feel flat, cluttered and excessively bright.
Successful landscape lighting decides what should appear first, what should remain in the background and what can stay dark. It guides movement, reveals selected plants and architectural features, and creates depth without exposing every fixture.
This guide explains how to compose a garden after dark using trees, planting, pathways, walls, sculptures and water features. It focuses on landscape effects, fixture positions, beam control, growth, maintenance and final aiming. For a broader introduction to exterior fixture types and general outdoor planning, begin with the Outdoor Lighting Guide.
1. Design the Night-Time Landscape
During the day, sunlight reveals almost everything in the garden. At night, artificial lighting determines which elements remain visible and how the landscape is understood.
The lighting plan should establish:
- The first feature people notice
- The route from one area to another
- The relationship between nearby and distant planting
- The position of entrances and level changes
- The depth of the garden when viewed from inside
- The boundaries that should remain visible
- The areas that can remain intentionally dark
This is different from simply placing fixtures beside every tree or at equal intervals along every path.
A successful scheme creates a sequence. A softly illuminated entrance may lead toward a path, a mature tree may become the main focal point and a distant wall or canopy may establish the background. Darker spaces between these elements preserve separation and visual depth.
Good landscape lighting does not reveal everything. It selects what the garden should become after dark.
2. Start With the Landscape Plan and Viewing Positions
Before selecting fixtures, prepare or mark a plan showing:
- Buildings and entrances
- Paths, steps and level changes
- Terraces and seating areas
- Trees and planting groups
- Walls, fences and boundaries
- Sculptures and water features
- Irrigation routes
- Drainage points
- Electrical supply locations
- Neighbouring windows and properties
Then identify the important viewing positions.
These may include:
- The main entrance
- Living-room windows
- Dining-room windows
- Terrace seating
- Garden seating
- The beginning and end of each path
- Upper floors or balconies
- The street or site entrance
The best view of the garden may be from inside the home. Lighting that works while walking through the landscape may expose bright sources or lose depth when viewed through a large window.
Walk the proposed views during daylight and again after sunset. Consider how planting, furniture, walls and architecture overlap from each position.
The lighting plan should support several important viewpoints without attempting to make every element appear equally strong from every direction.
3. Decide What Deserves Light—and What Remains Dark
Begin by establishing a hierarchy.
Primary focal points
These are the elements that should attract attention first. Examples include:
- A mature specimen tree
- A sculpture
- A textured stone wall
- A water feature
- A distinctive architectural element
A garden normally needs only a limited number of primary focal points within one view.
Secondary elements
These support the composition without competing with the main feature. They may include smaller trees, planting groups, walls or selected landscape details.
Guidance elements
Paths, steps, entrances and changes in level require enough visibility to support movement. They do not necessarily need to become visual focal points.
Intentional darkness
Some areas should remain darker to:
- Separate illuminated features
- Preserve the night-time atmosphere
- Reduce glare and spill
- Avoid flattening the garden
- Protect neighbouring properties
- Reduce unnecessary energy use
Illuminating every tree with the same fixture, beam and output removes hierarchy. Instead, vary the strength, direction and visibility of the lighting according to the importance of each element.
4. Build Foreground, Middle-Ground and Background Depth
A landscape viewed after dark can be organised into three visual planes.
| Visual plane | Typical elements | Lighting purpose |
|---|---|---|
| Foreground | Steps, nearby planting and surface texture | Immediate orientation and detail |
| Middle ground | Main trees, seating, sculptures and feature planting | Principal visual composition |
| Background | Boundary trees, walls and distant planting | Depth and enclosure |
If only the nearest planting is illuminated, the garden may appear to end immediately behind it. Adding a restrained background element can make the space feel deeper.
A balanced view might contain:
- Soft guidance lighting in the foreground
- One clearly defined tree in the middle ground
- A gently illuminated canopy or boundary wall farther away
- Dark intervals separating the three layers
The layers should not be equally bright. The main focal point can carry the strongest emphasis, while background lighting remains softer.
Review the composition from inside the property as well as from within the garden. A landscape that feels layered while walking through it may appear visually confused when viewed through glass from a fixed interior position.
5. Understand the Main Landscape-Lighting Techniques
Select the lighting effect before selecting the fixture.
Uplighting
Uplighting directs light from a lower position toward a tree, wall, sculpture or architectural feature.
It can reveal trunks, branches, canopies and vertical surfaces. The fixture should be positioned and aimed so that the useful beam reaches the target rather than continuing unnecessarily into the sky.
Downlighting
Downlighting directs light from an elevated position toward the ground, planting or circulation area.
It can provide useful guidance with less visible equipment at ground level, provided the source is shielded and remains accessible for maintenance.
Cross-lighting
Cross-lighting uses light from two separated directions.
It can reveal the depth of a tree, sculpture or multi-sided feature more effectively than one frontal beam. The two directions do not need to have equal brightness.
Backlighting
Backlighting places the light behind the subject from the main viewpoint.
It can create silhouettes, illuminate the edges of foliage or separate a plant from a darker background.
Grazing
Grazing places light close to a textured surface so that small projections create visible highlights and shadows.
Washing
Wall washing distributes light more broadly and evenly across a vertical surface.
Moonlighting
Moonlighting uses shielded light mounted above and directed downward through branches. It can create a soft pattern on the ground that resembles filtered natural light.
Terms such as beam angle, wall washing, wall grazing and light spill are explained further in the Lighting Glossary.
6. Light Trees According to Their Shape
Trees should not all receive the same lighting treatment.
| Tree form | Main lighting priority | Possible approach |
|---|---|---|
| Tall narrow tree | Height and vertical form | Controlled narrow or medium uplight |
| Broad-canopy tree | Trunk and canopy width | Wider beam or separated positions |
| Multi-trunk tree | Branch structure and depth | Cross-lighting from different angles |
| Dense evergreen | Outer form and selected texture | Controlled front or side lighting |
| Open deciduous tree | Trunk, branches and seasonal structure | Uplighting or cross-lighting |
| Palm | Trunk texture and upper crown | Separate attention to trunk and canopy |
| Small ornamental tree | Complete form | One restrained adjustable accent |
A narrow tree may be illuminated effectively with one controlled beam. A broad mature tree may require a wider distribution or more than one position to reveal both the trunk and canopy.
Fixture output should not be selected by tree height alone. Consider:
- Canopy width
- Foliage density
- Trunk colour
- Distance from the fixture
- Main viewing direction
- Surrounding darkness
- Available mounting positions
- Potential for spill beyond the canopy
The Beam Angle Guide explains how narrow, medium and wide beams behave. Use the Beam Angle Calculator to estimate preliminary coverage from the fixture-to-tree distance.
7. Choose One or More Lighting Positions for Each Tree
The number of lighting positions affects how the tree’s form is perceived.
One-light treatment
One fixture can create strong modelling and a clear direction. It is often suitable for a smaller tree or a feature viewed mainly from one direction.
The opposite side may remain darker, which can create useful depth.
Two-position treatment
Two separated positions can reveal more of the trunk and canopy. This may suit multi-trunk trees, broad canopies or trees viewed from different parts of the property.
The outputs and aiming angles do not need to be identical. Slight variation often creates a more natural result than perfect symmetry.
Three-position treatment
A large specimen viewed from several directions may justify three positions. This should be used selectively because too much equal illumination can flatten the tree and increase spill.
When positioning fixtures:
- Keep them away from vulnerable roots where possible
- Avoid placing them directly in main sightlines
- Hide them behind suitable planting without blocking the beam
- Allow space for maintenance
- Check lawn and gardening equipment routes
- Prevent the beam from passing unnecessarily beyond the canopy
- Leave adjustment capacity for future growth
There is no universal distance from the trunk. The correct position depends on the tree’s form, the selected optic and the intended effect.
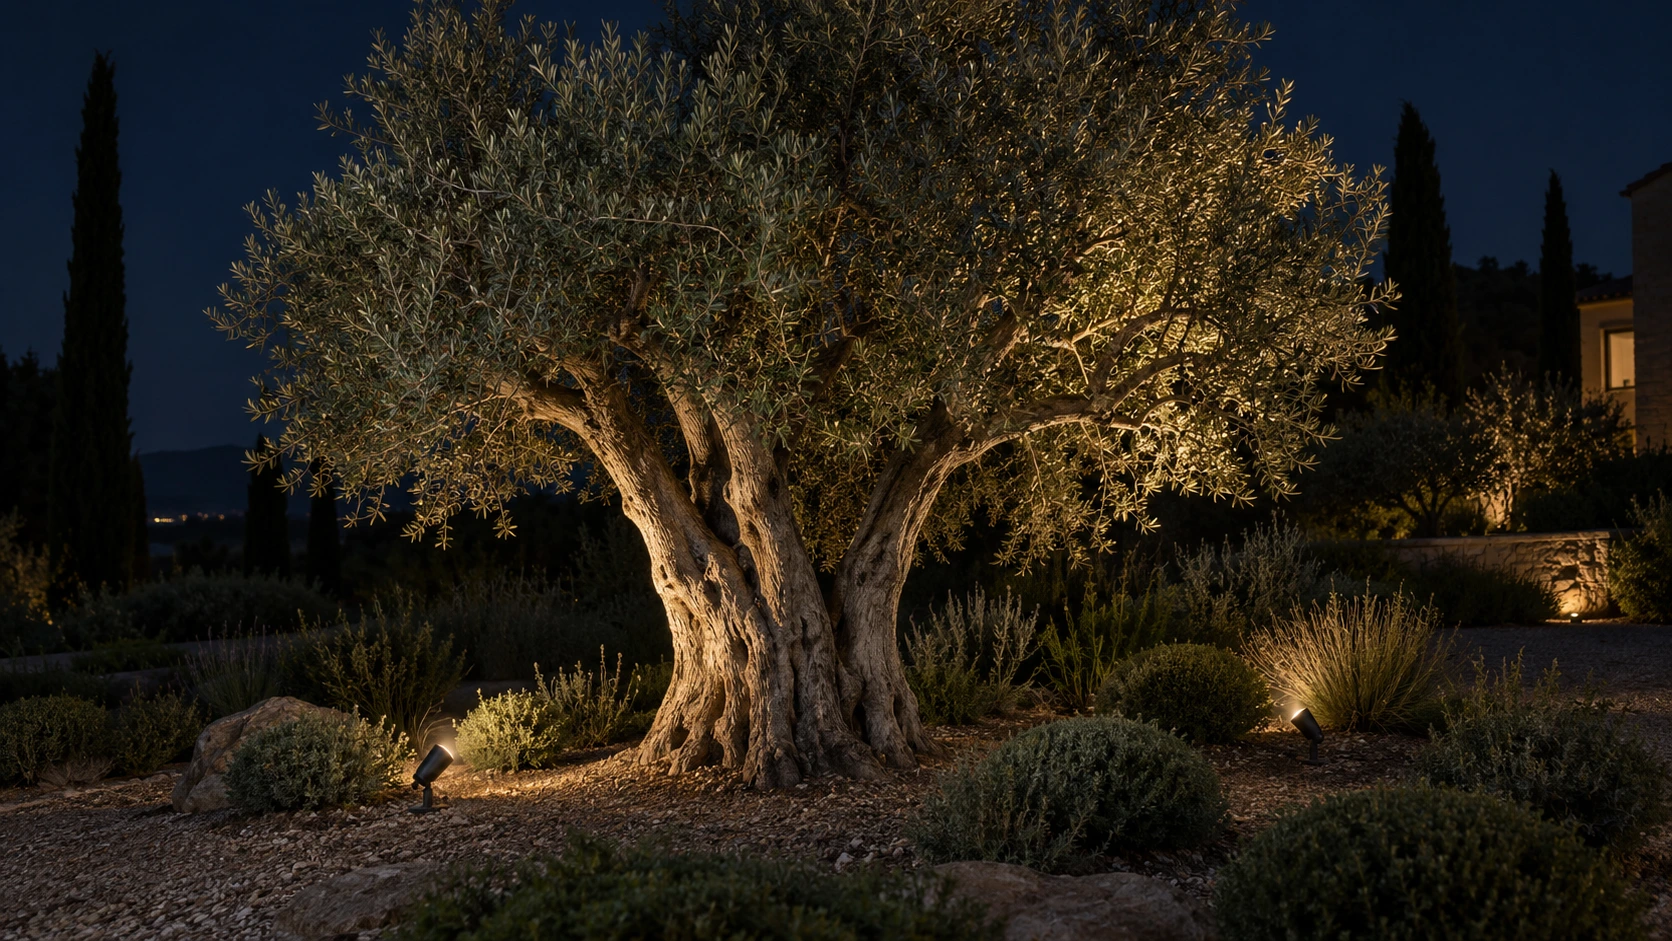
8. Light Shrubs and Planting Beds as Groups
Low planting usually works better as a composition than as a collection of individually illuminated plants.
Use light to reveal:
- One leading plant within a group
- Different planting heights
- Foliage texture
- A curved bed or landscape edge
- Layers of planting in front of a wall
- A relationship with a nearby tree or sculpture
Avoid installing a narrow spotlight beside every shrub. Repetition can create visual noise, excessive brightness and a garden full of visible fixtures.
Better approaches may include:
- One controlled accent serving a selected planting group
- Light reflected from a nearby wall
- Soft spill from a tree-lighting position
- Backlighting that separates foliage from the background
- Carefully concealed adjustable fixtures
- Wider, lower-output distributions where appropriate
Account for wind and seasonal movement. A beam passing through loose foliage can create rapidly moving shadows or become directly visible when branches shift.
Fixtures placed inside planting must remain accessible after growth. Explore adjustable Garden Spike Lights for trees, planting and landscape features where repositioning and aiming flexibility are required.
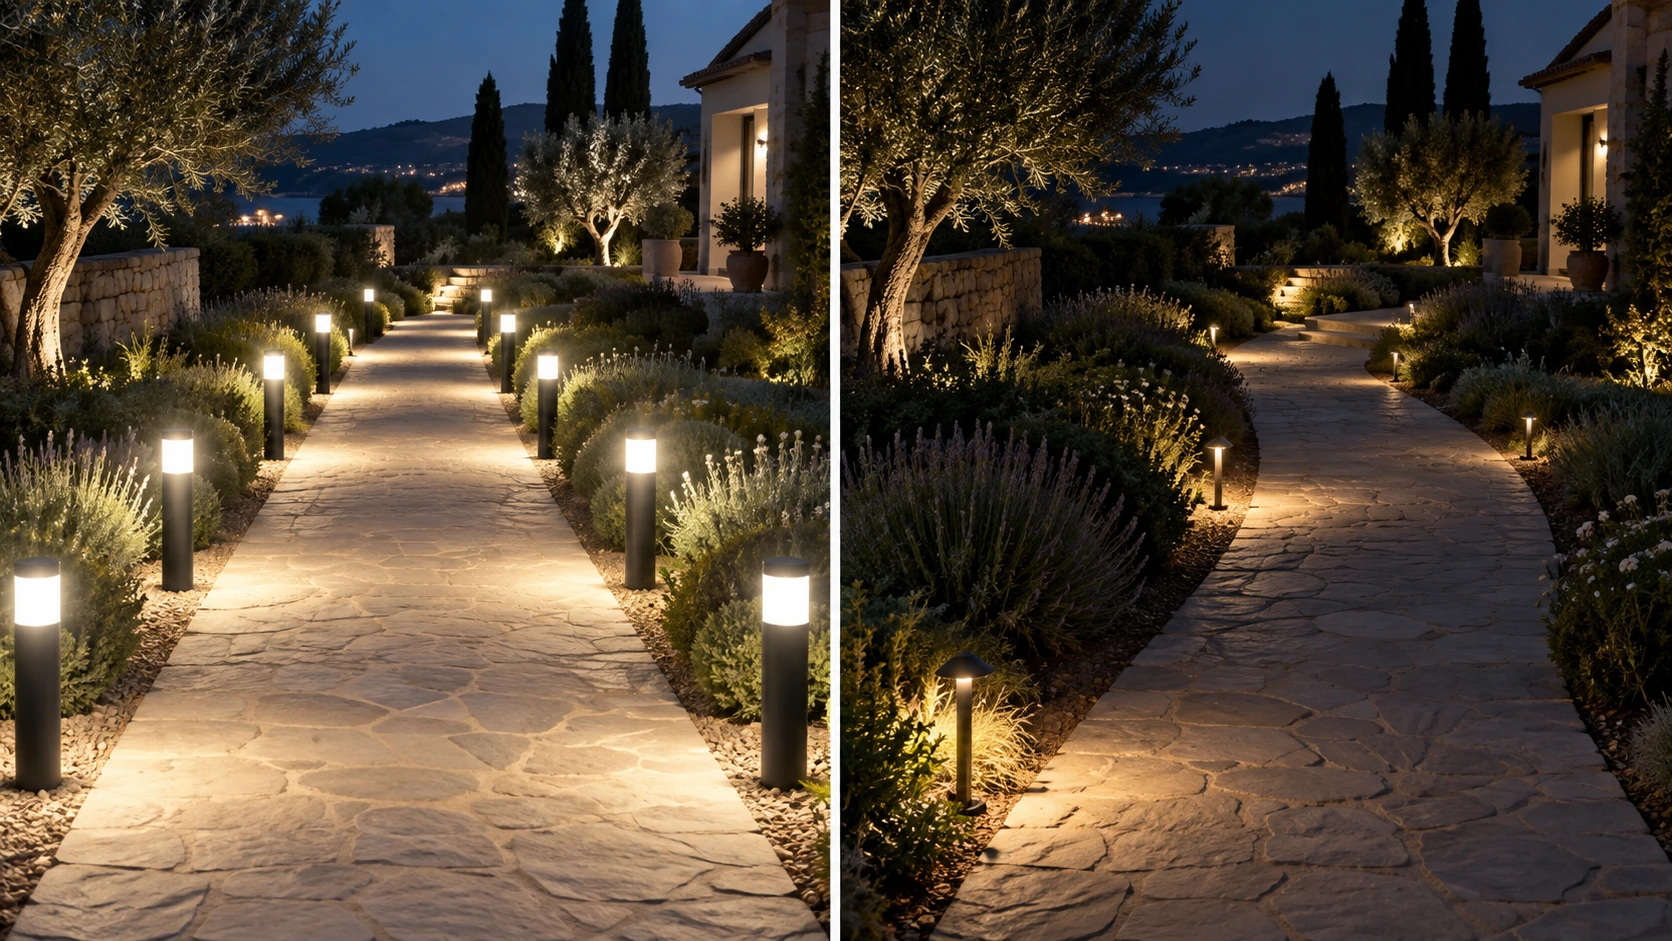
9. Guide Pathways Without Creating a Runway
Pathway lighting should help people understand where the route continues and where its edges or level changes are located.
It does not need to illuminate every square metre uniformly.
Avoid:
- Placing identical fixtures directly opposite one another
- Using very short repetitive spacing
- Creating a line of visible bright sources
- Selecting spacing according to wattage alone
- Making the pathway brighter than the destination
More natural approaches include:
- Alternating fixture positions
- Emphasising bends and decision points
- Lighting steps and level changes
- Using nearby planting or walls to support orientation
- Selecting shielded or asymmetric distributions
- Preserving darker intervals where the route remains clear
- Drawing attention toward the destination ahead
Two bollards with the same wattage can produce very different spacing requirements if their distributions differ. One may spread light laterally across the path, while another creates a concentrated pool directly around the fitting.
Use actual light distribution, mounting height, path width and surrounding reflectance to determine spacing.
For broader information about paths, entrances, bollards and exterior fixture types, see the Outdoor Lighting Guide.
10. Use Walls and Boundaries to Support the Landscape
A boundary wall can provide depth and enclosure after dark, but it does not always need to be fully illuminated.
Decide whether the wall should:
- Become a softly illuminated background
- Reveal natural stone or texture
- Frame nearby planting
- Receive shadows from foliage
- Guide movement
- Remain dark behind a focal tree
Grazing textured walls
Positioning a controlled source close to stone, brick or textured concrete can reveal surface relief through highlights and shadows.
The same technique can also exaggerate uneven joints, cracks or installation imperfections.
Washing smooth walls
A broader distribution can make a pale or smooth wall feel more even and can reflect useful light into the surrounding garden.
Plant-shadow composition
A light placed near selected foliage can cast controlled shadows onto a wall. This creates movement and depth, but the fixture should not be visible from normal viewing positions.
Beam width and distance determine whether the result appears as a narrow scallop, a broad wash or an uncontrolled patch. Review the Beam Angle Guide before selecting directional optics.
For focused architectural and landscape accents, explore Projector Lights.
11. Light Sculptures, Water and Garden Features Carefully
Garden objects require a lighting method suited to their form, material and viewing direction.
Sculptures
One directional source can create strong modelling by leaving one side darker. Two separated sources reveal more of the complete form but should not necessarily use equal output.
Highly reflective sculptures need careful aiming because even a modest source can create sharp highlights.
Fountains
Moving water reflects and redirects light. Position the fixtures so that the water remains visible without exposing bright sources to observers.
Consider:
- The main viewing direction
- Water movement
- Spray
- Maintenance access
- Cable routes
- Reflections
- Suitability for the actual water exposure
Reflecting pools
Dark water can act as an important reflective surface. Illuminating the entire pool from below may destroy the reflection and make the source itself more visible than the surrounding landscape.
Decorative objects
Not every pot, bench or ornament needs accent lighting. Select objects that contribute meaningfully to the overall night-time composition.
Water and in-ground applications require more than a high numerical IP rating. The fixture must be suitable for its specific installation, while drainage, electrical connections and access must also be coordinated. Read the IP Ratings for Lighting Guide before selecting products for exposed, in-ground or submerged conditions.
12. Coordinate Beam Angle, Distance and Output
Beam angle cannot be evaluated independently from fixture distance.
A narrow beam positioned close to a target creates a relatively small illuminated area. Moving the same fixture farther away increases the coverage while reducing the intensity reaching the surface.
A wider beam covers a larger area but may also send more light beyond the intended target.
Consider four factors together:
- Target size
- Fixture-to-target distance
- Beam angle or distribution
- Delivered light output
Aiming affects the result as well. When a symmetrical beam strikes a flat surface at an angle, its footprint becomes stretched rather than remaining circular.
Two fixtures with the same wattage can produce different results because they may have different:
- Delivered lumens
- Beam angles
- Centre-beam intensity
- Optical efficiency
- Spill outside the main beam
- Light distributions
Use the Beam Angle Calculator to estimate the geometric beam diameter, required angle or throw distance. Its professional options can also provide preliminary aimed-beam footprint context.
Actual landscape performance still depends on the fixture photometrics, foliage, surfaces, aiming and environmental conditions.
13. Choose Colour Temperature and Light Quality
Colour temperature changes how planting, stone, timber and architecture appear after dark.
2700K
This produces a very warm atmosphere and can suit intimate residential gardens, warm stone and decorative areas.
3000K
This is a strong starting point for many residential landscapes. It generally works comfortably with planting, timber, natural stone and nearby outdoor seating.
4000K
This provides a cleaner and more neutral appearance. It may suit selected contemporary architecture or functional areas, but extensive use can make a residential garden feel colder.
Mixing colour temperatures can work when the difference supports a clear purpose. For example, a warmer landscape composition might be combined with slightly more neutral functional light in a service area. Randomly mixing visible sources usually makes the project feel inconsistent.
Colour rendering also affects:
- Green foliage
- Flowers
- Warm-toned planting
- Natural stone
- Timber
- Sculptures
- People near seating areas
Where accurate appearance matters, consider CRI 90 or higher and compare actual samples where possible.
Read the 3000K vs 4000K Lighting Guide for a complete colour-temperature comparison. The Light Quality Explained guide covers CRI, R9, colour consistency, glare and flicker in more detail.
14. Control Glare, Spill and Unnecessary Light
Landscape fixtures are often installed at or below eye level. This makes shielding and aiming essential.
A small, bright source visible against a dark garden can be uncomfortable even when its wattage is low.
Review each fixture from:
- Main paths
- Garden seating
- Terrace seating
- Interior windows
- Upper floors
- The street
- Neighbouring properties
Control glare and spill by:
- Shielding the source
- Aiming away from observers
- Selecting lower output
- Tightening the beam where appropriate
- Repositioning the fixture
- Using reflected light
- Dimming accent layers
- Keeping light within the target
- Switching decorative lighting off when it is no longer needed
Check uplights carefully. A beam intended for a canopy may pass through gaps in the foliage and continue into the sky or neighbouring property.
Also consider how the garden changes during winter, pruning or leaf loss. A beam contained by dense foliage in one season may become uncontrolled in another.
Preserve dark areas, limit operating hours and use only the output required for the intended effect. Landscape lighting should reveal the garden without making every fixture or boundary visible.
15. Plan Wiring, Drainage, Growth and Maintenance
Landscape lighting operates in a changing environment.
Plants grow, soil moves, roots expand and irrigation patterns may change. Fallen leaves, dust and mineral deposits can reduce fixture output or alter the beam.
Before installation, coordinate:
- Cable routes
- Driver and transformer locations
- Junction points
- Irrigation pipes
- Drainage
- Root zones
- Soil depth
- Lawn and gardening equipment
- Access for cleaning
- Future planting changes
- Fixture repositioning
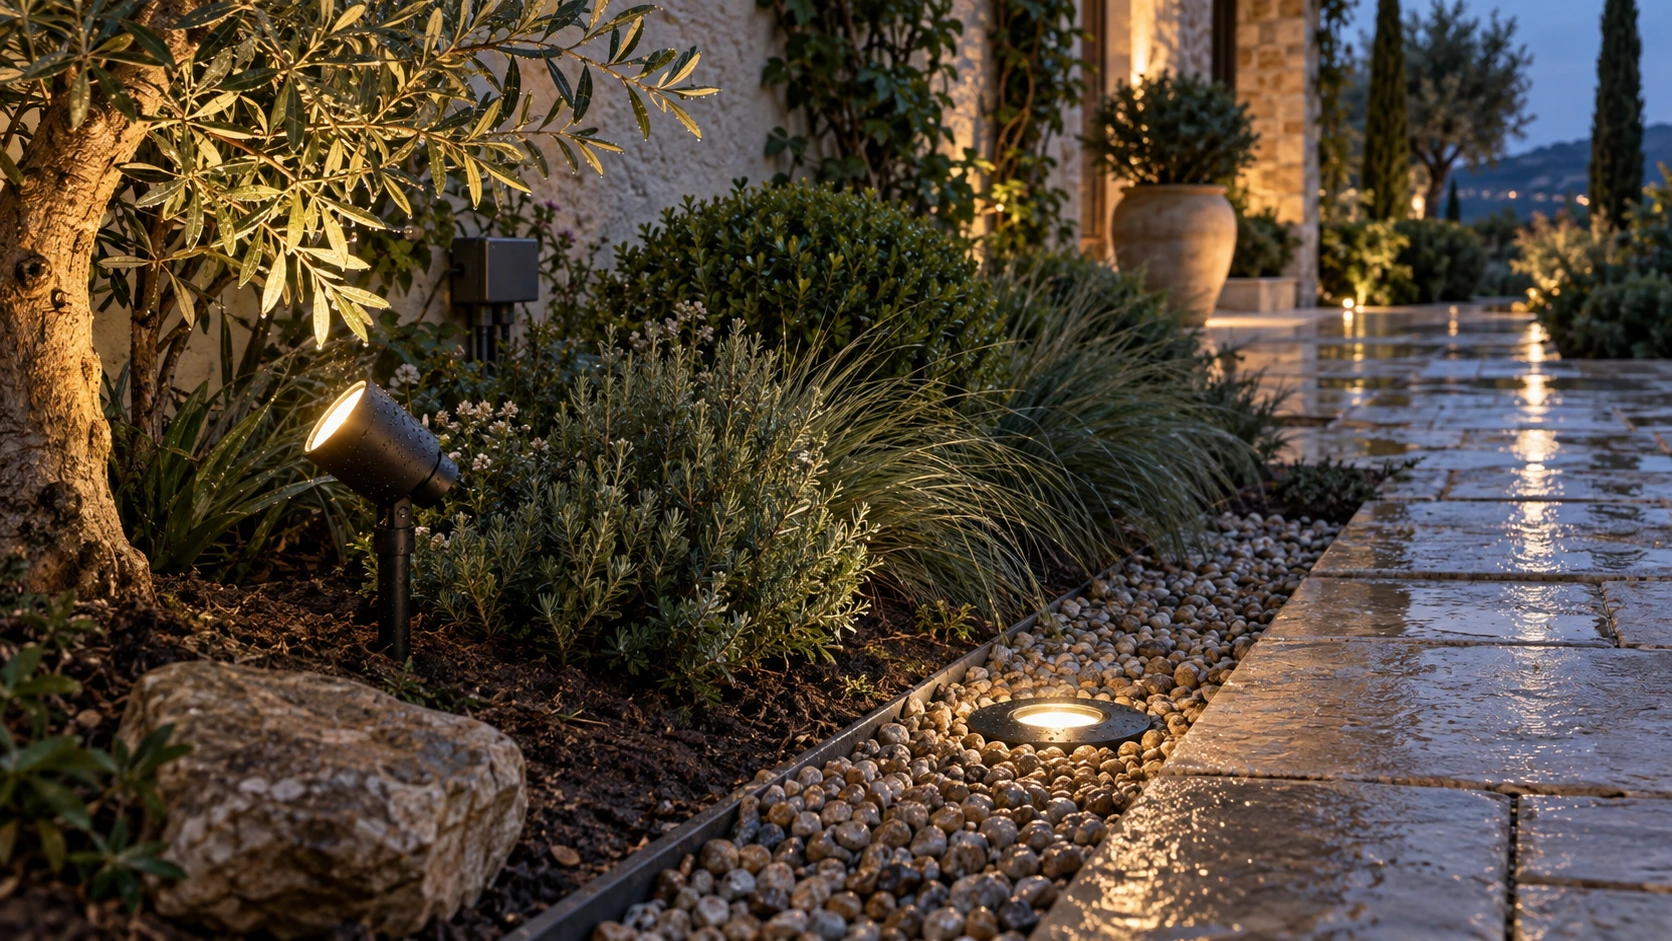
In-ground fittings require suitable drainage around the housing. A strong enclosure rating does not compensate for unsuitable installation conditions or permanently trapped water.
Drivers and electrical connections should remain protected and accessible. Record underground cable routes before planting and surface work are completed.
Review the IP Ratings for Lighting Guide when matching fixtures to rain, irrigation, soil or possible water accumulation. Explore In-Ground Lights for suitable landscape and architectural applications.
Create a maintenance plan that includes:
- Cleaning lenses
- Removing leaves and soil
- Inspecting seals and connections
- Re-aiming fittings
- Checking physical stability
- Trimming foliage blocking the beam
- Adjusting positions as plants grow
- Testing controls and timers
The lighting plan should be able to evolve with the landscape.
16. Aim and Commission the Garden After Dark
Final aiming should take place after sunset with the planting, furniture and main architectural finishes in position.
Commission the scheme in stages.
1. Start with the primary focal points
Aim the main trees, sculpture, wall or water feature first.
2. Establish visual depth
Add middle-ground and background elements. Reduce any source competing with the primary feature.
3. Add pathway and guidance lighting
Confirm that routes, steps and level changes remain readable without becoming the brightest part of the garden.
4. Review glare and spill
Walk through every route and sit in the main viewing positions. Check the garden from inside the property and from upper floors.
5. Reduce unnecessary brightness
Dimming or repositioning a fixture often improves the scheme more than adding another light.
6. Test controls and timing
Confirm the operating schedule, scenes, sensors and manual override.
7. Record the final arrangement
Photograph fixture positions and aiming directions. Record drivers, circuits and underground cable routes for future maintenance.
Before approving the completed scheme, confirm that:
- Every fixture has a defined target
- The primary focal points remain clear
- Foreground, middle-ground and background layers are visible
- Trees are illuminated according to their form
- Planting retains areas of shadow
- Pathways avoid a repetitive runway effect
- Steps and level changes remain readable
- Walls support rather than overpower the landscape
- Sculptures and water features are comfortably illuminated
- No bright source creates direct glare
- Beams remain within their intended targets
- Neighbouring windows are protected
- Colour temperature remains coordinated
- Fixtures suit their environmental exposure
- In-ground fittings have suitable drainage
- Drivers and connections remain accessible
- Irrigation does not compromise the installation
- Controls reduce unnecessary operating hours
- Fixtures can be repositioned as plants grow
Bringing the Landscape Together
Successful garden lighting begins with the night-time composition—not the product list.
Choose the important viewing positions, establish the focal points and divide the landscape into foreground, middle-ground and background layers. Then select the technique, fixture position, beam and output required for each target.
Light trees according to their form, treat planting beds as groups and guide pathways without creating repetitive rows of bright fittings. Use walls, water and architectural features selectively, while preserving enough darkness to maintain depth.
Finally, coordinate the lighting with irrigation, drainage, wiring, growth and maintenance. Aim the completed installation after dark and reduce any light that does not serve a clear purpose.
When every fixture has a defined target, the landscape feels intentional, comfortable and connected to the architecture while remaining part of the night.
Related Lighting Guides and Tools
- Outdoor Lighting Guide
- IP Ratings for Lighting Guide
- Beam Angle Guide
- 3000K vs 4000K Lighting Guide
- Light Quality Explained
- Lighting Glossary
- Beam Angle Calculator
- All Lighting Tools
Explore Saleh Deco outdoor lighting, including Garden Spike Lights, In-Ground Lights and Projector Lights.
For help comparing fixtures, beam angles, protection ratings and installation requirements for your landscape, contact the Saleh Deco team.