
Choosing the correct beam angle determines whether a spotlight creates a focused accent, balanced room lighting or broad general illumination.
A 24° beam is generally suited to artwork, displays and smaller focal points. A 36° beam offers a versatile balance between concentration and coverage, while a 60° beam spreads light more broadly for general lighting, circulation areas and lower ceilings.
The angle alone does not determine the final result. Ceiling height, distance to the illuminated surface, lumen output, spotlight spacing and the size of the target all affect how the light will appear.
Quick Answer
Choose 24° for focused accent lighting, 36° for balanced and versatile coverage, and 60° for broad, softer illumination. For the most accurate choice, match the beam width to the size of the target at the actual mounting distance.
Need the exact beam width for your ceiling height?
Use our Beam Angle Calculator →
Quick Guide: Which Beam Angle Should You Choose?
Use these as practical starting points. The final result still depends on mounting height, lumen output, spotlight spacing and the size of the area being illuminated.
Choose 24° If:
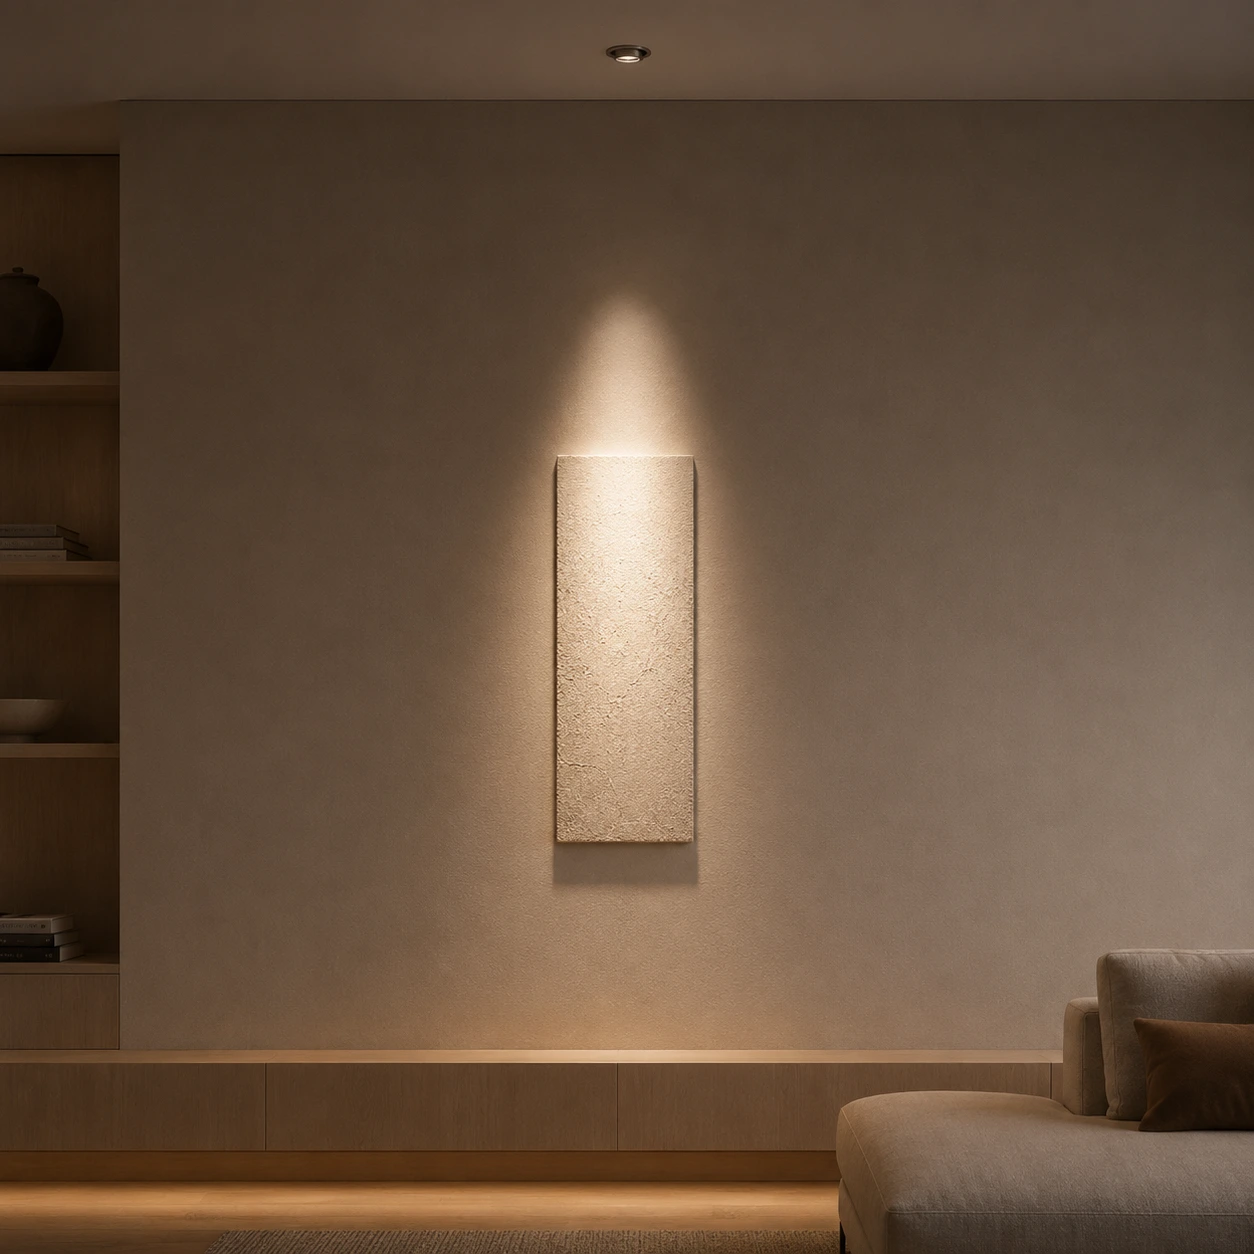
- You want focused accent lighting.
- You are highlighting artwork, sculptures or displays.
- The target is relatively small.
- You want stronger contrast and less spill.
- The spotlight is mounted farther from the target.
Best for: artwork, decorative objects, textured walls, retail displays and selected dining-table accents.
Main limitation: Narrow beams can create isolated bright pools and dark gaps when spacing is poor.
Choose 36° If:
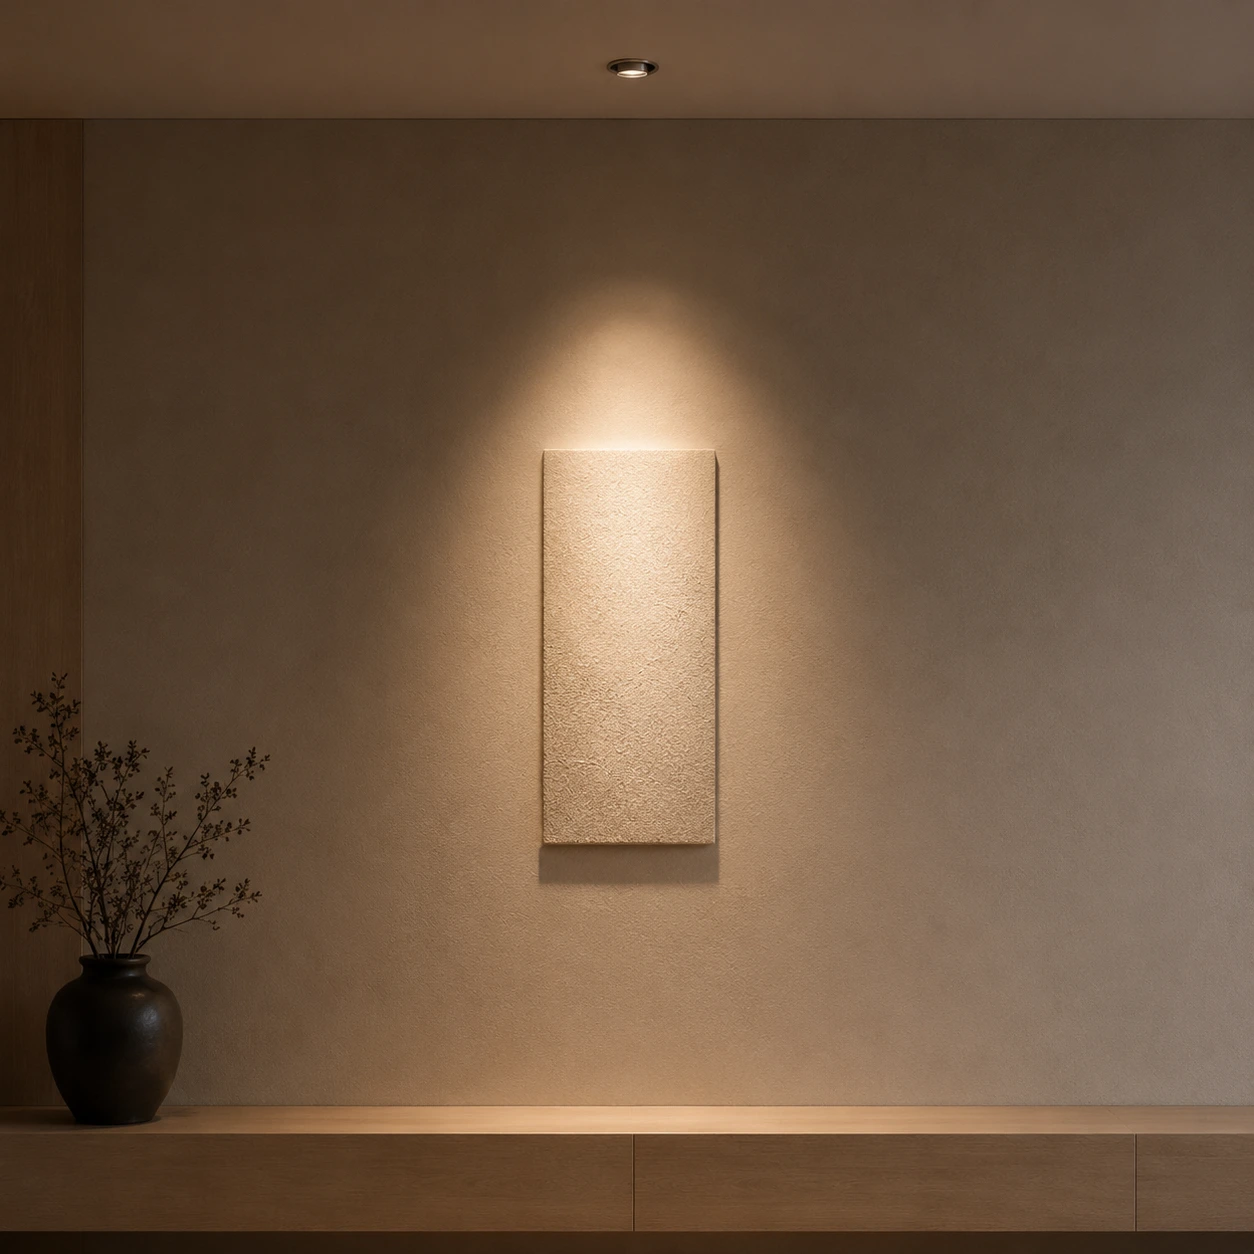
- You want a balance between focus and coverage.
- The room needs both general and accent lighting.
- You are lighting medium-sized targets or furniture zones.
- You want a versatile residential starting point.
- You need controlled light without an overly narrow effect.
Best for: living rooms, bedrooms, dining rooms, corridors and mixed-use residential spaces.
Main limitation: It can still create uneven lighting when fixtures are spaced too far apart.
Choose 60° If:
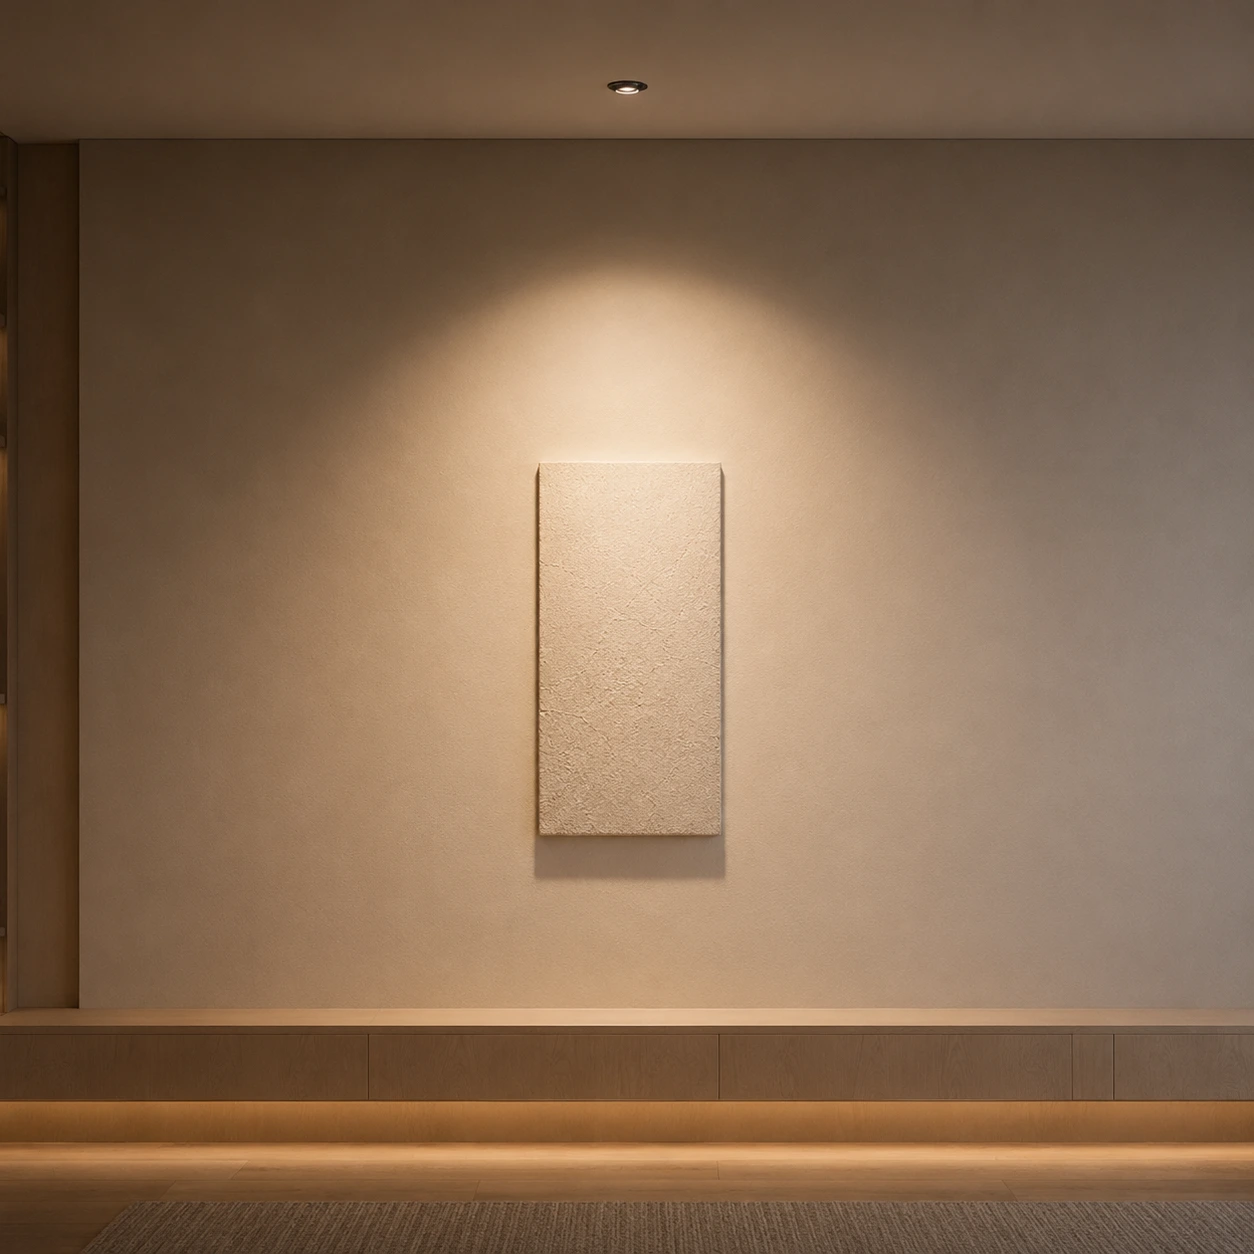
- You want broad, softer illumination.
- The ceiling is relatively low.
- You need smoother overlap between fixtures.
- The goal is general room or circulation lighting.
- You want fewer visible bright and dark patches.
Best for: low ceilings, circulation areas, broad floor coverage and softer ambient lighting.
Main limitation: The light is less concentrated and may provide weaker accent contrast.
Still unsure? Start with 36° for balanced residential lighting, move to 24° for deliberate accents, and use 60° where broad, softer coverage is more important than visual drama.
In This Guide
Use the links below to understand how beam angle affects coverage, brightness, ceiling height and spotlight spacing, or jump directly to the section most relevant to your project.
› 24° vs 36° vs 60° Quick Comparison
› What Is a 24° Beam Best For?
› What Is a 36° Beam Best For?
› What Is a 60° Beam Best For?
› Which Beam Angle Is Best for Each Room?
› How Ceiling Height Changes Beam Spread
› Beam Angle and Spotlight Spacing
› Does Beam Angle Affect Brightness?
What Is Beam Angle?
Beam angle describes the width of the main cone of light produced by a directional fixture such as a recessed spotlight, track spotlight or projector.
A narrow beam concentrates light over a smaller area, while a wider beam spreads the same fixture output across a broader surface. This affects how focused, dramatic or uniform the lighting appears.
In photometric terms, the beam angle is measured between the two directions where luminous intensity falls to 50% of the maximum centre-beam intensity.
Beam angle is not the same as:
- the total visible spread of light
- the fixture’s lumen output
- the physical tilt angle of an adjustable spotlight
- the final brightness on the illuminated surface
The final result also depends on mounting distance, lumen output, optical quality, reflector design and the surface being illuminated.
Key point: Beam angle tells you how widely the central light is distributed, but it does not describe the complete visible edge of the light.
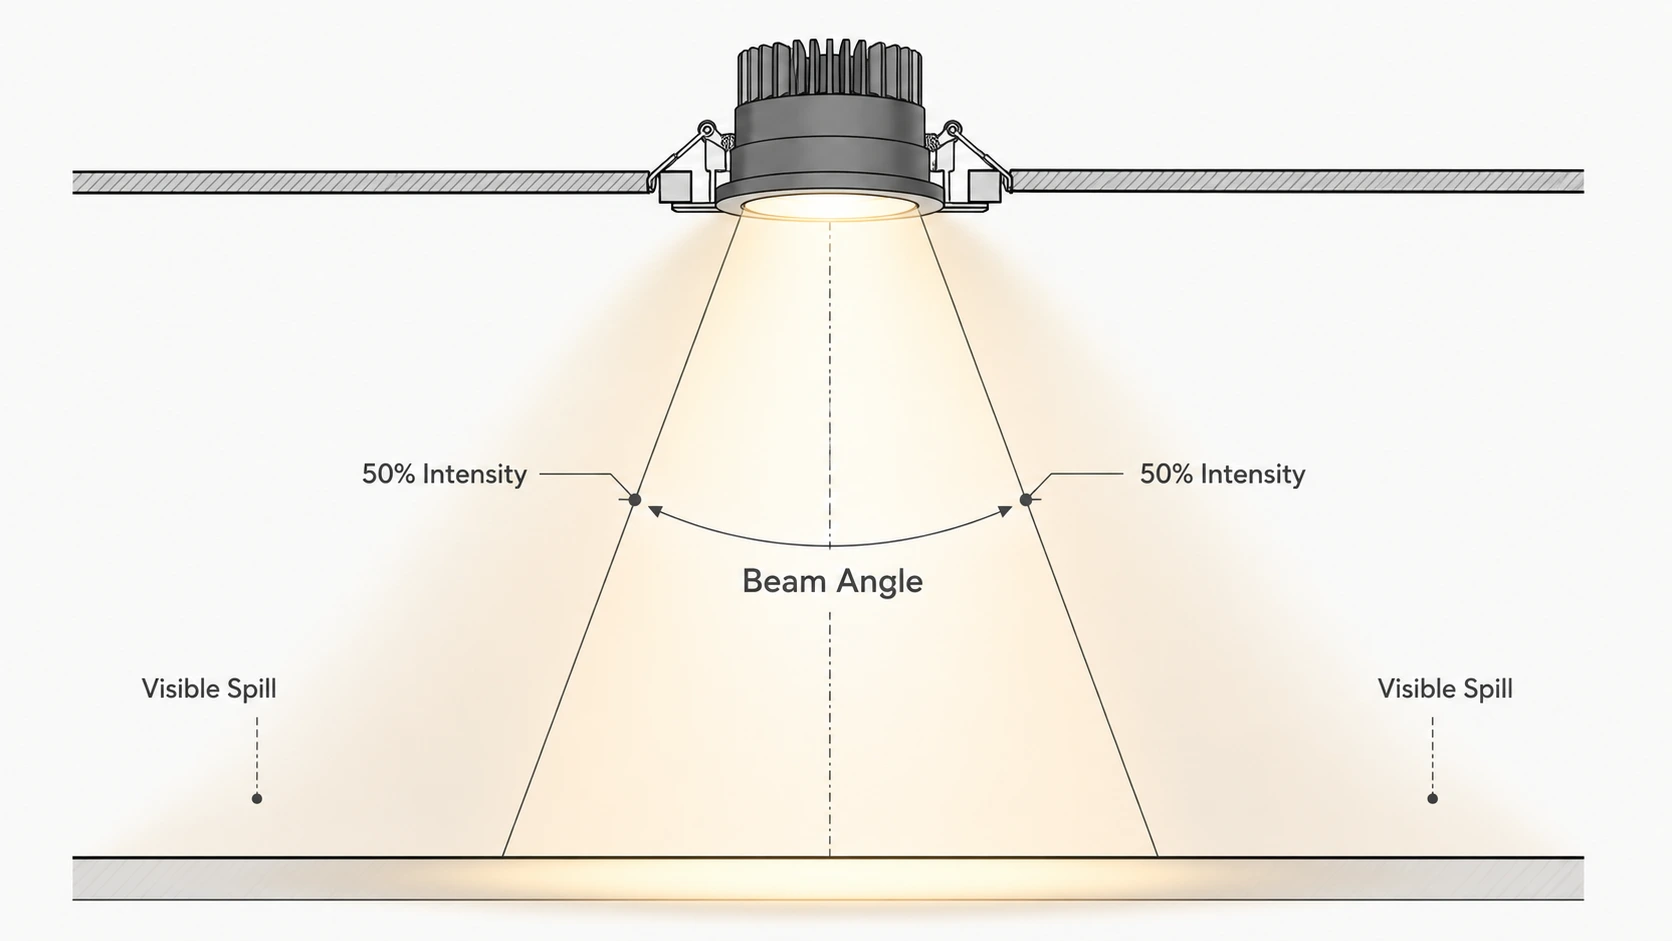
Beam Angle vs Field Angle: What Is the Difference?
Beam angle and field angle describe two different parts of the same light distribution.
The beam angle marks the central portion of the light where intensity remains at or above 50% of the maximum centre-beam intensity. This is the angle most commonly listed in spotlight specifications.
The field angle is wider. It extends to the points where intensity falls to 10% of the maximum, capturing more of the softer visible spill around the main beam.
This is why a spotlight labelled 24°, 36° or 60° does not create a perfectly sharp circle with no light beyond it. The nominal beam defines the stronger central zone, while the field extends farther with gradually decreasing intensity.
For layout planning, the beam angle is useful for estimating concentrated coverage and overlap. For final lighting design, photometric data gives a more complete picture of how the light fades beyond that nominal beam.
Measurement | Beam Angle | Field Angle |
| Intensity reference | 50% of maximum | 10% of maximum |
| Area described | Main usable beam | Wider visible spread |
| Commonly shown in product data | Yes | Less commonly |
| Best used for | Coverage and spacing estimates | Understanding spill and edge falloff |
| Visual edge | Stronger central zone | Softer outer boundary |
The beam circles shown in the Spotlight Layout Calculator represent nominal planning coverage, not a hard visible edge.
Key point: Beam angle is the main planning angle, while field angle explains why visible light continues beyond the calculated beam circle.
24° vs 36° vs 60° Beam Angle: Quick Comparison
The main difference is how widely the light spreads. A 24° beam concentrates light over a smaller area, 36° balances focus and coverage, and 60° creates a broader, softer distribution.
| Factor | 24° Narrow Beam | 36° Medium Beam | 60° Wide Beam |
|---|---|---|---|
| Light spread | Narrow and concentrated | Balanced and controlled | Broad and soft |
| Visual effect | Dramatic and focused | Versatile and natural | Smooth and uniform |
| Relative centre intensity | Higher | Moderate | Lower |
| Best use | Accent lighting | Mixed general and accent lighting | General illumination |
| Typical targets | Artwork, objects, displays | Furniture zones, dining areas, rooms | Floors, circulation and broad areas |
| Ceiling suitability | Medium to high ceilings | Most standard residential ceilings | Low to standard ceilings |
| Spacing sensitivity | High | Moderate | Lower |
| Main risk | Bright pools and dark gaps | Uneven lighting if spaced too far apart | Flat appearance or excessive spill |
Two spotlights with the same nominal beam angle can still look different because lumen output, reflector design, optical quality, glare control and photometric distribution also affect the final result.
Quick verdict: Choose 24° for deliberate accents, 36° for balanced residential lighting, and 60° for broad general coverage.
How Wide Is a 24°, 36° or 60° Beam?
Beam width increases as the distance between the spotlight and the illuminated surface increases. The same 36° spotlight will therefore create a wider pool of light from a 4m ceiling than from a 2.5m ceiling.
Formula
Approximate beam diameter = 2 × distance × tan(beam angle ÷ 2)
Use this as a planning estimate, not as a substitute for manufacturer photometric data.
Beam Diameter Table
Approximate nominal beam diameter
| Distance to Surface | 24° Beam | 36° Beam | 60° Beam |
|---|---|---|---|
| 2.0m | 0.85m | 1.30m | 2.31m |
| 2.5m | 1.06m | 1.62m | 2.89m |
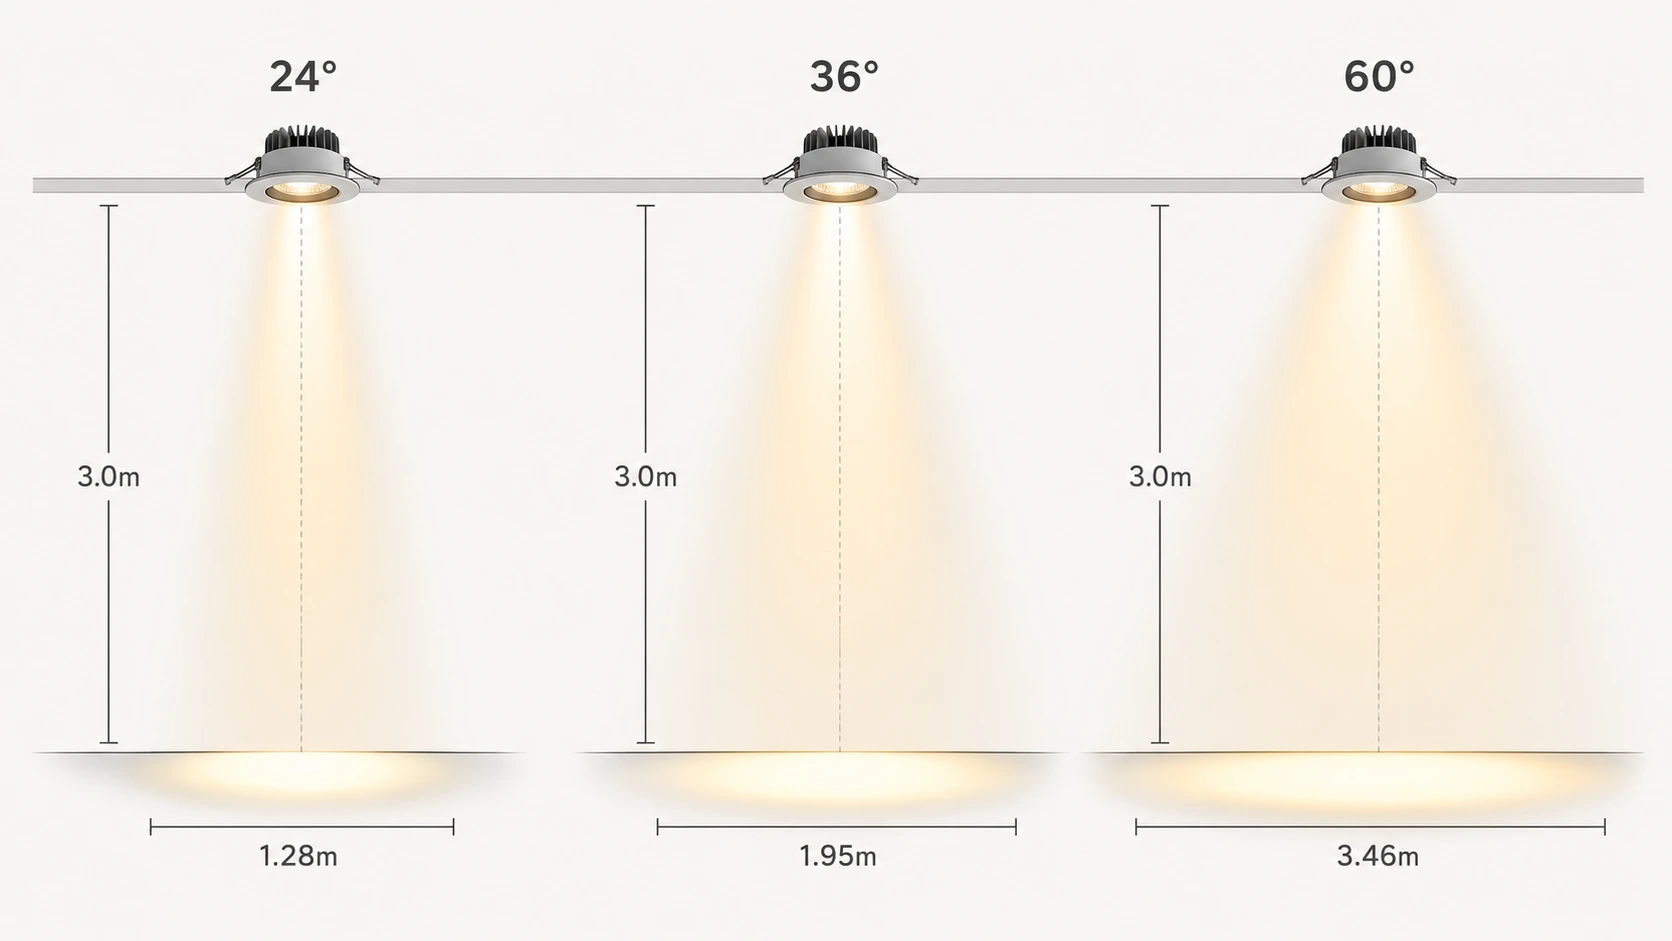
| 3.0m | 1.28m | 1.95m | 3.46m |
| 4.0m | 1.70m | 2.60m | 4.62m |
Accuracy Note
These are approximate nominal beam diameters measured at the main 50% beam boundary. Actual visible light extends beyond this area, and real performance varies by fixture optics, lumen output and photometric distribution.
Use the Spotlight Layout Calculator to test beam angle, mounting height, spacing and approximate coverage for your room.
Practical Reading
At 3m distance
- 24° creates a beam about 1.28m wide
- 36° creates a beam about 1.95m wide
- 60° creates a beam about 3.46m wide
This is why beam angle should be selected together with mounting distance and target size.
What Is a 24° Beam Best For?

A 24° beam is a narrow, focused distribution designed to concentrate light on a smaller target. It creates stronger visual contrast and less spill than wider beam angles, making it well suited to accent lighting.
It is most effective when the spotlight is used to draw attention to a specific object, surface or architectural feature rather than illuminate an entire room evenly.
Best Uses
- Artwork and framed pieces
- Sculptures and decorative objects
- Textured walls and architectural details
- Retail displays and selected products
- Dining-table accents
- Display niches
- High or medium ceilings where the light must remain controlled
Advantages
- Stronger visual emphasis
- Higher centre concentration
- Better control over spill light
- Useful for creating depth and contrast
- Effective when the target is relatively small
Limitations
- Can create bright pools with dark gaps between fixtures
- Requires more careful spacing
- May feel harsh if aimed directly into normal viewing angles
- Usually needs more fixtures for broad general coverage
- Can miss the target if the aiming angle or mounting position is incorrect
Practical Example
At a 3m mounting distance, a 24° beam creates an approximate nominal diameter of 1.28m. This makes it suitable for a medium artwork, feature wall section or focused display, but too narrow for broad room illumination on its own.
Best use: Choose 24° when the goal is to highlight a defined target and create contrast, not when you need smooth general lighting across a large area.
What Is a 36° Beam Best For?

This makes it a versatile starting point for many residential and commercial applications where both useful illumination and a controlled visual effect are required.
Best Uses
- Living rooms and bedrooms
- Dining areas
- Medium-sized furniture zones
- Corridors
- Residential general lighting
- Retail displays requiring moderate emphasis
- Mixed ambient and accent-lighting layouts
Advantages
- Balanced focus and coverage
- Suitable for many standard ceiling heights
- Easier to space than narrow 24° beams
- More visual definition than broad 60° beams
- Works well in mixed-use residential spaces
Limitations
- Can produce uneven lighting when spaced too far apart
- May be too wide for small artwork or precise displays
- May be too concentrated for very low ceilings or broad uniform coverage
- Final performance still depends on lumen output, optics and mounting distance
Practical Example
At a 3m mounting distance, a 36° beam creates an approximate nominal diameter of 1.95m. This makes it suitable for balanced illumination across seating areas, dining zones and medium-sized room sections.
Best use: Choose 36° when you need a practical balance between visual focus, comfortable coverage and flexible fixture spacing.
What Is a 60° Beam Best For?

A 60° beam creates a broad, softer light distribution designed to cover a larger area. It produces less concentrated visual emphasis than 24° or 36°, but it can provide smoother overlap and more uniform general illumination.
This makes it especially useful where broad coverage is more important than dramatic accent contrast.
Best Uses
- Low to standard ceilings
- General room lighting
- Corridors and circulation areas
- Broad floor coverage
- Open-plan interiors
- Bedrooms and living spaces requiring softer illumination
- Areas where visible bright and dark patches should be minimized
Advantages
- Broad coverage
- Smoother overlap between fixtures
- Softer visual effect
- Useful for general ambient lighting
- Reduces the appearance of isolated light pools
Limitations
- Lower centre concentration than narrower beams
- Less suitable for small artwork or precise displays
- More light spill onto surrounding surfaces
- Can flatten texture and reduce visual drama
- May still require multiple fixtures depending on lumen output and target lux
Practical Example
At a 3m mounting distance, a 60° beam creates an approximate nominal diameter of 3.46m. This makes it suitable for broad room coverage, but the light will be less concentrated than a 24° or 36° beam with similar output.
Best use: Choose 60° when broad, soft and more uniform illumination matters more than strong accent contrast.
Which Beam Angle Is Best for Each Room?
The room type gives a useful starting point, but ceiling height, fixture output and furniture layout still determine the final choice.
Use beam angle to match the target surface, then apply it within the complete living room, retail and showroom or outdoor lighting plan.
Room Guide
| Room or Area | Recommended Starting Angle |
|---|---|
| Living room | 36° for general use, 24° for accents |
| Bedroom | 36° or 60° for softer coverage |
| Dining room | 24° or 36° over the table |
| Kitchen | 36° for task zones, 60° for circulation |
| Corridor | 36° or 60° |
| Artwork or display | 24° |
| Retail or showroom | 24°–36° for products, wider beams for general light |
| Low ceiling | 60° |
| High ceiling | 24°–36°, depending on target size |
Starting rule: Use narrower beams for specific targets and wider beams for general coverage.
How Ceiling Height Changes Beam Spread
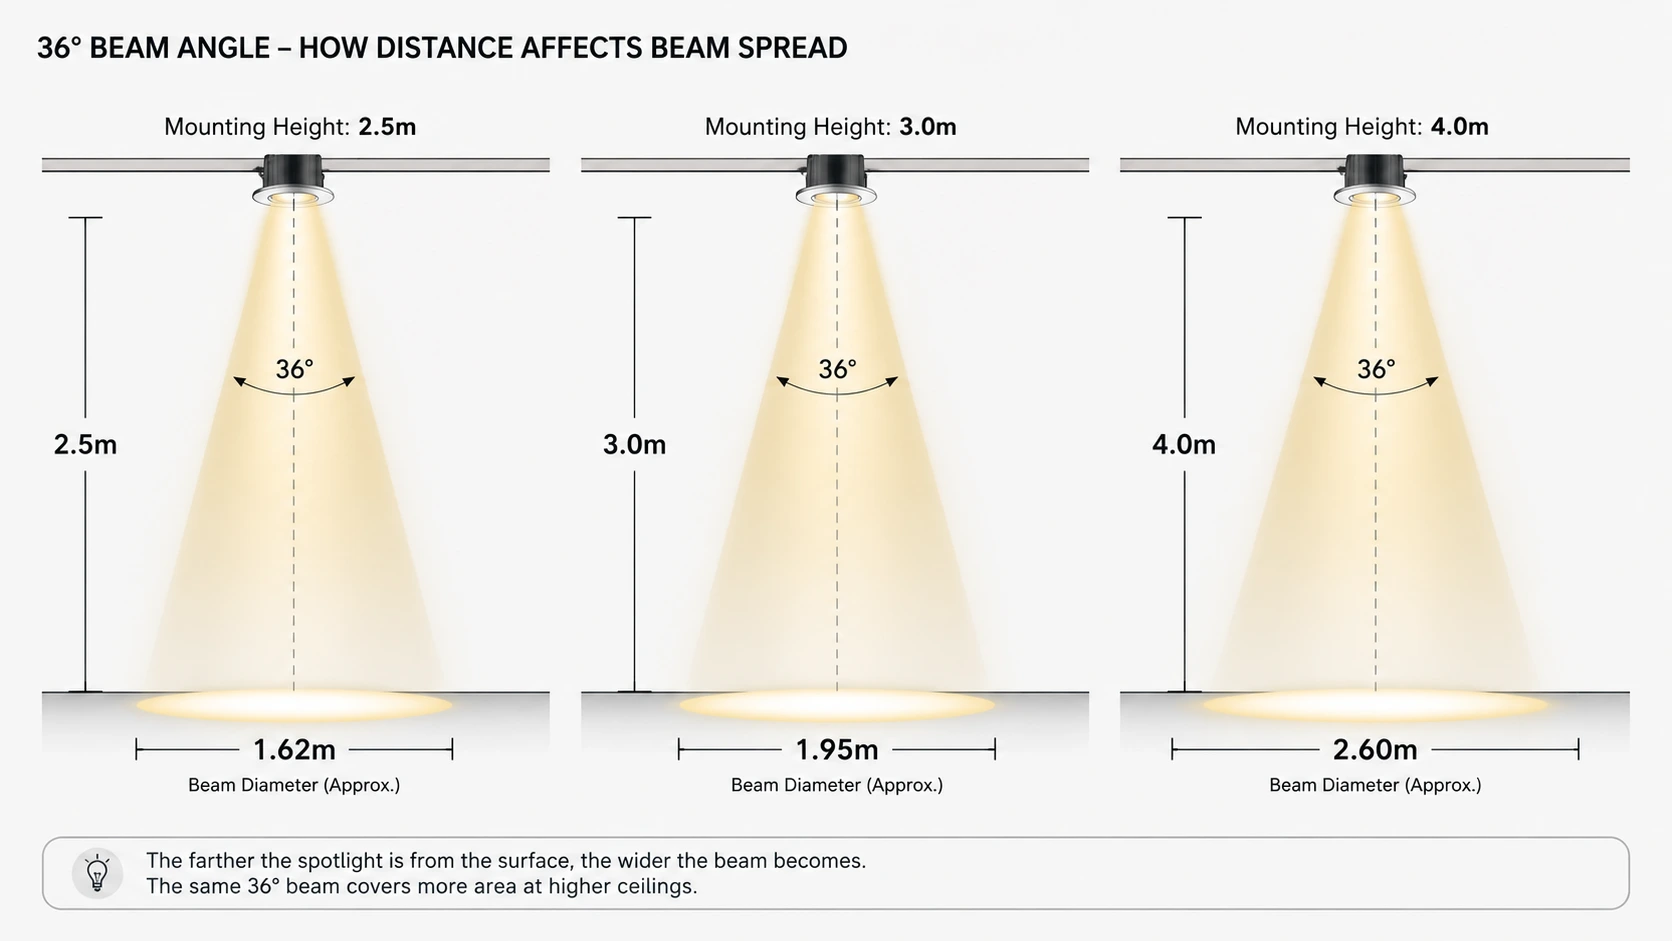
The farther a spotlight is from the illuminated surface, the wider its beam becomes. The same beam angle therefore covers more area from a higher ceiling, but the light also becomes less concentrated.
Example: 36° Beam
- At 2.5m: approximately 1.62m wide
- At 3.0m: approximately 1.95m wide
- At 4.0m: approximately 2.60m wide
Higher ceilings may require:
- A narrower beam
- Greater lumen output
- More precise aiming
- Closer attention to glare and target size
Key point: Do not choose beam angle from ceiling height alone. Match the beam diameter to the actual surface or object being illuminated.
How Does Beam Angle Affect Spotlight Spacing?
Narrow beams need more careful spacing because gaps between light pools are easier to see. Wider beams overlap more easily and usually create smoother general illumination.
Practical Rule
- 24°: closer spacing for general coverage, or intentional separation for accents
- 36°: balanced spacing for most residential layouts
- 60°: wider coverage with smoother overlap
Do not use beam angle alone to set spacing. Also consider:
- Ceiling height
- Lumen output
- Room shape
- Required lux
- Wall offsets
- Furniture and task zones
For the full quantity-planning method, see how many spotlights a room needs.
Key point: Wider beams can improve overlap, but they do not automatically reduce the number of spotlights needed.
Does Beam Angle Affect Brightness?
Beam angle does not change the fixture’s total lumen output, but it changes how concentrated that light appears on the illuminated surface.
- 24°: concentrates light over a smaller area, so the centre often appears brighter
- 36°: balances concentration and coverage
- 60°: spreads light over a larger area, so the centre appears softer
Two fixtures with the same lumens can therefore create very different results.
Key point: Lumens measure total light output; beam angle controls how that light is distributed.
Beam angle controls light distribution, while colour temperature controls whether the light appears warmer or more neutral. Compare 3000K and 4000K lighting.
Beam angle changes how concentrated the light appears, while lumens describe total output. Learn more about lux, lumens and room-lighting calculations.
Actual brightness also depends on mounting distance, optics, reflector design and centre-beam intensity.
Can You Mix 24°, 36° and 60° Beam Angles?
Yes. Mixing beam angles often creates a better result than using one angle everywhere, provided each beam has a clear lighting purpose.
Practical Combinations
- 60° for general ambient lighting
- 36° for furniture zones and balanced room coverage
- 24° for artwork, displays or architectural accents
Example
A living room may use 60° beams for broad ambient light, 36° beams around the seating area and 24° beams for artwork.
The choice also depends on the lighting system itself; compare magnetic track lighting vs recessed spotlights when deciding how flexible the layout should be.
Best rule: Mix beam angles by lighting function, not randomly by fixture availability.
Common Beam Angle Mistakes
- Choosing the angle only by room type
- Ignoring ceiling height and target size
- Using narrow beams everywhere
- Assuming wider beams are always brighter
- Spacing spotlights without checking overlap
- Selecting fixtures before furniture and artwork are planned
- Treating the beam edge as a hard cutoff
- Comparing wattage instead of lumens and photometric performance
The safest approach is to match the beam diameter to the target at the actual mounting distance, then check spacing and output together.
Avoid this: Do not copy a spotlight layout from another room unless the ceiling height, fixture output and beam angle are also comparable.
Final Recommendation: 24° vs 36° vs 60°
Choose 24° for focused accent lighting, 36° for balanced and versatile coverage, and 60° for broad, softer illumination.
Choose 24° when:
- The target is small or specific
- Strong contrast is important
- Spill light should be controlled
Choose 36° when:
- You need a balance of focus and coverage
- The room combines ambient and accent lighting
- You want a versatile residential starting point
Choose 60° when:
- Broad coverage is the priority
- The ceiling is relatively low
- Smoother overlap matters more than dramatic contrast
Best rule: Match the beam diameter to the target at the actual mounting distance, then confirm lumen output and spotlight spacing.
Explore Saleh Deco’s technical spotlights to compare beam angles, wattages, colour temperatures and fixture styles.
Continue exploring the Saleh Deco Lighting Guide for more practical advice on spotlight planning, colour temperature and lighting-system selection.
Frequently Asked Questions
What is the most versatile spotlight beam angle?
A 36° beam is generally the most versatile starting point because it balances concentration and coverage for many residential spaces.
Is a 24° beam brighter than a 60° beam?
With equal lumen output, a 24° beam usually appears brighter at its centre because the light is concentrated over a smaller area.
Which beam angle is best for a low ceiling?
A 60° beam is often more suitable for low ceilings because it creates wider coverage and smoother overlap.
Which beam angle is best for artwork?
A 24° beam is generally suitable for focused artwork lighting, but the correct angle depends on the artwork size and mounting distance.
Can different beam angles be used in one room?
Yes. Wider beams can provide general illumination while narrower beams highlight artwork, furniture or architectural features.