
A dining room needs more than a decorative light above the table. The lighting should make food and faces look natural, provide enough illumination for everyday meals, remain comfortable for people seated beneath it, and create a softer atmosphere when the occasion becomes more relaxed.
The most successful dining rooms combine table lighting, ambient lighting and accent lighting instead of expecting one chandelier or pendant to do every job.
Start with the table, not the ceiling. The dining table is the functional and visual centre of the room, so the lighting plan should be organised around it first. General room lighting should then support the table rather than compete with it.
In This Guide
- The Four Lighting Jobs in a Dining Room
- Plan the Lighting Around the Table
- How Much Light Does a Dining Room Need?
- How to Light the Dining Table
- Chandelier & Pendant Placement
- Spotlights Around a Dining Table
- Choosing the Right Beam Angle
- 2700K vs 3000K for a Dining Room
- Why CRI Matters in a Dining Room
- Wall, Sideboard & Vertical Lighting
- Controls, Dimming & Dining Scenes
- Worked Example: Complete 5 × 4m Dining Room Plan
- Five Common Dining-Room Lighting Mistakes
- Build Your Dining-Room Lighting Plan
- Dining Room Lighting Checklist
The Four Lighting Jobs in a Dining Room
A well-planned dining room usually combines several lighting functions rather than relying on one central decorative fixture.
1. Table Lighting
This is the primary layer.
A chandelier, pendant, linear suspension or carefully positioned directional light should illuminate the dining surface while creating a clear focal point.
Good table lighting should:
illuminate plates and serving dishes clearly;
make faces comfortable to see;
avoid strong glare when people look across the table;
relate naturally to the table's shape and position;
remain useful at both brighter everyday settings and softer evening settings.
2. General Ambient Lighting
The rest of the room still needs enough light for circulation, serving and cleaning.
Ambient lighting may come from:
recessed or surface spotlights;
ceiling lights;
wide-beam downlights;
indirect lighting;
wall lighting;
part of the light emitted by the main decorative fixture.
The goal is not to make the entire room equally bright. The ambient layer should support the dining table without competing with it.
3. Accent Lighting
Accent lighting adds depth and helps the room feel more complete.
Use it selectively to highlight:
artwork;
a sideboard;
display cabinets;
decorative objects;
textured walls;
architectural details.
Because the main dining fixture naturally draws attention toward the table, lighting selected vertical surfaces helps prevent the surrounding room from disappearing into darkness.
4. Decorative & Mood Lighting
The chandelier or pendant is often one of the strongest visual elements in a dining room.
But decorative lighting should still perform well.
A beautiful fixture that creates uncomfortable glare, leaves the table poorly illuminated or cannot adapt to different occasions is solving only part of the problem.
The best dining-room lighting combines visual character, useful illumination and flexible control.
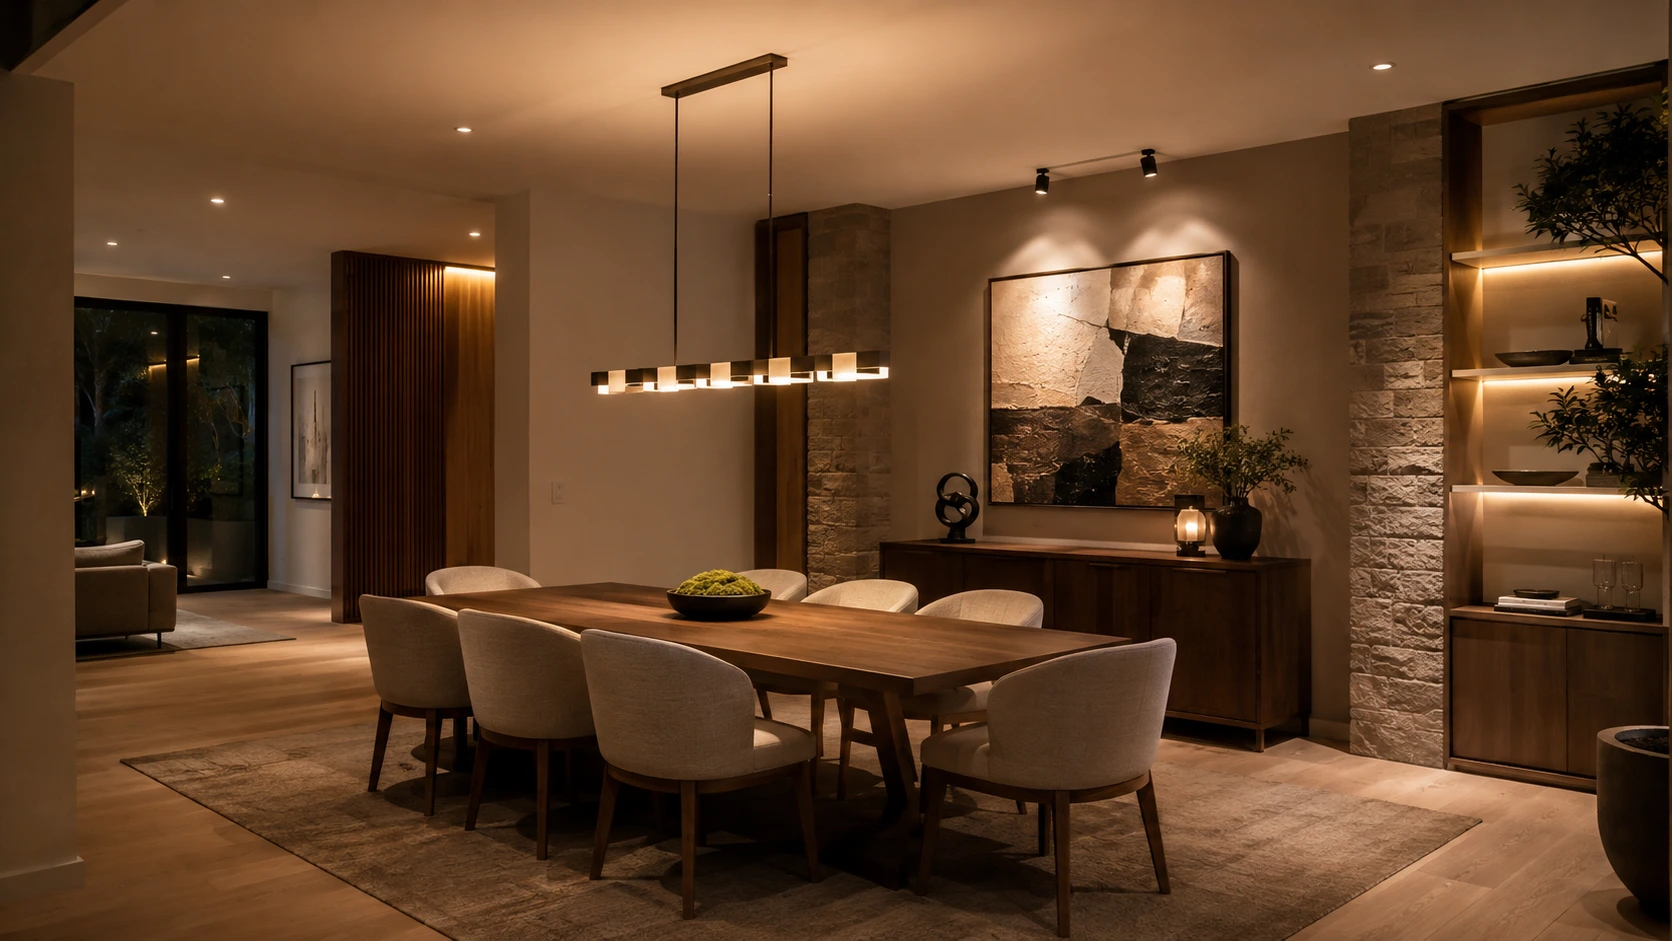
Plan the Lighting Around the Table
One of the most common dining-room mistakes is designing a perfectly symmetrical ceiling before the final table position is known.
This can leave the chandelier or pendant centred in the room but not centred over the dining table.
That difference is immediately noticeable.
The dining table should normally determine:
the position of the main suspended fixture;
the orientation of a linear pendant or chandelier;
the location of supporting spotlights;
the position of stronger task illumination;
which wall, artwork or sideboard becomes the secondary visual focus.
In a dining room, furniture-centred planning usually works better than ceiling-centred planning.
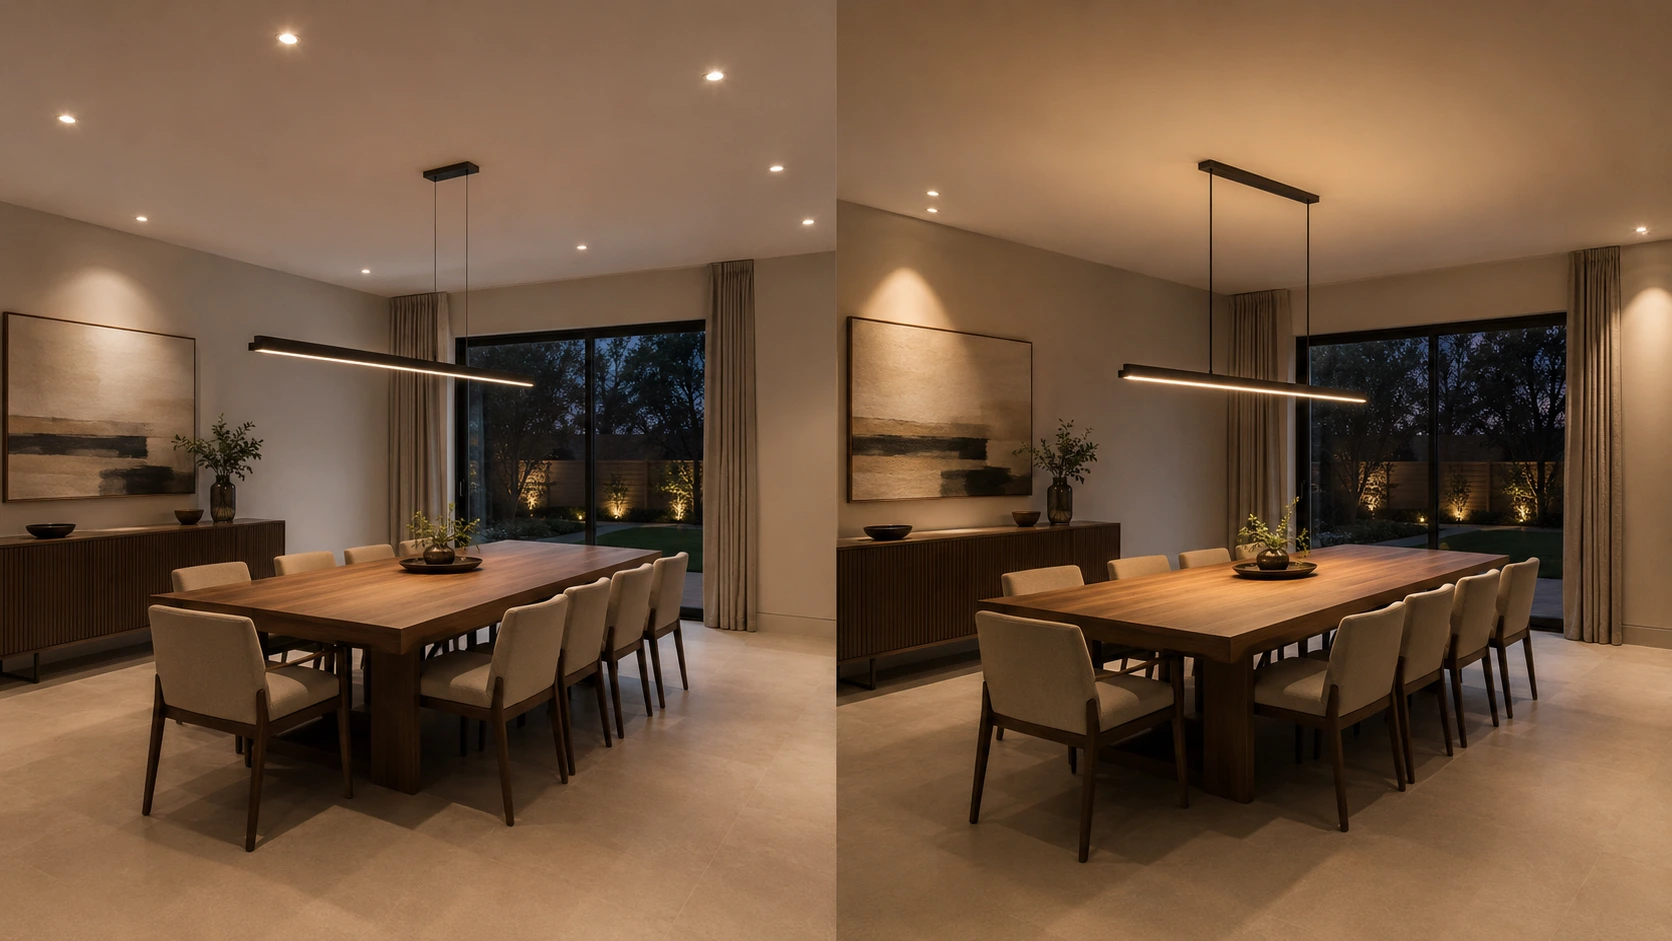
Start With the Table Position
Before fixing lighting points, confirm as closely as possible:
table length and width;
table orientation;
chair positions when occupied;
main circulation paths;
sideboard or display furniture;
artwork or architectural features.
Only then should the ceiling layout be finalised.
Centre the Main Fixture on the Table
For most conventional layouts, the chandelier or pendant should align with the centreline of the dining table, even if the table itself is slightly offset within the room.
This creates a stronger relationship between the furniture and the lighting.
If the table moves significantly later, the suspended fixture may also need to move. That is why the furniture plan should be resolved before electrical points are fixed whenever possible.
Let the Rest of the Lighting Support the Table
Once the main fixture is positioned correctly, add the secondary lighting around it.
The goal is not to create the most symmetrical ceiling.
The goal is to:
provide comfortable circulation light;
illuminate useful wall surfaces;
highlight artwork or a sideboard;
support the dining area without competing with the central fixture.
A ceiling that looks slightly asymmetric on plan can still create a much better room when the lighting follows the furniture and architecture below it.
How Much Light Does a Dining Room Need?
For general dining-room lighting, 150–250 lux is a practical starting range.
The exact target depends on:
room size and ceiling height;
wall, floor and furniture colours;
natural daylight;
fixture distribution and beam angle;
how the dining table is used;
the atmosphere you want in the evening.
A dining room does not need one fixed brightness level at all times. Everyday meals, entertaining, cleaning and occasional table work can each benefit from different lighting levels.
Start With the Room Area
The basic relationship is:
Basic lumen requirement = room area × target lux
For a dining room measuring:
5m × 4m = 20m²
Using 200 lux as a practical starting target:
20m² × 200 lux = 4,000 lumens
So the room needs a basic starting requirement of approximately 4,000 lumens before real-room adjustment factors are considered.
This does not mean the chandelier above the table should produce 4,000 lumens by itself.
The total lighting can be shared between:
the chandelier or pendant above the table;
general ceiling lighting;
wall or accent lighting;
indirect or decorative lighting.
Real Rooms Need Adjustment
The simple calculation is only a starting point.
Actual installed output may need to be higher because some light is lost through:
fixture optics and diffusers;
higher ceilings;
dark walls, floors or furniture;
narrow beam angles;
normal maintenance and ageing;
inefficient fixture placement.
Saleh Deco's Lux & Lumens Calculator applies utilization and maintenance factors to help move from the basic lumen requirement toward a more realistic installed-light estimate.
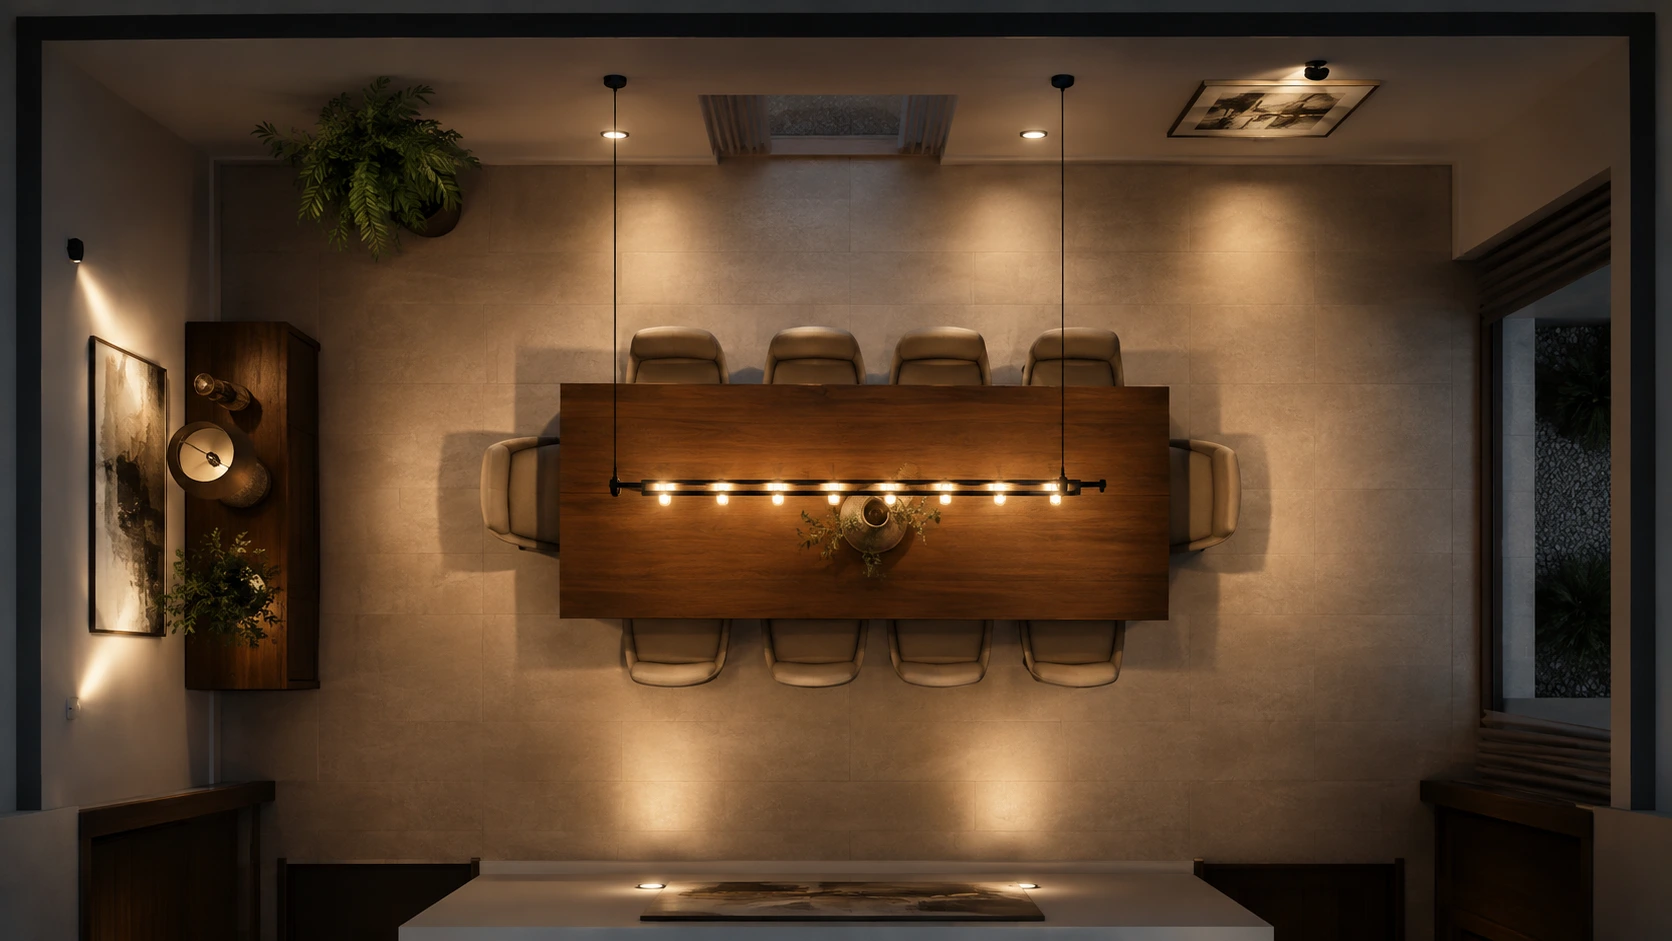
Lumens tell you how much light is available. Placement determines whether that light reaches the table, walls and circulation areas where it is actually useful.
The Dining Table May Need a Different Light Level
The dining table is often used for more than meals.
It may also become a surface for:
homework;
paperwork;
board games;
hobbies;
detailed table settings.
For relaxed dining, a softer setting may feel more comfortable.
When the table is used for detailed tasks, stronger localized illumination can be useful without making the entire room equally bright.
This is one reason dining rooms benefit from separate lighting layers and dimming where the selected fixtures and controls support it.
How to Light the Dining Table
The dining table is the main task surface in the room, so its lighting should be planned for comfort, visibility and atmosphere at the same time.
The goal is not simply to make the table bright.
Good table lighting should:
illuminate plates, serving dishes and table settings clearly;
keep faces comfortable to see across the table;
avoid exposed glare at seated eye level;
distribute light across the full useful table surface;
remain visually connected to the table;
adapt from practical everyday use to softer evening dining.
Direct the Light Onto the Table
A pendant, chandelier or linear suspension with useful downward output can place light directly where it is needed.
This is especially effective because the dining table is a fixed horizontal work surface.
The light should cover the table evenly enough that one end does not become noticeably brighter than the other.
For a long rectangular table, this may favour:
a linear pendant;
an elongated chandelier;
multiple coordinated pendants;
a fixture with several distributed light sources.
For round or square tables, a more compact symmetrical fixture can often create a natural relationship with the furniture below.
Avoid Excessive Glare
A fixture can illuminate the table well and still be uncomfortable.
Glare becomes a problem when diners can see an excessively bright lamp, LED source or concentrated optical element directly while looking across the table.
This is particularly noticeable with:
exposed high-output lamps;
very bright integrated LEDs;
poorly shielded downward sources;
fixtures installed too low;
narrow intense beams aimed toward glossy surfaces.
Prefer fixtures that control the light through:
shades;
diffusers;
recessed light sources;
optical shielding;
appropriate hanging height.
The table should feel illuminated; the light source itself should not dominate the diners' field of view.
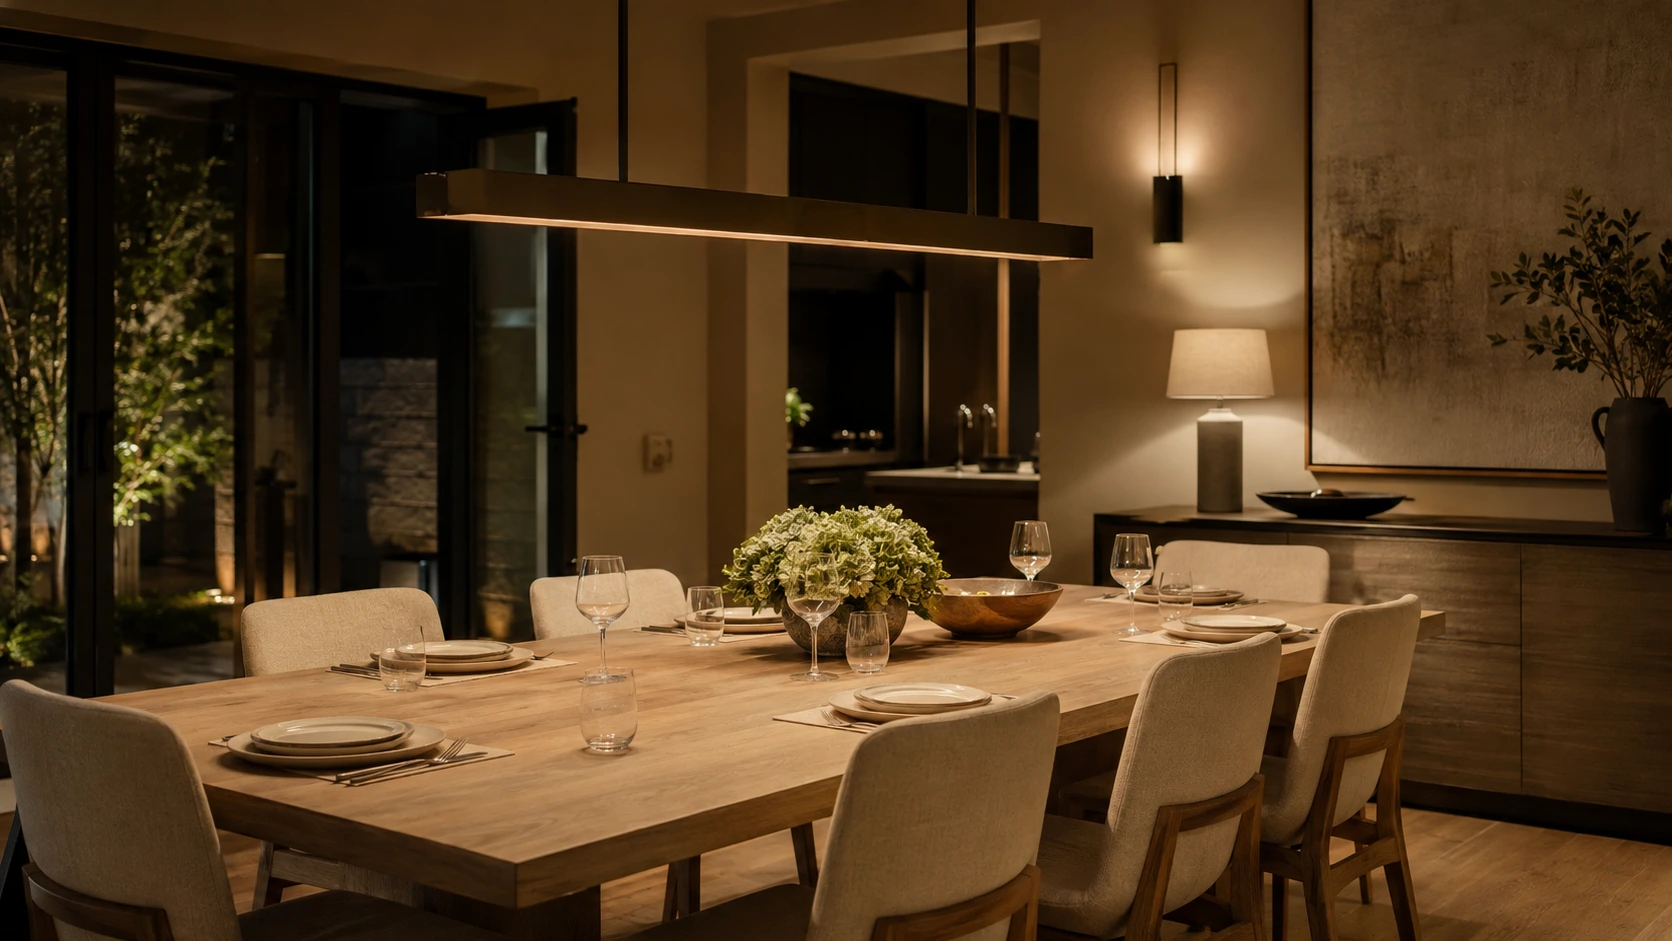
Illuminate Faces as Well as the Table
Purely downward lighting can create a dramatic table but leave faces darker than expected.
A more balanced dining room often combines the table fixture with softer surrounding or vertical light.
This can come from:
wall lights;
reflected ambient light;
broad ceiling lighting;
illuminated artwork;
indirect lighting;
a decorative fixture that also emits some light outward or upward.
The result should maintain the table as the focal point without isolating it inside a dark room.
Match the Fixture to the Table Shape
The fixture does not need to copy the table exactly, but the two should feel related.
For example:
Long rectangular table
A linear or elongated fixture can distribute light naturally along the table length.
Round table
A round chandelier, cluster or central pendant can create a balanced composition.
Square table
A compact central fixture or symmetrical chandelier often works well.
Very long table
Several coordinated fixtures may provide better distribution than one oversized central chandelier.
Fixture size and proportion should be refined separately using the Chandelier Size Guide.
Check the Table From a Seated Position
Do not judge the fixture only while standing.
Sit at the table and check:
whether the light source is directly visible;
whether the fixture blocks sightlines;
whether faces across the table remain visible;
whether the tabletop is evenly illuminated;
whether reflections from glass, polished stone or glossy surfaces are distracting.
The dining experience happens at seated eye level, so that viewpoint should influence the final fixture height and light distribution.
Chandelier & Pendant Placement
Once the dining-table position is fixed, the next question is where the suspended fixture should sit vertically and horizontally.
The goal is to make the chandelier or pendant feel visually connected to the table while keeping sightlines comfortable and the light useful.
Centre the Fixture on the Dining Table
For most dining-room layouts, the main suspended fixture should align with the centre of the table, not simply the centre of the architectural room.
For a rectangular table, also check that the fixture follows the table's main axis.
This is particularly important with:
linear pendants;
elongated chandeliers;
multiple-pendant arrangements;
asymmetrical decorative fixtures.
A fixture that is only a few centimetres off-axis can become noticeably distracting when viewed along a long rectangular table.
Start Around 75–90cm Above the Table
For many residential dining fixtures, approximately 75–90cm between the tabletop and the bottom of the fixture is a useful starting range.
This is not a fixed rule.
The final height should respond to:
ceiling height;
fixture dimensions;
light distribution;
whether lamps or LEDs are exposed;
table width;
seated sightlines;
decorative centrepieces.
If the Fixture Hangs Too Low
A low fixture can create intimacy, but excessive drop can cause problems.
It may:
obstruct views across the table;
expose bright lamps directly to seated diners;
visually divide the room;
interfere with tall centrepieces;
make a large fixture feel too heavy.
If the Fixture Hangs Too High
A fixture installed too high may:
lose its visual connection to the table;
spill more light into the surrounding room instead of concentrating it on the dining surface;
make the composition feel unfinished;
reduce the table's sense of focus.
The correct hanging height should be judged from a seated position, not only from the floor or ceiling plan.
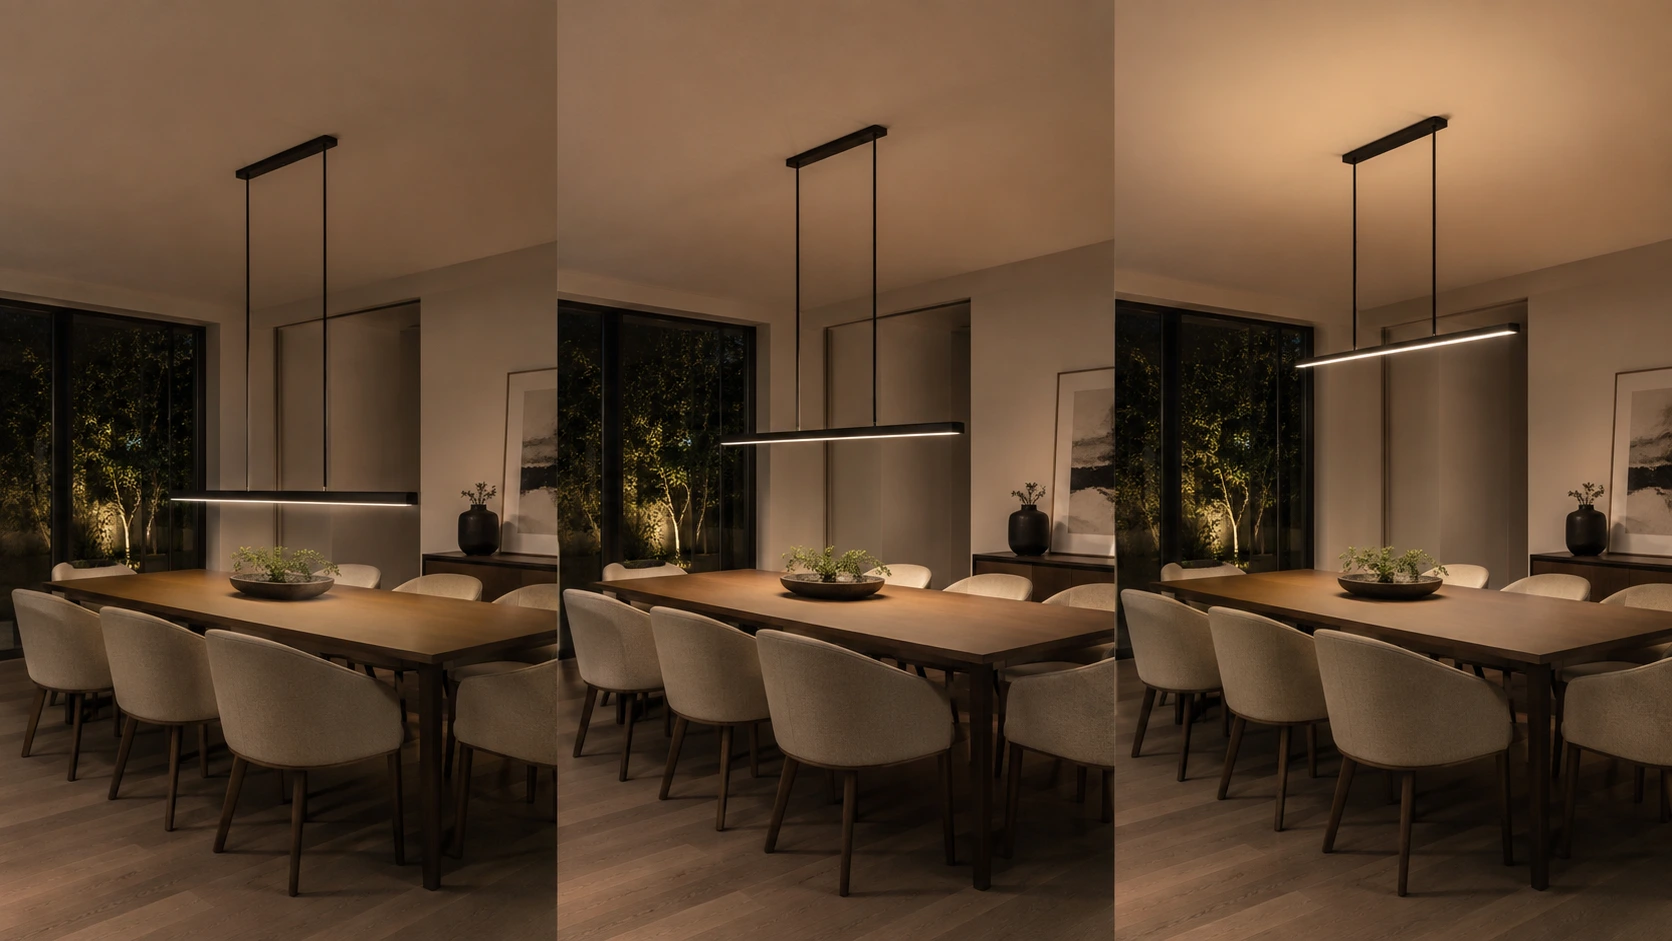
Check the Fixture From Across the Table
Before finalising the suspension length, sit in several chairs and look across the table.
Check whether:
the fixture blocks another diner's face;
the brightest light source is directly visible;
the pendant feels too dominant at eye level;
the full table remains adequately illuminated;
the fixture feels proportionate to the room and table.
A visually open chandelier may tolerate a slightly different position from a solid shade or concentrated linear pendant, so use the starting range as a guide rather than an absolute dimension.
For Multiple Pendants
When using two or more pendants, treat them as one composition.
Consider:
equal visual spacing;
alignment with the table;
combined overall width;
beam overlap;
consistent hanging height.
The fixtures should illuminate the table as a coordinated group rather than creating isolated bright spots.
For detailed fixture-size selection, use the Chandelier Size Guide rather than increasing fixture size simply because the room is large.
Spotlights Around a Dining Table
Spotlights can work very well in a dining room, but they should be added for a clear purpose rather than simply filling the ceiling.
They are most useful when they support the main dining fixture by adding:
general ambient light;
circulation light;
accent light to artwork or a sideboard;
vertical light on walls;
extra flexibility when the pendant is dimmed.
Do Not Build the Layout as a Ceiling Pattern First
A common mistake is placing spotlights in a rigid decorative grid and only later checking where the dining table, chairs and sideboard actually sit.
That often leads to:
spotlights directly over diners' heads;
awkward reflections on the table;
bright patches in the wrong places;
too much light in circulation areas and not enough where it is useful;
a ceiling that looks orderly on plan but feels uncomfortable in the room.
In a dining room, spotlights should follow the furniture layout and the visual tasks below, not just the room geometry above.
Avoid Spotlights Directly Above Seated Diners
A spotlight directly above a dining chair can create several problems.
It may:
cast unflattering shadows on faces;
create bright reflections on plates or glasses;
produce visual discomfort when people look upward or across the table;
overemphasize the chair positions instead of the table itself.
This does not mean every spotlight near the table is wrong.
It means the beam direction, position and purpose should be considered carefully.
Better Roles for Spotlights in a Dining Room
Spotlights are often more effective when they are used to:
support the room perimeter;
wash or highlight a wall;
illuminate artwork;
light a sideboard or display area;
provide soft general light around the table rather than directly over each seat.
When the pendant already gives the table its main focal light, the spotlights can quietly improve the rest of the room.
Think About Beam Angle and Mounting Position Together
A spotlight is not defined only by where it is mounted.
Its effect also depends on:
beam angle;
mounting height;
aiming direction;
lumen output;
distance to the wall or object being lit.
A narrow beam aimed precisely at artwork behaves very differently from a medium or wide beam used for soft ambient support.
That is why a dining-room spotlight layout should be tested using actual beam spread and fixture positions rather than copied from a generic spacing rule.
Use Spotlights to Support the Pendant, Not Compete With It
The dining pendant or chandelier should normally remain the visual centre of the room.
If the surrounding spotlights are too bright, too numerous or too evenly spaced, they can flatten the room and weaken the role of the main suspended fixture.
A better approach is to let the pendant define the table while the spotlights:
balance the room;
improve wall brightness;
add depth;
provide flexibility for different moods and uses.
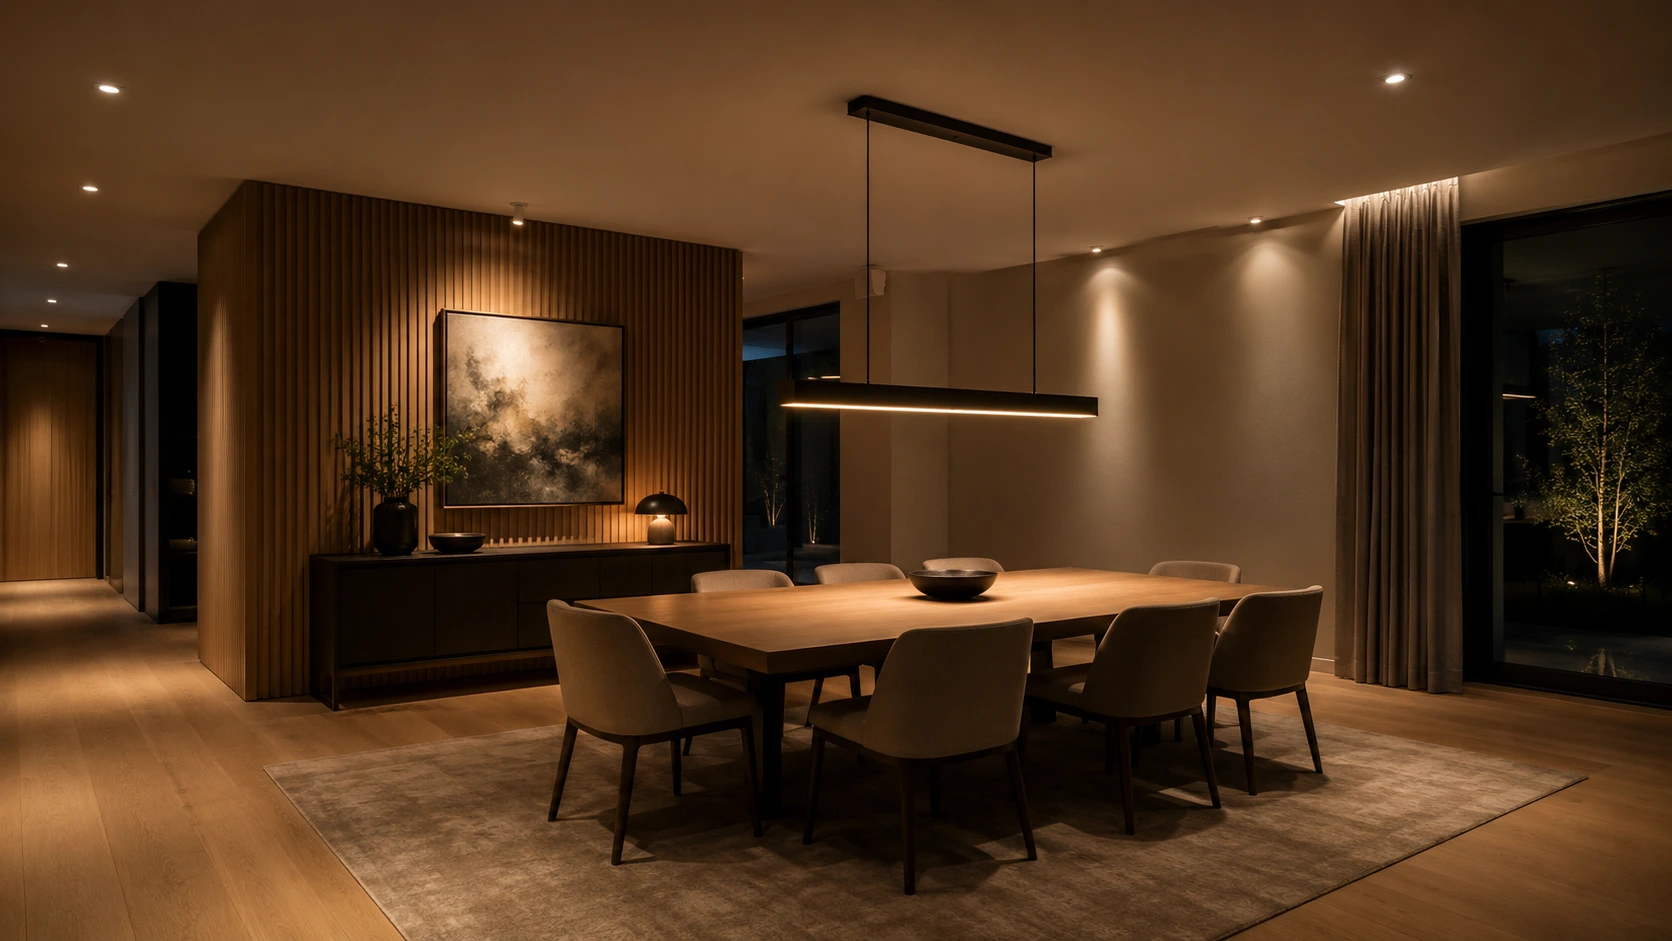
In most dining rooms, the best spotlight layout is not the most symmetrical one — it is the one that quietly supports the table, the walls and the way the room is used.
Choosing the Right Beam Angle
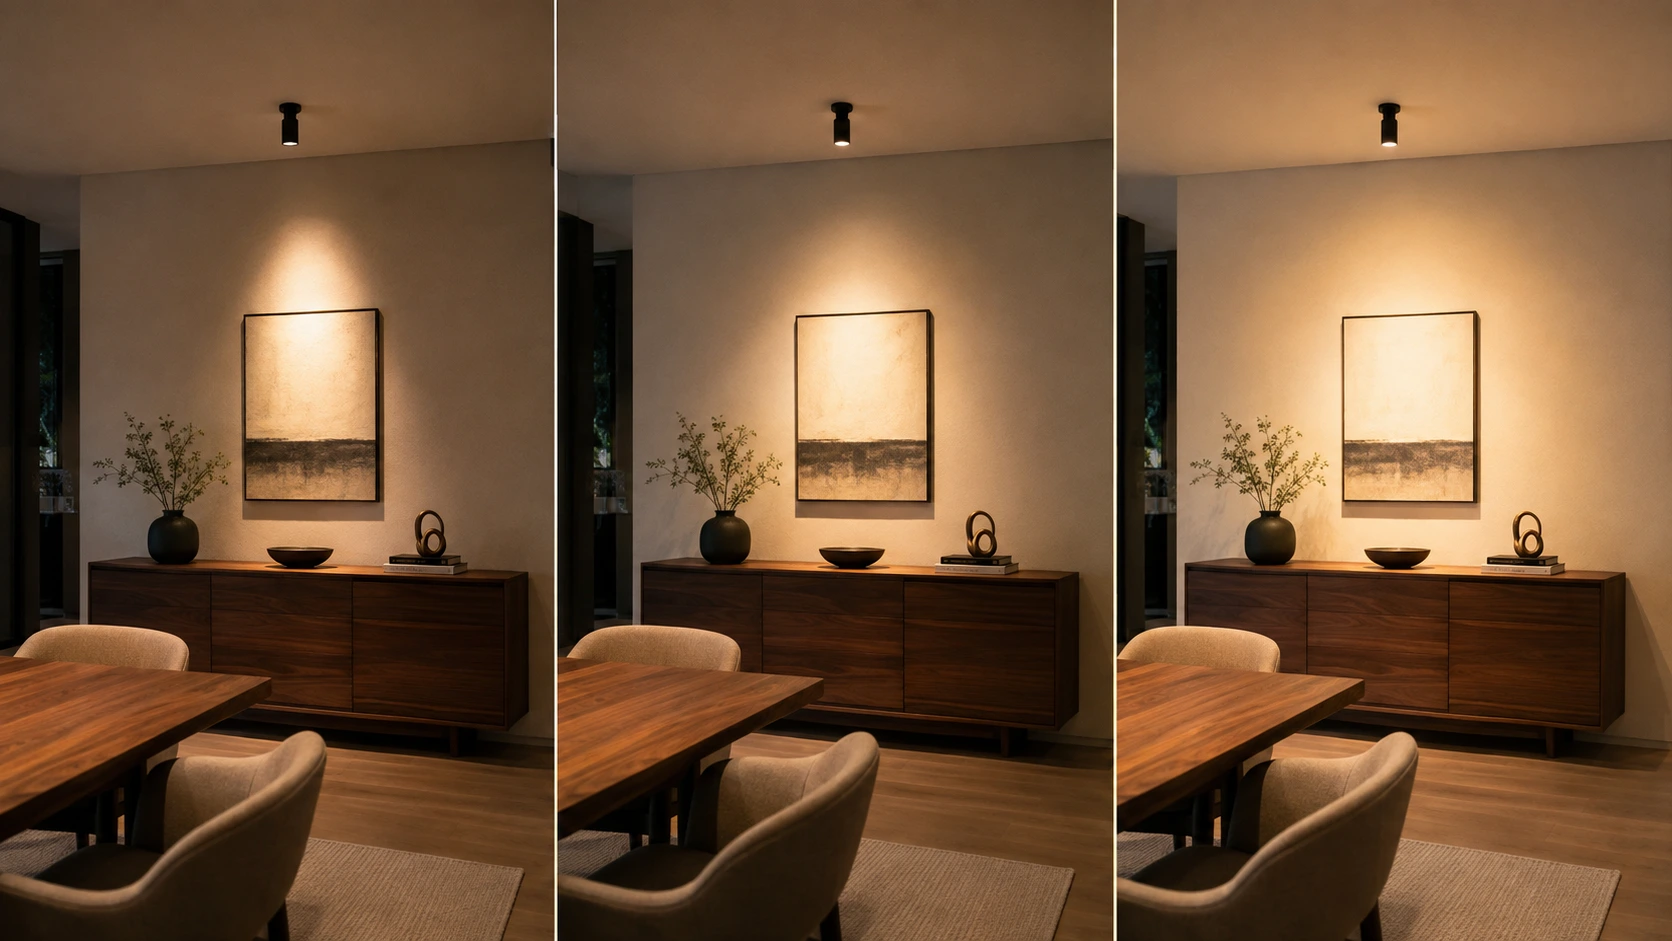
Use a focused beam for artwork or a sideboard and broader coverage for ambient support. Keep concentrated light away from seated diners’ eyes, and check the beam at the actual mounting distance.
The beam angle guide covers 24°, 36° and 60° in detail. Use the Beam Angle Calculator to check the footprint and the Spotlight Layout Calculator to test positions around the furniture.
2700K vs 3000K for a Dining Room
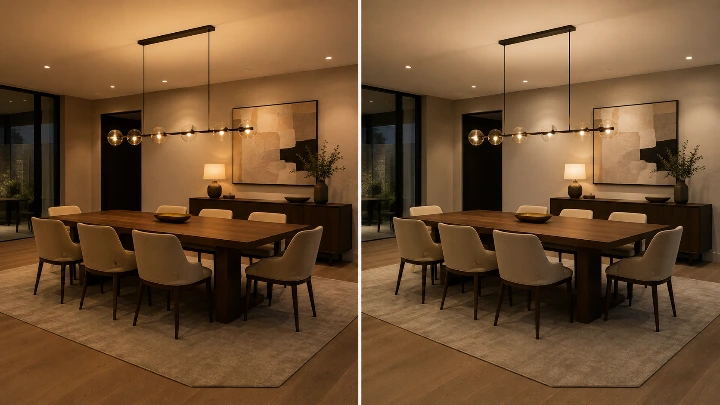
Dining rooms generally work best with warm white light, but 2700K and 3000K create noticeably different atmospheres.
Both can work well. The better choice depends on the interior materials, the adjacent spaces and how formal or relaxed you want the room to feel.
2700K — Warmer and More Intimate
2700K produces a warmer, softer appearance.
It works particularly well with:
natural wood;
brass and bronze;
warm fabrics;
beige and cream interiors;
classic or decorative chandeliers;
intimate evening dining.
This colour temperature can make the dining room feel calmer and more atmospheric, especially when the lighting is dimmed in the evening.
3000K — Warm but Cleaner
3000K still feels warm, but the white light appears slightly cleaner and more neutral.
It works well with:
contemporary interiors;
marble and stone;
black or dark-metal finishes;
modern linear pendants;
open-plan dining areas connected to a kitchen;
spaces that need both atmosphere and practical visibility.
For many modern dining rooms, 3000K offers a useful balance between warmth and clarity.
For a broader comparison of residential colour temperatures, see our 3000K vs 4000K Lighting Guide.
Match the Dining Room to Adjacent Spaces
In an open-plan layout, do not choose the dining-room colour temperature in isolation.
If the nearby kitchen uses 3000K, a 2700K dining area may look noticeably warmer when both spaces are visible together.
That contrast can be intentional, but it should not happen accidentally.
Consider:
the kitchen;
living room;
corridor;
nearby decorative lighting;
integrated LED furniture or joinery.
The connected spaces should feel coordinated even if different lighting layers are controlled separately.
Avoid Unplanned Mixed Whites
A dining room can quickly feel inconsistent when fixtures that are supposed to form one composition use visibly different white tones.
For example:
2700K chandelier;
4000K spotlights;
3000K wall lights.
Each fixture may work individually, but together they can make the room feel disconnected.
Choose a dominant colour temperature for the room, then keep the main lighting layers visually coordinated unless a deliberate contrast is part of the design.
Dimming Changes Brightness, Not Colour Temperature
A standard dimmer reduces light output, but it does not automatically change a 3000K fixture into 2700K.
Some products use warm-dim or tunable-white technology, but that must be specifically supported by the fixture and control system.
Do not assume that dimming alone will make the light physically warmer.
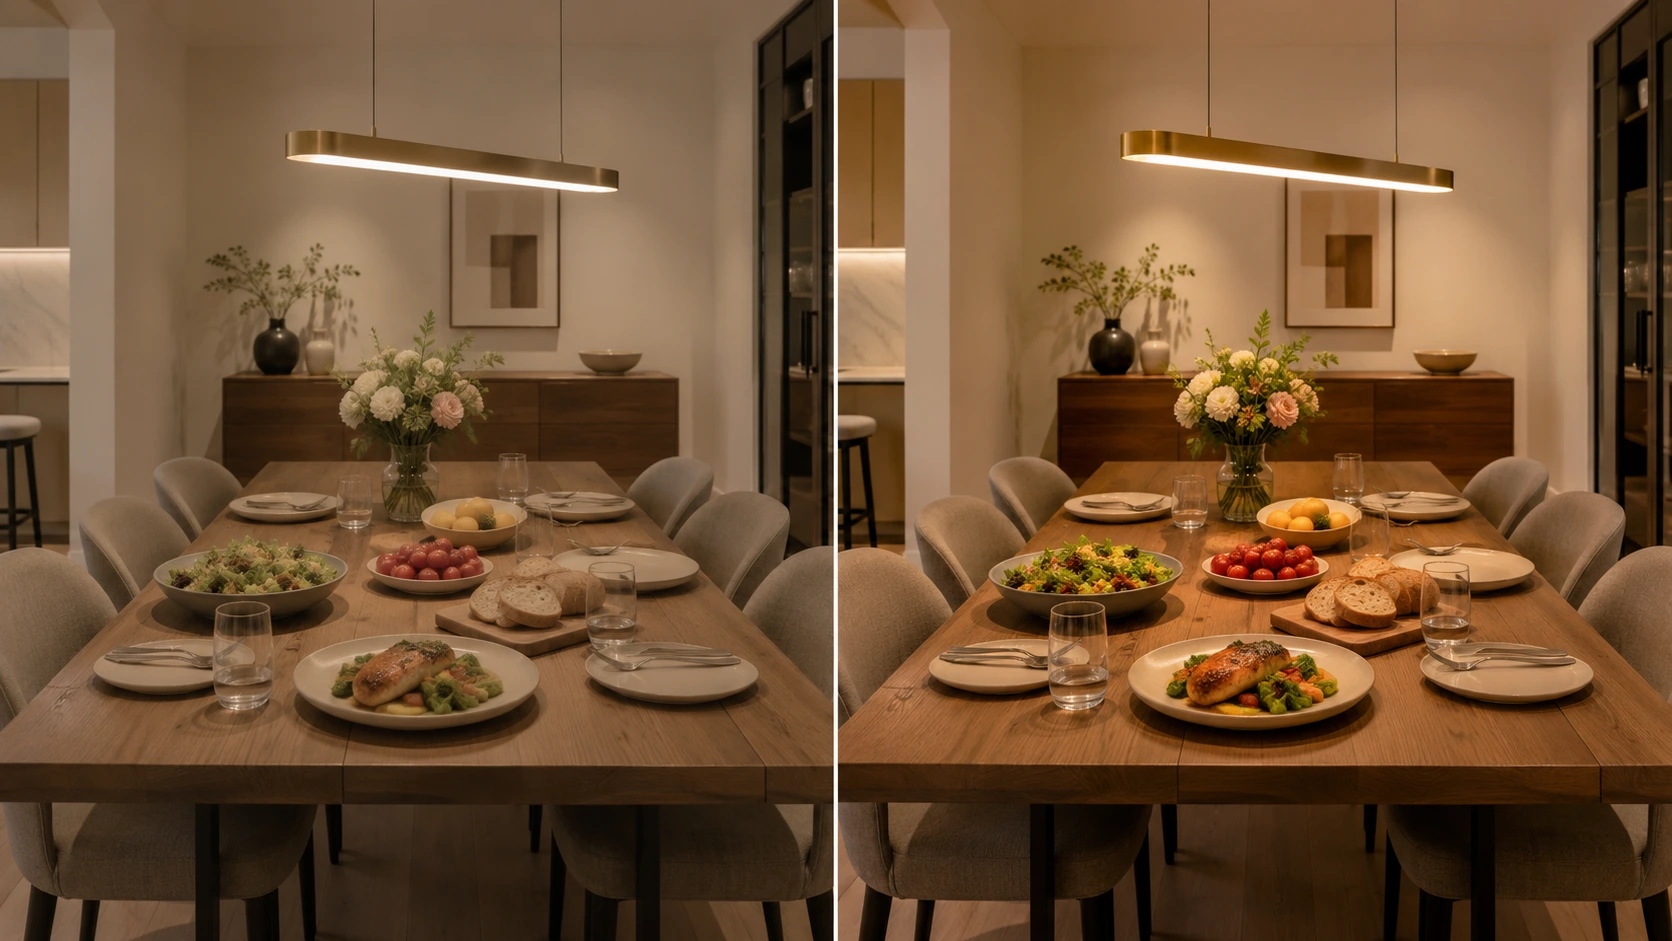
Why CRI Matters in a Dining Room
Give colour quality particular attention at the table, where food, faces, flowers and materials are seen together. CRI 90+ is a useful preference for the main dining light, but a warm colour temperature alone does not establish good colour rendering.
Compare the fixtures using Light Quality Explained and the Light Quality & Visual Comfort Selector. Check the final result with the actual table finishes and food, at both normal and dimmed settings.
Wall, Sideboard & Vertical Lighting
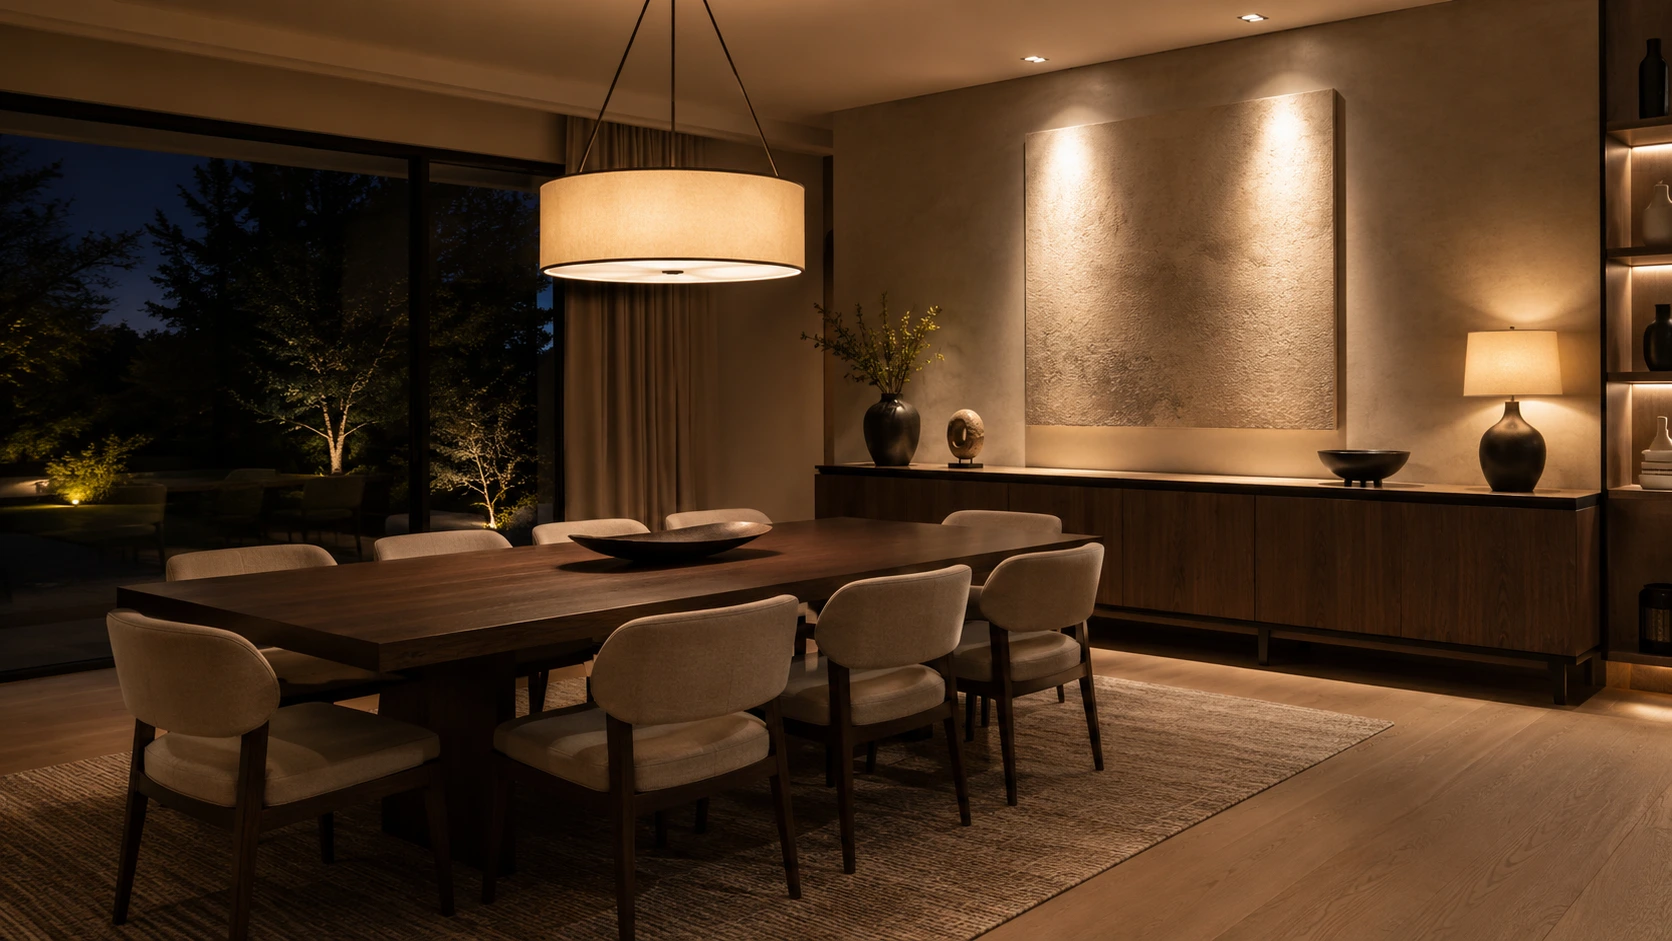
A dining room can feel uncomfortable when the table is bright but the surrounding walls remain dark.
Vertical lighting solves this by adding light to the surfaces people actually see around the room.
It can make the space feel:
- brighter without increasing ceiling brightness everywhere;
- more spacious;
- more visually balanced;
- more architectural;
- less dependent on the central pendant.
Light the Walls, Not Only the Floor
People experience a room mainly through the surfaces in front of them.
Lighting a wall, artwork or textured surface can improve perceived brightness even when the total lumen output remains moderate.
Useful targets include:
- artwork;
- textured walls;
- decorative panels;
- sideboards;
- display shelves;
- architectural niches.
A well-lit wall can make a dining room feel brighter and deeper without flooding the whole ceiling with more light.
Use the Sideboard as a Secondary Focal Point
The dining table should remain the main focus, but a sideboard naturally creates a second visual anchor.
It can be lit with:
- one or two adjustable spotlights;
- a wall light;
- concealed LED strip;
- integrated cabinet lighting;
- a decorative table lamp.
The objective is not to compete with the dining pendant.
The sideboard should add depth and balance to the room.
Artwork Lighting
Artwork above a sideboard can benefit from controlled directional light.
The fixture should:
- cover the artwork appropriately;
- avoid strong glare on glass or glossy surfaces;
- avoid creating a narrow hotspot unless intentional;
- keep the artwork visually connected to the room.
Beam angle and distance should be chosen together.
A wider artwork may need a broader beam or multiple carefully aimed fixtures rather than one narrow spotlight.
Avoid Over-Lighting Every Wall
Vertical lighting should remain selective.
If every wall is equally bright, the room can lose hierarchy.
A better approach is to choose one or two important vertical surfaces and let them support the central dining composition.
That creates depth without making the room visually flat.
Controls, Dimming & Dining Scenes
A dining room rarely needs the same lighting level for every situation.
The room may be used for:
- everyday meals;
- entertaining;
- homework or paperwork;
- cleaning;
- late-evening dining.
That is why control strategy matters almost as much as fixture selection.
Separate the Main Lighting Layers
Where the electrical installation allows it, divide the dining room into separate control groups.
A practical setup might be:
Circuit 1 — Dining Table Fixture
Controls the chandelier, pendant or linear suspension above the table.
This lets the main focal fixture operate independently from the rest of the room.
Circuit 2 — General Lighting
Controls recessed, surface-mounted or ambient ceiling lighting.
This layer can be brighter for practical use and lower during more relaxed dining.
Circuit 3 — Accent & Vertical Lighting
Controls artwork, sideboard, wall lights, shelving or other accent layers.
This allows the room to keep visual depth even when the central lighting is reduced.
The best dining-room control strategy lets you change the atmosphere without changing the lighting layout.
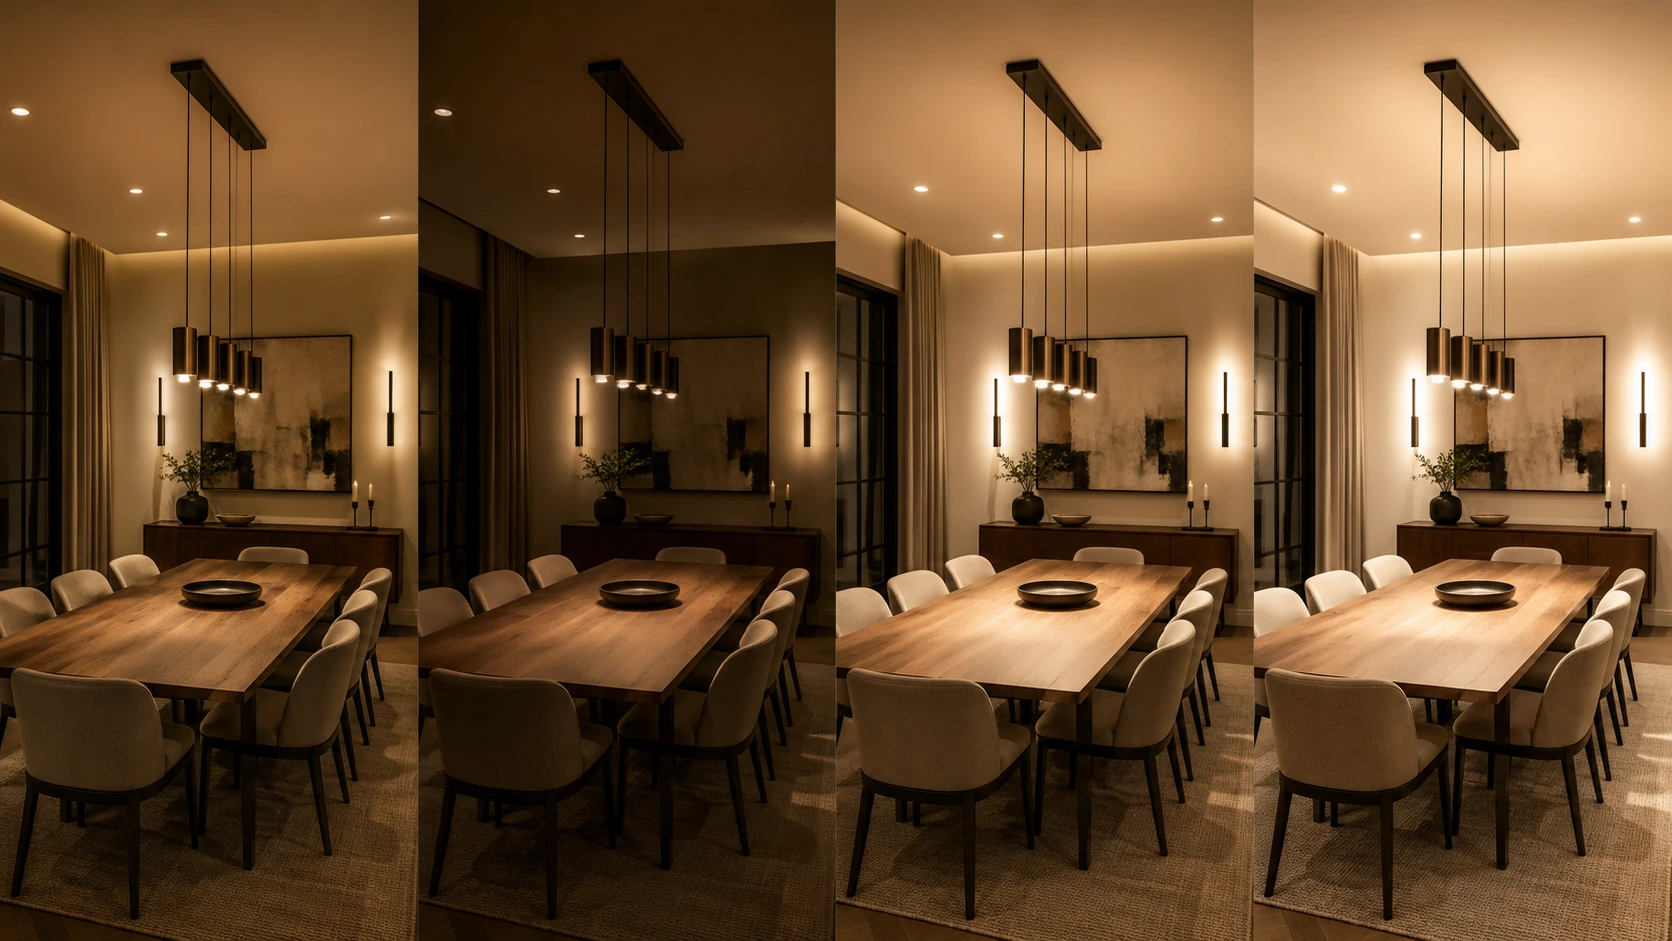
Scene 1 — Everyday Meal
A practical everyday setting might use:
- dining pendant at moderate output;
- general lighting at a comfortable level;
- accent lighting on selected walls or artwork.
The room remains functional without feeling over-lit.
Scene 2 — Entertaining
For a softer evening atmosphere:
- reduce the dining pendant output;
- lower general ceiling lighting;
- keep wall, sideboard or accent lighting active.
This increases contrast and lets the room feel more relaxed while still keeping faces and surroundings visible.
Scene 3 — Homework or Table Work
When the dining table becomes a task surface:
- increase table illumination;
- increase general lighting if needed;
- keep glare under control;
- maintain enough surrounding light to avoid excessive contrast.
Scene 4 — Cleaning
For cleaning or setup:
- use the dining fixture at higher output;
- raise general ambient lighting;
- switch on useful perimeter lighting.
This is one of the few situations where a more uniformly bright room is useful.
Dimming Adds Flexibility
Dimming is particularly valuable in dining rooms because it allows the same fixture to support both:
- practical use;
- relaxed evening use.
But dimming only works correctly when the selected:
- lamp;
- integrated LED module;
- LED driver;
- dimmer;
- control method
are compatible.
Do not assume that every LED fixture is dimmable.
Keep the Controls Simple
A complex lighting system is not automatically better.
The goal is to make the important scenes easy to select.
For many residential dining rooms, three clearly separated layers are enough:
Table / General / Accent
That already gives the user significantly more flexibility than one switch controlling everything.
Worked Example: Complete 5 × 4m Dining Room Plan
Now combine the lighting layers, calculations and placement principles into one practical example.
Room Brief
Room size: 5m × 4m
Area: 20m²
Ceiling height: 2.8m
Dining table: 220 × 100cm rectangular table
Seating: 8 people
Secondary feature: sideboard with artwork above
Main uses: everyday dining, entertaining and occasional table work
The objective is to create a room that can become bright enough for practical use while still feeling warm and layered during dinner.
Step 1 — Estimate the Basic Light Requirement
Using 200 lux as a practical starting point within the recommended 150–250 lux dining-room range:
20m² × 200 lux = 4,000 lumens
This is the basic lumen requirement under ideal conditions.
It does not yet allow for losses caused by fixture optics, diffusers, room surfaces, distribution or normal depreciation over time.
Using the same preliminary adjustment method as the Saleh Deco Lux & Lumens Guide:
- Basic requirement: 4,000 lm
- Utilization Factor: 0.70
- Maintenance Factor: 0.80
The adjusted initial luminaire output becomes:
4,000 ÷ 0.70 ÷ 0.80 ≈ 7,143 lumens
So, if the objective is approximately 200 lux maintained average illumination across the room, around 7,100 lumens of initial luminaire output is a more realistic preliminary planning reference than simply installing fixtures that total 4,000 lumens.
These factors are planning assumptions rather than universal constants. The final requirement depends on the actual fixture optics, room reflectance, mounting positions and selected products.
The 7,100-lumen figure is a planning reference for the room—not a target for one chandelier.
Step 2 — Fix the Table and Main Pendant Position
The 220 × 100cm table becomes the reference point for the room.
The main suspended fixture should:
- follow the long axis of the table;
- sit directly over its centreline;
- distribute light across most of the useful tabletop;
- remain visually proportionate to the furniture.
For this example, a linear pendant or elongated chandelier is more natural than forcing one oversized round fixture over the long table.
Start with the bottom of the fixture approximately 75–90cm above the tabletop, then refine the height from a seated position.
Use the Chandelier Size Guide to refine the actual fixture dimensions.
Step 3 — Give the Pendant One Clear Job
The pendant should provide the primary table-lighting layer, not illuminate every corner of the room.
For this worked example, a suitable suspended fixture or coordinated pendant composition might provide approximately:
2,200–2,600 lumens
of initial fixture output directed primarily toward the dining table.
The exact requirement depends on:
- fixture optics;
- diffuser efficiency;
- hanging height;
- table finish;
- light distribution;
- how much surrounding ambient light reaches the table.
The objective is strong, comfortable illumination across the dining surface without forcing the suspended fixture to satisfy the entire room requirement by itself.
Step 4 — Add Supporting Ambient Light
The remaining room needs comfortable illumination for:
- circulation;
- serving;
- movement around the chairs;
- cleaning;
- visual balance.
Instead of surrounding the table with a dense spotlight grid, use a restrained number of medium- or wide-beam ceiling fixtures positioned according to the useful room zones.
For this example, the supporting ambient layer could contribute approximately:
4,500–5,000 lumens
of initial fixture output.
Depending on the selected products, this might come from several fixtures rather than one large source.
Their positions should respond to:
- circulation around the table;
- room perimeter;
- wall surfaces;
- furniture;
- beam overlap.
They should not simply be placed directly above every dining chair.
Primary + Ambient Planning Total
The table and general layers would therefore provide approximately:
6,700–7,600 lumens
of initial luminaire output.
This places the principal functional lighting around the 7,100-lumen preliminary planning requirement calculated for the room.
Final fixture selection should still be checked using actual photometric output and the Lux & Lumens Calculator.
Step 5 — Add Accent & Vertical Lighting Separately
The sideboard and artwork form the secondary focal point.
Two adjustable accent fixtures at approximately 300–400 lumens each could add:
600–800 lumens
of controlled vertical light.
This layer should be treated separately from the room's basic horizontal lux calculation because much of its output is intentionally directed toward the wall or artwork rather than the general floor plane.
Its job is to:
- reveal the artwork;
- illuminate the sideboard wall;
- increase perceived room brightness;
- add depth behind the dining area;
- prevent the room perimeter from disappearing into darkness.
Example Installed Lighting Mix
A possible starting composition therefore becomes:
| Lighting Layer | Example Initial Output |
|---|---|
| Dining pendant / chandelier | 2,200–2,600 lm |
| Supporting ambient lighting | 4,500–5,000 lm |
| Primary + ambient subtotal | 6,700–7,600 lm |
| Accent / vertical lighting | 600–800 lm |
| Approximate total installed fixture output | 7,300–8,400 lm |
The total installed fixture output is higher than the simple 4,000-lumen area × lux calculation because the design allows for real-room losses and also includes a separate accent layer whose light is intentionally directed toward vertical surfaces.
Do not interpret 7,300–8,400 lumens as a requirement for every 20m² dining room.
It is a worked planning example based on:
- a 200-lux target;
- UF 0.70;
- MF 0.80;
- the assumed room geometry;
- layered table, ambient and accent lighting.
Actual product output, optics and layout should determine the final specification.
Step 6 — Select the Light Quality
For this room, a strong starting specification would be:
Colour temperature: 2700K–3000K
CRI: preferably 90+ for the table and accent layers
Spotlight beam angle: around 36° where balanced accent coverage is needed, adjusted to the actual target
All major lighting layers should use visually compatible white light.
For a broader comparison of residential colour temperatures, see the 3000K vs 4000K Lighting Guide.
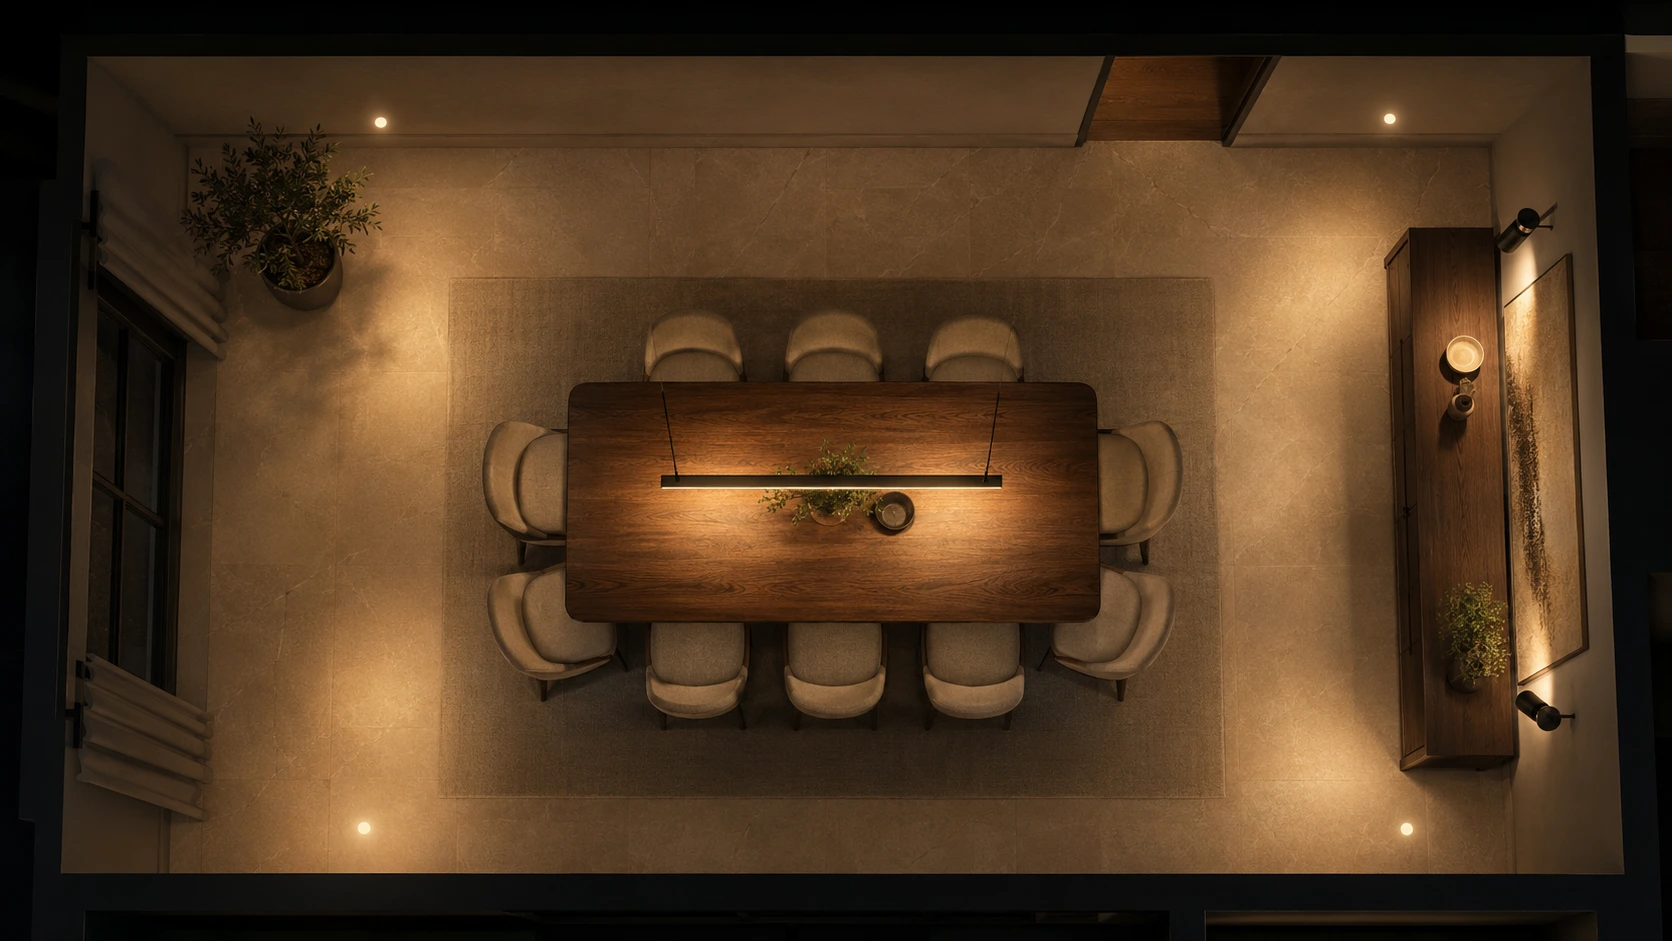
Step 7 — Build the Ceiling Layout Around Functions
A practical arrangement could use:
Centre
- one linear pendant or elongated chandelier centred over the dining table.
Room Perimeter / Circulation
- a restrained number of medium- or wide-beam fixtures providing the supporting ambient layer;
- positions chosen according to circulation and useful coverage rather than a rigid ceiling grid.
Sideboard Wall
- two adjustable accent fixtures aimed at the artwork or feature wall.
The ceiling does not need to be perfectly symmetrical.
The final composition should make sense when viewed from inside the room, not only when viewed as a drawing from above.
Step 8 — Separate the Controls
Use three main lighting groups:
- Dining pendant
- General ambient lighting
- Sideboard / accent lighting
This gives the same installation several useful settings.
Everyday Meal
Pendant + moderate ambient + light accent
Entertaining
Dimmed pendant + reduced ambient + accent lighting
Table Work
Brighter pendant + stronger ambient lighting where required
Cleaning
Pendant + full ambient + accent/perimeter lighting
The installed system therefore has enough available output for practical use without requiring every fixture to operate at full brightness during normal dining.
Final Lighting Recipe
For this 5 × 4m dining room:
Light Requirement
200 lux × 20m² = 4,000 lm basic requirement
Using UF 0.70 and MF 0.80:
approximately 7,143 lm preliminary initial luminaire output
Table Layer
One correctly sized linear pendant or chandelier centred over the 220 × 100cm table, contributing approximately 2,200–2,600 lm in this worked example.
Ambient Layer
A restrained number of medium- or wide-beam ceiling fixtures contributing approximately 4,500–5,000 lm, positioned to support circulation and general room visibility.
Accent Layer
Two controlled fixtures contributing approximately 600–800 lm toward the sideboard and artwork.
Light Quality
2700K–3000K, with CRI90+ preferred where food, faces and artwork are illuminated.
Controls
Table / General / Accent on separate circuits where practical.
The goal is not to hit one lumen number with one fixture. It is to provide enough initial output for the target light level, then distribute that light according to what the table, surrounding room and vertical surfaces actually need.
Five Common Dining-Room Lighting Mistakes
A dining room usually looks better when the lighting is planned around the table, the people using it and the atmosphere you want to create.
These are the mistakes that most often weaken the result.
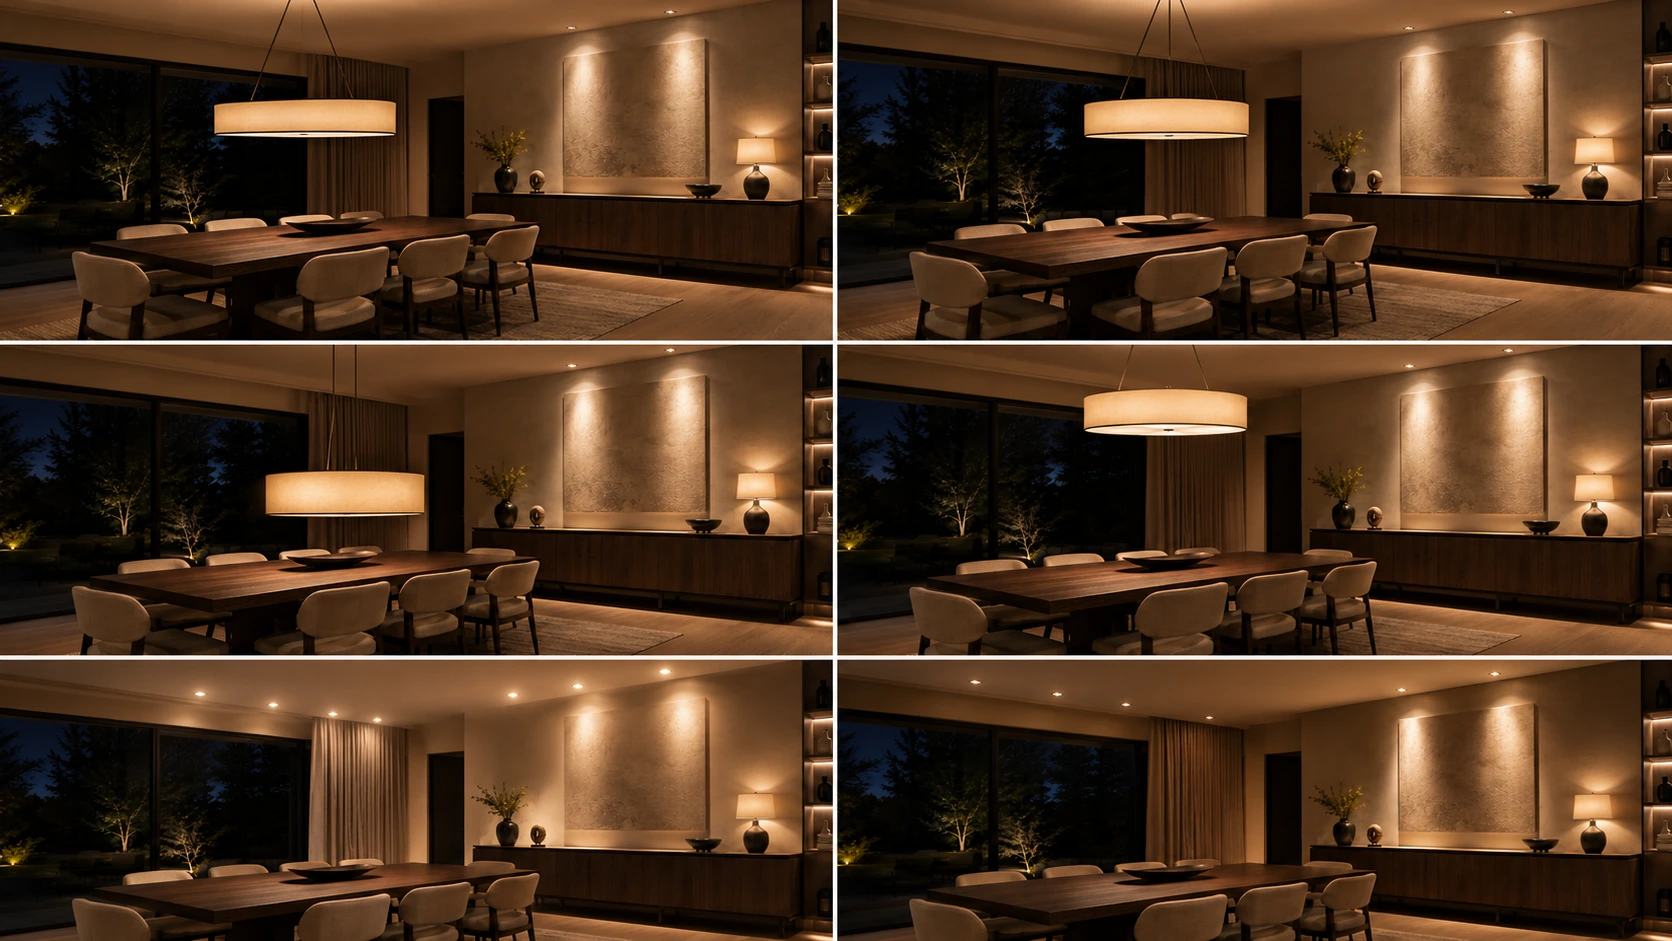
1. Centering the Chandelier on the Room Instead of the Table
A fixture can be perfectly centered on the ceiling and still look wrong if it is not centered over the dining table.
This usually happens when the furniture plan changes after the electrical points are fixed.
Better approach:
Fix the table position first, then center the chandelier or pendant on the table rather than automatically centering it on the room.
2. Expecting One Decorative Fixture to Light Everything
A chandelier may look beautiful above the table but still fail to light circulation, walls, artwork or the rest of the room properly.
That often leads to one of two problems:
- the fixture is too dim for the room; or
- it is made uncomfortably bright because it is being forced to do every job alone.
Better approach:
Let the main suspended fixture focus on the table, then use ambient and accent layers to support the rest of the space.
3. Hanging the Pendant at the Wrong Height
If the fixture hangs too low, it can:
- block sightlines;
- create glare;
- feel visually heavy.
If it hangs too high, it can:
- lose its relationship with the table;
- spread light too broadly;
- weaken the dining focal point.
Better approach:
Start around 75–90cm above the tabletop, then refine the final height from a seated position.
4. Using Spotlights as a Ceiling Pattern Instead of a Lighting Strategy
A rigid spotlight grid may look tidy in plan, but it often creates poor results in the actual room.
Common problems include:
- spotlights directly above diners' heads;
- awkward reflections on the table;
- too much light in the wrong places;
- a flat room with no hierarchy.
Better approach:
Use spotlights to support circulation, walls, artwork and sideboards rather than simply repeating a symmetrical ceiling pattern.
5. Putting Everything on One Switch
A dining room is used differently for meals, entertaining, homework and cleaning.
One switch controlling every fixture makes the room far less flexible.
Better approach:
Separate the major layers where practical:
- table lighting;
- general lighting;
- accent lighting.
That gives you a much better range of moods and functions without changing the physical layout.
Most dining-room lighting problems come from treating the room as a ceiling plan rather than a lived space centered around a table.
Build Your Dining-Room Lighting Plan
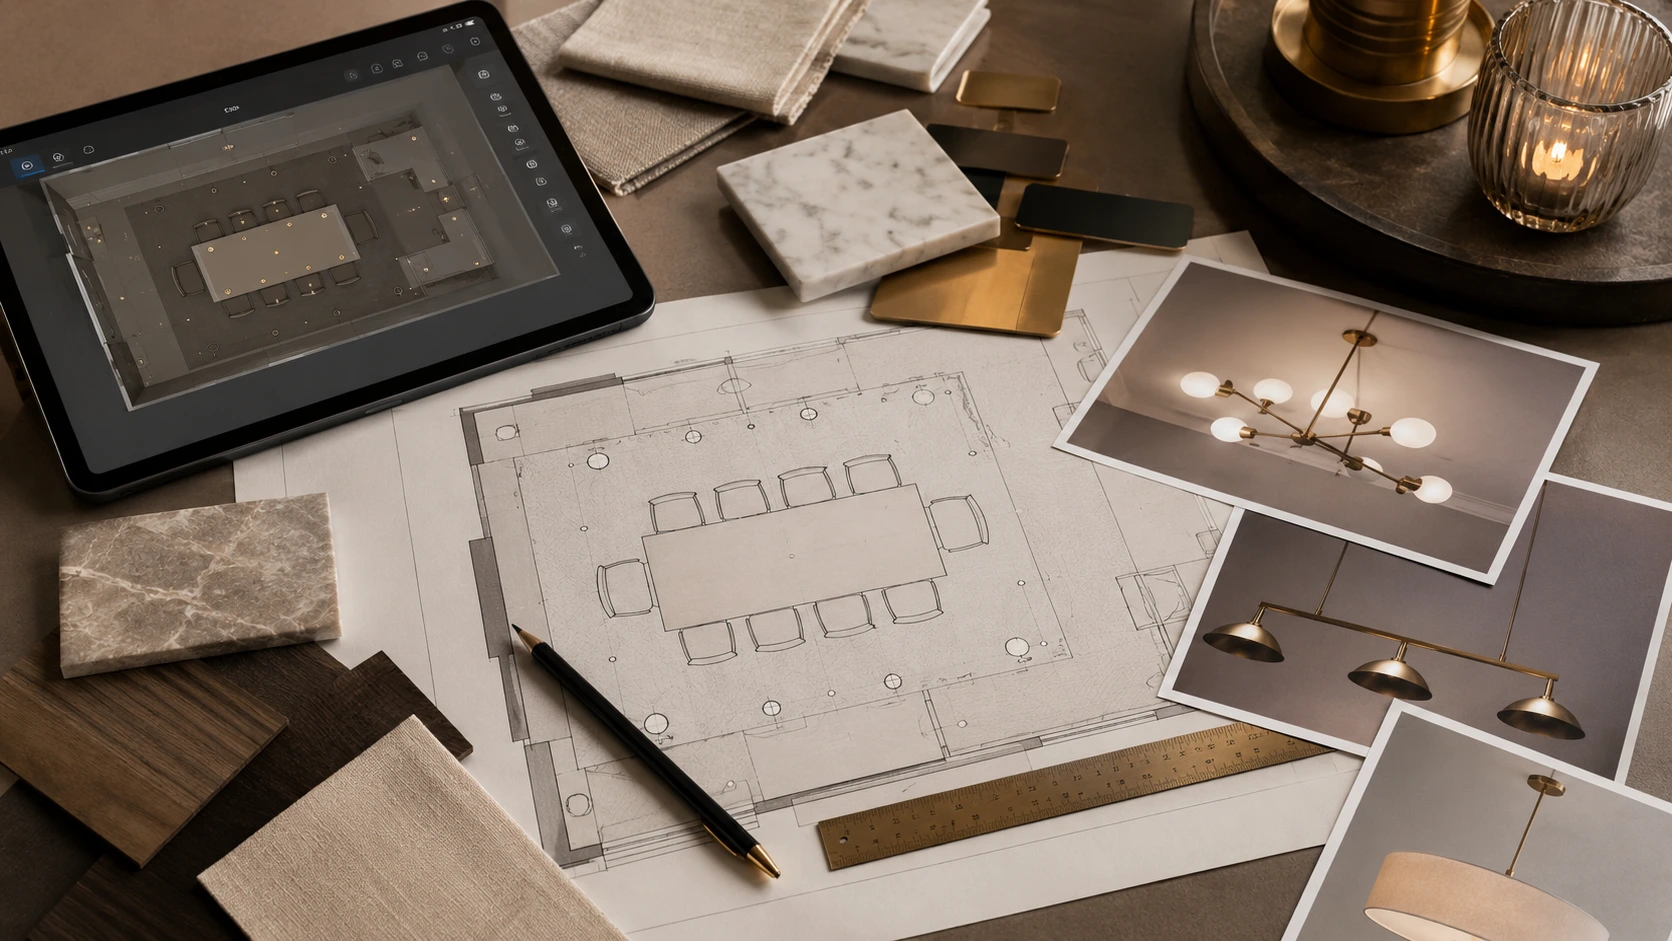
Once you know how the room should work, the next step is choosing the right planning tool or product path.
Different questions require different tools.
I Need to Know How Much Light the Room Needs
Use the Lux & Lumens Calculator.
This is the right starting point when you want to estimate:
- the basic light requirement for the room;
- approximate fixture quantity;
- whether your selected fixture output is likely to be enough;
- how much installed light may be needed after real-room adjustments.
Use it when you are still deciding how much light the dining room needs overall.
I Am Planning Recessed or Surface Spotlights
Use the Spotlight Layout Calculator.
This helps when you need to test:
- spotlight quantity;
- spacing;
- beam overlap;
- ceiling layout;
- light distribution around the table and circulation zones.
Use it when you are deciding where the spotlights should go, not only how many you need.
I Need to Choose a Chandelier or Pendant Size
Use the Chandelier Size Guide.
This is the correct reference when you want to compare:
- table size;
- room size;
- fixture proportion;
- hanging relationship above the dining table;
- the difference between round, linear and multi-light compositions.
Use it when you are deciding how large the suspended decorative fixture should be.
I Need to Choose a Beam Angle
Use the Beam Angle Guide and Beam Angle Calculator.
These help when you want to understand:
- narrow vs medium vs wide beams;
- artwork lighting;
- sideboard lighting;
- spotlight spread;
- how beam width changes with mounting distance.
Use them when you are deciding how concentrated or how broad the spotlight effect should be.
I Am Using LED Strip for Joinery or a Sideboard
Use the LED Strip Driver Calculator.
This is useful if the dining room includes:
- concealed strip lighting in shelves;
- sideboard lighting;
- cabinet or joinery lighting;
- decorative linear lighting.
Use it when you are deciding driver size, run length and power requirements for the strip installation.
Explore Dining-Room Lighting Categories
Once the lighting strategy is clear, start browsing the most relevant product groups.
Chandeliers
For decorative central table lighting and strong visual presence.
Pendant Lights
For single, linear or multi-light suspended compositions above the table.
Technical Spotlights
For controlled ambient or accent lighting around the dining room.
Wall Lights
For softer vertical lighting and added depth.
Track Lighting
For adjustable accent lighting where flexibility is important.
A Good Planning Sequence
For most dining rooms, a practical order is:
- estimate the room's light requirement;
- decide the table fixture type and size;
- plan spotlight locations if needed;
- choose beam angles for accents;
- review the most relevant lighting categories.
Start with the lighting plan, then choose the products — not the other way around.
Need Help Comparing Options?
If you already know your room size, table size and approximate layout, you can move from planning into product selection much more confidently.
Bring or prepare:
- room dimensions;
- table dimensions;
- ceiling height;
- a simple plan if available;
- notes on whether you want dining only, entertaining, or mixed use.
That will make it easier to compare the right decorative and technical lighting options for the space.
Dining Room Lighting Checklist
Before finalising the lighting plan, check each of these points.
Table & Fixture Position
- The final dining-table position is confirmed.
- The main chandelier or pendant is centred on the table, not simply the room.
- A linear fixture follows the table's long axis correctly.
- The fixture size is proportionate to the table and surrounding room.
Hanging Height & Glare
- The suspended fixture starts around 75–90cm above the tabletop and has been adjusted to suit the actual fixture.
- The fixture does not block normal seated sightlines.
- Bright lamps or LEDs are not uncomfortable at seated eye level.
- Glossy tabletops, glass and tableware do not create distracting reflections.
Light Quantity
- The room's approximate lux and lumen requirement has been estimated.
- The chandelier is not expected to provide all of the room's light by itself.
- Ambient, table and accent lighting are treated as separate layers.
- Actual product lumen output has been checked before installation.
Spotlights & Beam Angles
- Spotlights have a clear purpose rather than forming a decorative ceiling grid.
- Fixtures are not unnecessarily positioned directly above every dining chair.
- Artwork and sideboard lighting use suitable beam angles.
- Beam spread has been considered together with mounting height and target distance.
Light Quality
- The main lighting layers use a coordinated colour temperature.
- 2700K–3000K has been considered for a warm residential dining atmosphere.
- CRI90+ is preferred for fixtures illuminating food, faces and artwork where suitable products are available.
- Adjacent kitchen, living-room or corridor lighting has been considered so connected spaces do not clash visually.
Controls
- Table lighting can be controlled independently where practical.
- General lighting has separate control where practical.
- Accent or wall lighting can be controlled separately where useful.
- Dimming compatibility has been confirmed between the fixture, lamp or LED driver and dimmer.
Final Installation Check
- Fixture dimensions have been verified against the actual room.
- Ceiling points match the final furniture layout.
- The plan has been reviewed from both standing and seated positions.
- Driver locations, access and maintenance requirements have been considered.
- The final electrical layout is confirmed before ceiling finishes are closed.
A successful dining-room lighting plan should make the table feel important without making the rest of the room disappear.
Need Help Planning Your Dining Room Lighting?
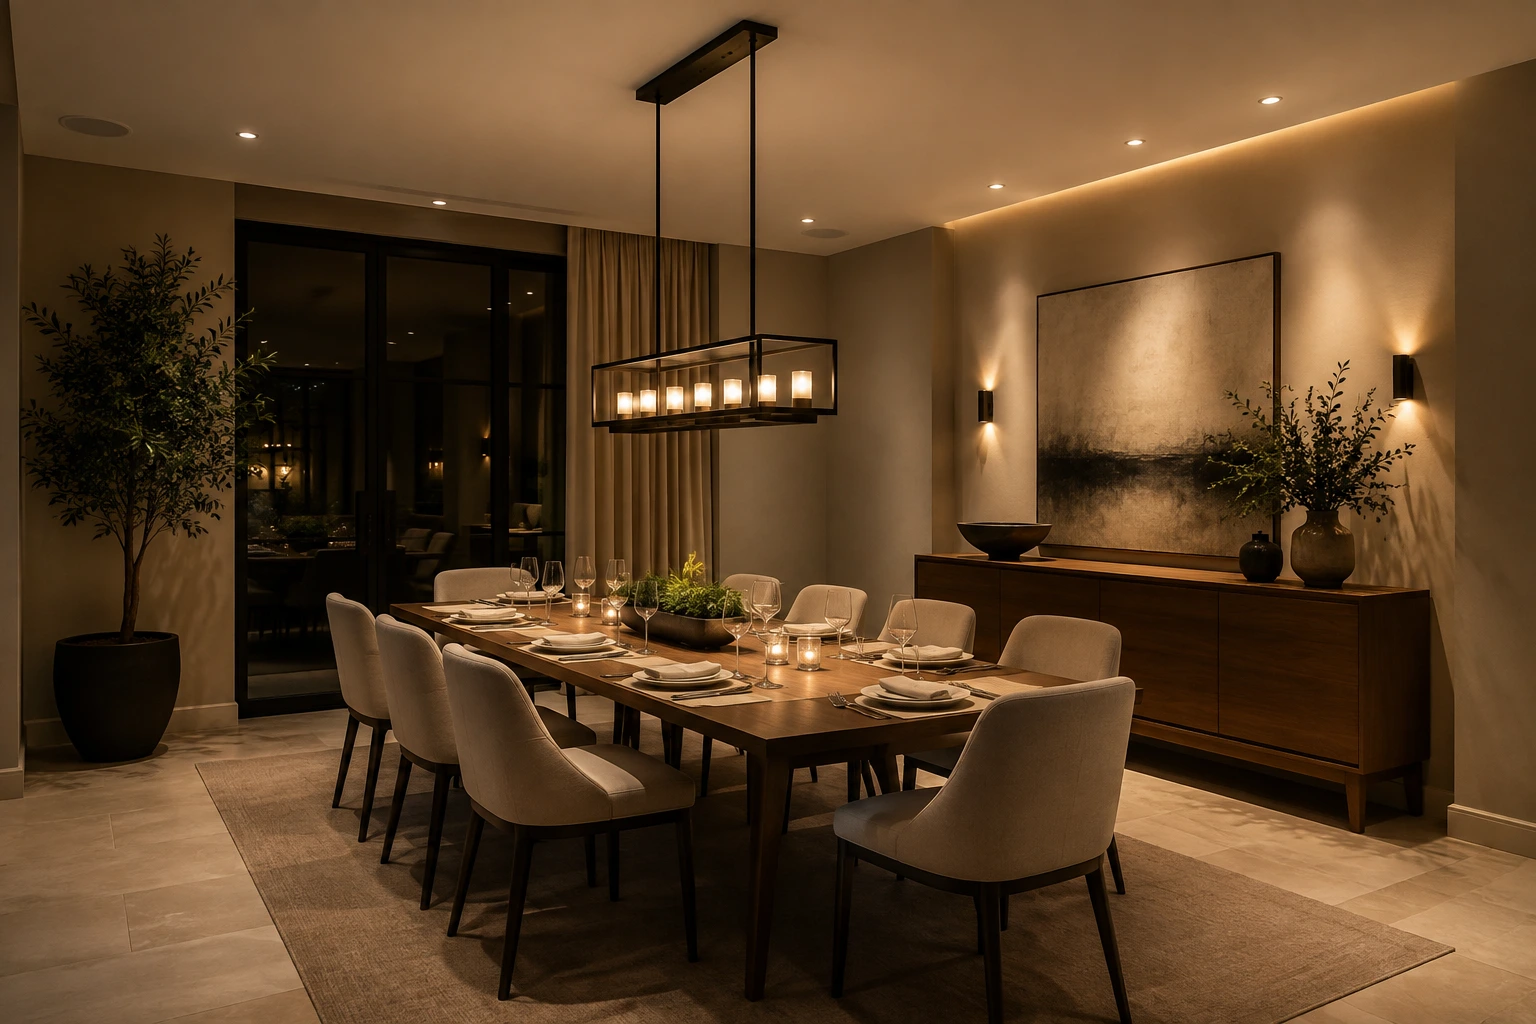
If you have already measured the room, bring the key information with you:
- room length and width;
- ceiling height;
- dining-table dimensions;
- approximate table position;
- photos or a simple floor plan;
- any chandelier, pendant or spotlight styles you are considering.
Saleh Deco can help you compare the decorative and technical lighting options that suit the layout and intended atmosphere.
Saleh Deco — Achrafieh, Beirut
Explore the relevant Chandeliers, Pendant Lights, Technical Spotlights, Wall Lights and Track Lighting, or use the Saleh Deco lighting tools before finalising your selection.