
In This Guide
- What Corridor & Stair Lighting Must Do
- How to Light a Corridor Without Creating a Runway
- How to Make Stair Treads, Risers & Landings Easy to Read
- Step Lights vs Wall Lights vs Ceiling Lights
- How Much Light Does a Corridor or Staircase Need?
- Spotlight Placement in Narrow Corridors
- Beam Angle & Light Distribution
- Glare: Check the Staircase From Above and Below
- Night Lighting & Low-Level Guidance
- Controls, Two-Way Switching & Motion Sensors
- Double-Height Staircases & Decorative Lighting
- Worked Corridor + Staircase Lighting Plans
- Six Common Corridor & Stair Lighting Mistakes
- Build Your Corridor & Stair Lighting Plan
- Corridor & Staircase Lighting Checklist
Corridor & Staircase Lighting: Start With the Route People Travel
Corridors and staircases are easy to underestimate because people usually spend only a short time in them. But they are among the areas where lighting has the clearest practical job: helping people move safely, understand changes in level and find their way comfortably at any time of day.
A good circulation-lighting plan therefore does more than make the space bright.
It should help you see:
where the route continues;
where doors and turns occur;
where a staircase begins and ends;
individual treads and landings;
walls, handrails and architectural features that help define the space.
At the same time, the lighting should remain comfortable. A staircase can technically have enough light and still feel unpleasant if bright sources are visible when walking up or down. A corridor can contain plenty of spotlights and still feel narrow or repetitive if all the light is concentrated on the floor.
Light the route people travel — not the ceiling pattern above it.
That principle will guide the rest of this article.
Instead of starting with a fixed row of downlights, we will look at the corridor, staircase and landing as one connected circulation system. Ceiling lighting, wall lighting, low-level guidance and decorative layers can then be positioned according to what each part of that route actually needs.
The result should feel safe without looking clinical, bright enough without being harsh, and visually connected to the rooms around it.
What Corridor & Stair Lighting Must Do
A successful corridor or staircase lighting plan has several jobs at the same time. It must support movement, reveal changes in level and make the space feel connected to the rooms around it without relying on unnecessary brightness.
1. Make the Route Easy to Understand
The first job is orientation.
Lighting should make it immediately clear:
where the corridor continues;
where doors and intersections occur;
where the staircase starts;
where it changes direction;
where landings begin and end.
This does not always require more fixtures. Often, better placement and stronger visual cues are more useful than simply increasing brightness.
2. Make Steps and Level Changes Easy to Read
On a staircase, seeing the overall stairwell is not enough.
Individual treads, risers and landings should remain visually distinct so that changes in level are easy to recognise while moving both up and down.
Useful light may come from:
ceiling fixtures;
wall lights;
low-level stair lights;
concealed architectural lighting;
or a combination of these layers.
The important point is that the staircase should not become a flat, uniformly illuminated surface where the edges between steps are difficult to distinguish.
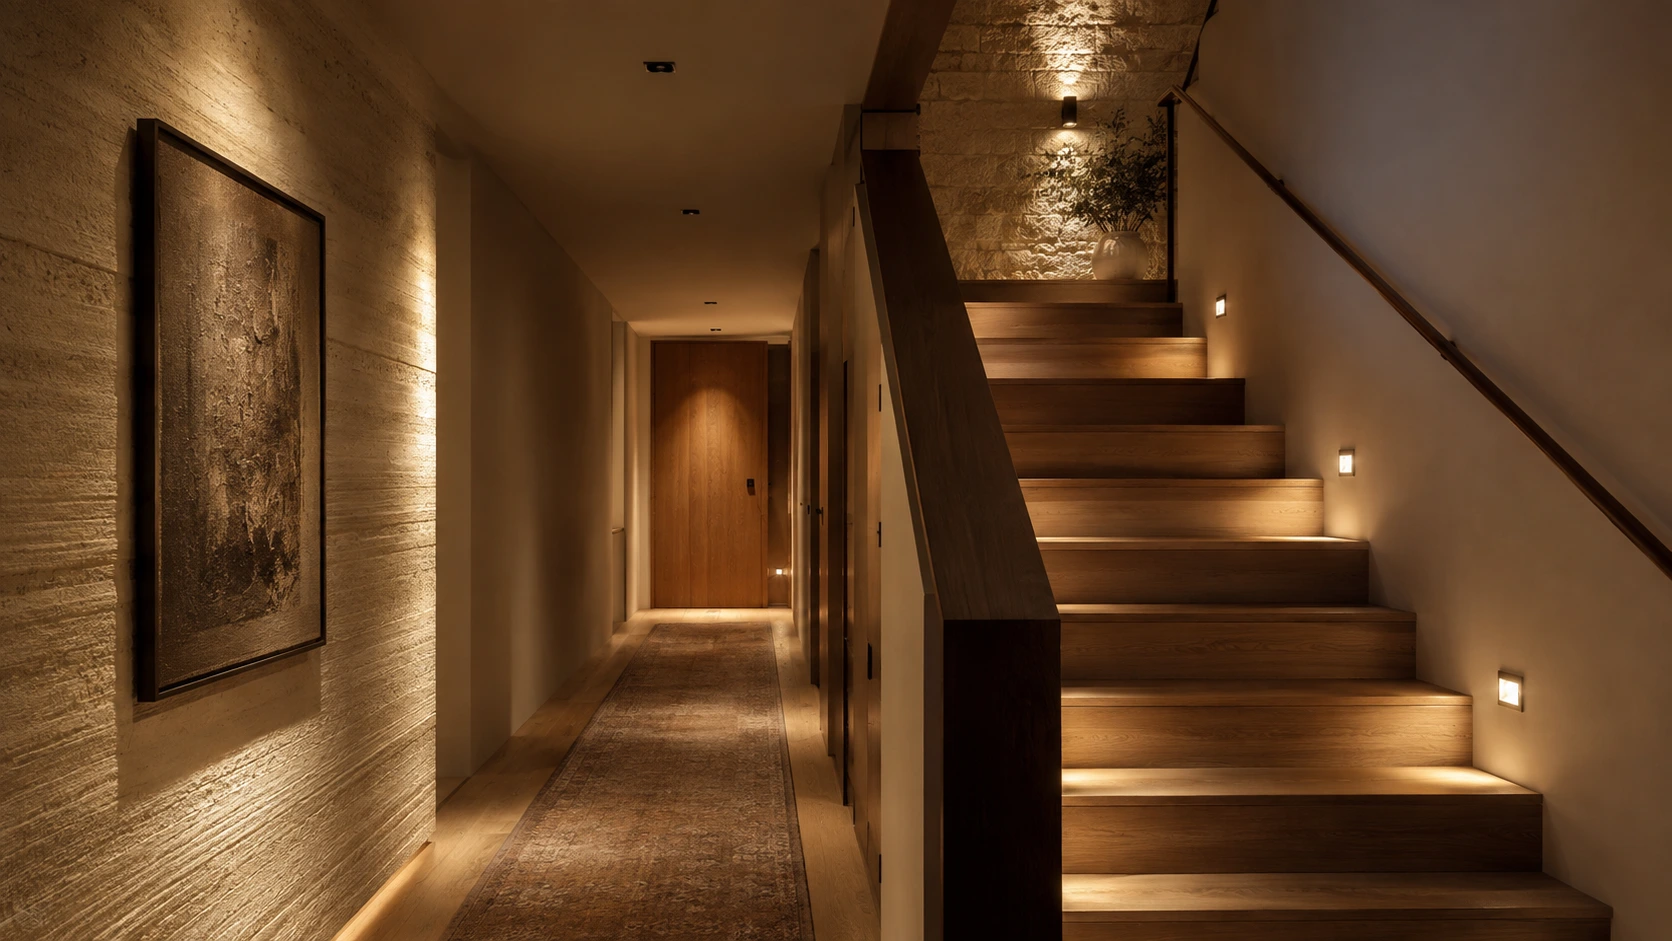
A staircase should reveal its shape, not simply be bright.
3. Add Vertical Brightness
Corridors often feel dark or narrow when all of the light is directed toward the floor.
Illuminating selected walls can make the space feel more open and comfortable while also providing useful visual orientation.
Vertical lighting can support:
artwork;
textured surfaces;
end walls;
niches;
stair walls;
architectural details.
It can also increase the perceived brightness of the space without filling the ceiling with additional downlights.
4. Control Glare While People Are Moving
Circulation spaces are viewed from constantly changing angles.
A light that appears comfortable from one position may become directly visible a few steps later.
This is especially important on staircases, where people view fixtures:
from below;
from above;
across landings;
and through open stair voids.
Good lighting should provide visibility without placing harsh light sources directly in normal sightlines.
5. Work Differently During the Day and at Night
A corridor used during the evening may need comfortable general lighting.
The same corridor at 2:00 a.m. may need only enough low-level light to move safely without suddenly illuminating the entire home.
This is why corridors and staircases often benefit from:
separate lighting layers;
dimming;
low-level night lighting;
motion or occupancy control where appropriate;
convenient switching from both ends of the route.
The best plan therefore does not ask one lighting circuit to perform every job at the same brightness.
The Goal
Corridor and staircase lighting should work as a connected system:
the route is visible, the steps are readable, the walls help define the space, glare is controlled and the lighting can adapt to how the area is being used.
The next step is understanding why simply placing a row of identical ceiling lights along a corridor often produces a weaker result.
How to Light a Corridor Without Creating a Runway
A common corridor-lighting mistake is to place identical downlights at perfectly equal intervals simply because the ceiling is long and narrow.
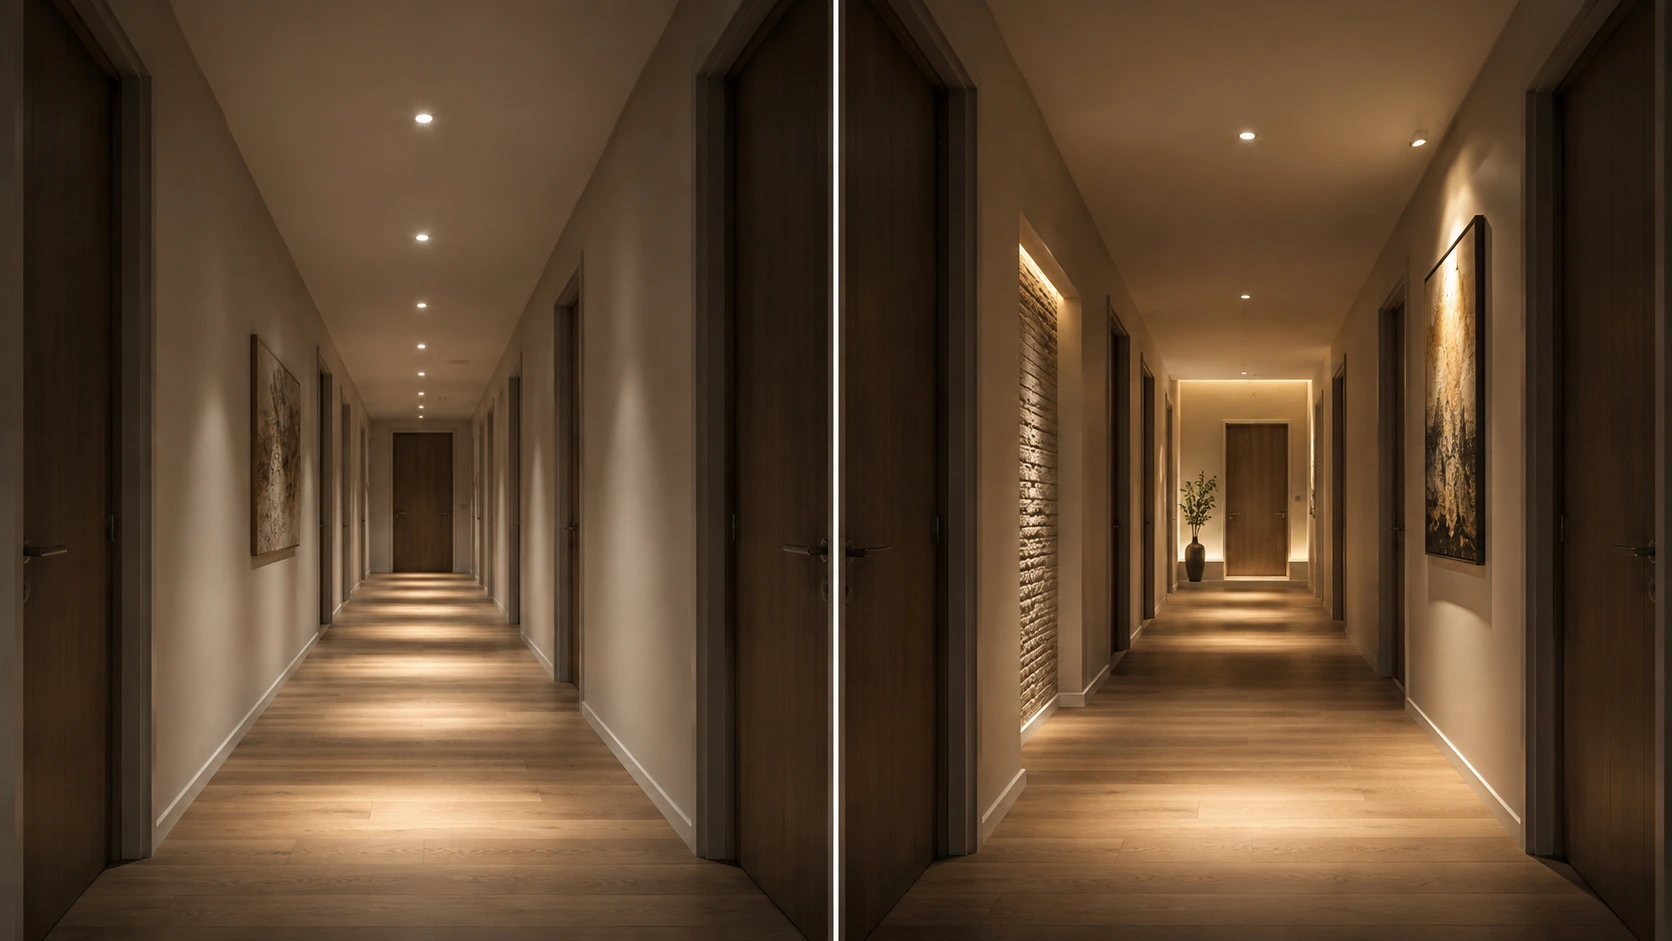
The result may look organised on the drawing, but in the finished space it can create a repetitive runway effect: a line of bright circles on the floor with little attention to doors, walls, artwork, turns or the way people actually move through the corridor.
A better corridor plan starts with the route and the surrounding architecture.
Start With the Corridor Geometry
Before placing any fixtures, identify:
the corridor length and width;
ceiling height;
door positions;
turns and intersections;
the start and end of the route;
artwork or feature walls;
any connection to a staircase or landing.
These features should influence the lighting layout.
A 6-metre corridor with four doorways should not automatically receive the same fixture arrangement as a 6-metre corridor with one continuous artwork wall.
Equal spacing can be useful, but it should never be more important than the space itself.
Use Light to Mark Important Points
Some parts of a corridor deserve more visual emphasis than others.
Lighting can help define:
an entrance from another room;
a corridor turn;
a staircase connection;
a doorway at the end of the route;
artwork;
a console or niche;
a textured end wall.
These points create visual rhythm naturally.
The goal is not to make every metre of the corridor equally important.
Avoid Lighting Only the Floor
When every fixture points straight down, the floor may be bright while the walls remain comparatively dark.
This can make a narrow corridor feel even more enclosed.
A stronger plan often combines general circulation lighting with selected vertical illumination.
For example:
one or two ceiling fixtures can provide useful floor light;
an adjustable spotlight can illuminate artwork;
a wall light can add vertical brightness;
an illuminated end wall can visually shorten a long corridor.
The result usually feels more spacious and intentional than a simple row of identical downlights.
Think About the End of the Corridor
The end wall has a strong effect on how a corridor feels.
If the corridor finishes in darkness, the route can feel longer and less inviting.
If the end wall, artwork or doorway is softly illuminated, the eye has a destination.
This is particularly useful in long residential corridors.
Keep the Lighting Rhythm Calm
A corridor does not need a light directly above every doorway or every fixed distance.
Instead, aim for a calm rhythm with enough overlap to support circulation while allowing walls, doors and architectural features to influence the final positions.
If spotlights are part of the scheme, their quantity and spacing should be tested against the actual corridor dimensions rather than chosen from a generic rule.
For the numerical layout, use the Spotlight Layout Calculator and the How Many Spotlights Does a Room Need? guide. The corridor guide should determine why and where the light is needed; the spotlight tools can then help refine spacing and beam overlap.
A Better Corridor Lighting Strategy
For many residential corridors, a useful planning sequence is:
identify the walking route;
mark doors, turns and important features;
decide which surfaces need vertical light;
add only the general ceiling lighting required to support circulation;
check the final layout from both ends of the corridor.
The ceiling plan may end up slightly asymmetrical.
That is not a problem if the finished space feels balanced.
The best corridor layout is not the one with the most perfect ceiling pattern. It is the one that makes the route, walls and destinations feel clear and comfortable.
How to Make Stair Treads, Risers & Landings Easy to Read
A staircase can be bright and still be difficult to use if the individual steps are not visually clear.
The goal is not simply to illuminate the stairwell. The lighting should help the eye distinguish:
the front edge of each tread;
the riser below it;
the first and last step;
intermediate landings;
changes in direction;
handrails and nearby walls that help define the route.
Good staircase lighting reveals changes in level before you reach them.
Avoid Flat, Uniform Lighting
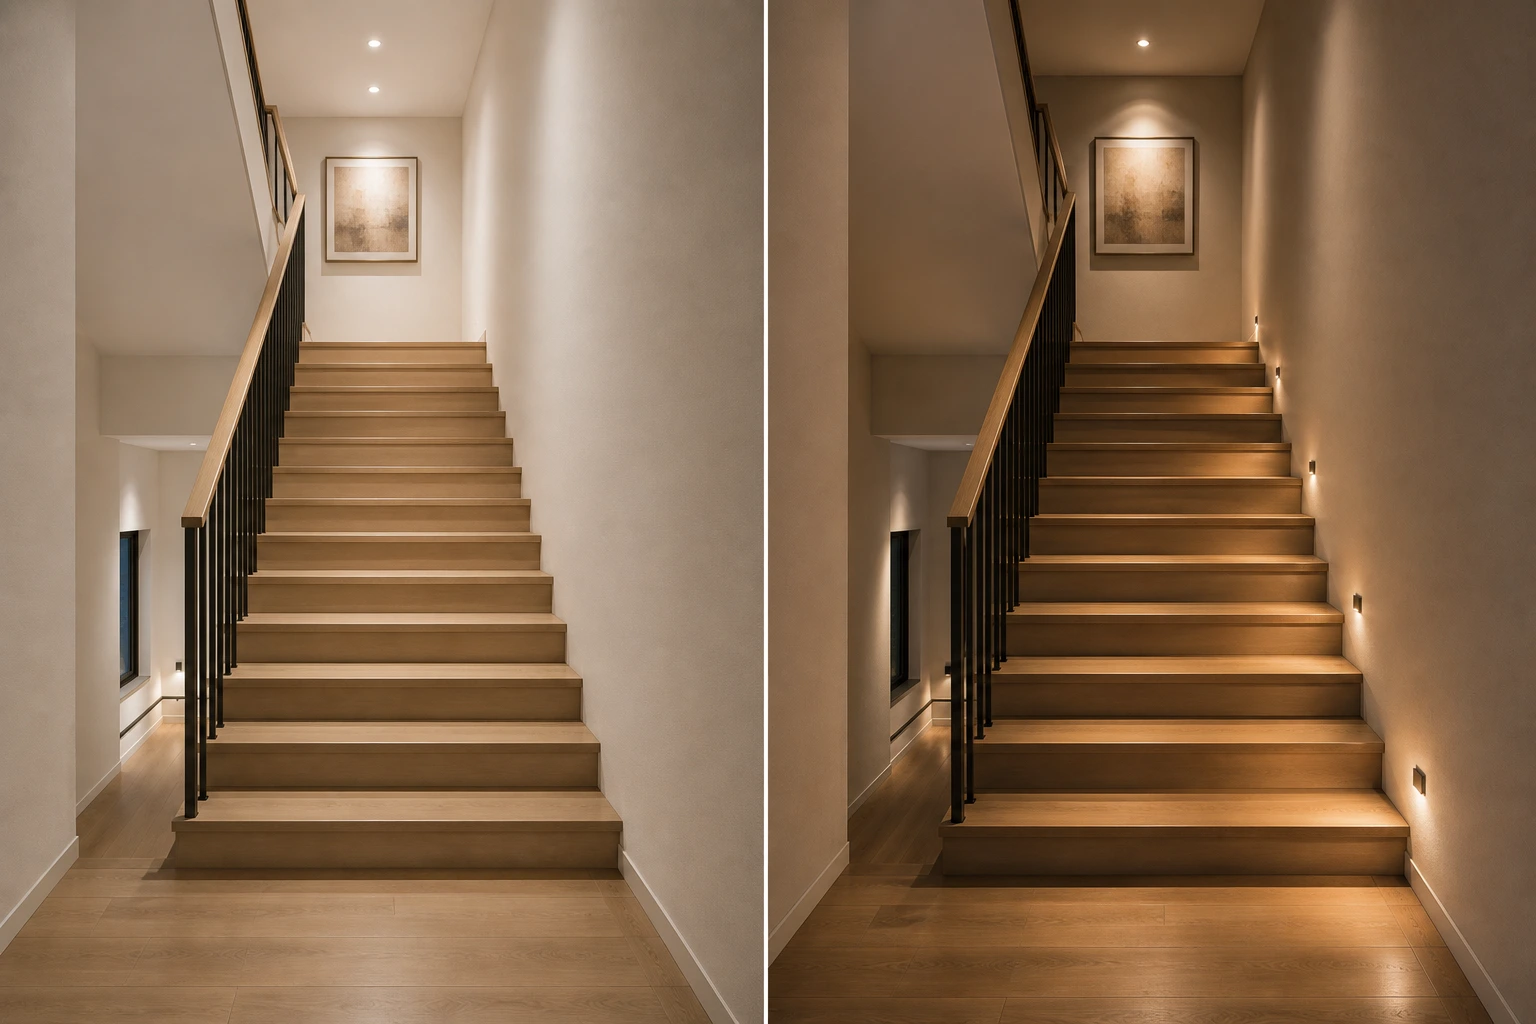
When a staircase is illuminated too evenly from above, the treads and risers can lose definition.
The whole staircase may appear bright, but the edges between individual steps can become visually weak.
A better approach creates enough directional or low-level light to give the stair geometry some depth.
This does not mean producing dramatic shadows.
The objective is clear step definition without harsh contrast.
Make the First and Last Step Obvious
The beginning and end of a staircase deserve particular attention.
These are the points where a person changes from level walking to climbing or descending.
Avoid allowing:
the first tread to disappear into a dark floor;
the final step to merge visually with the landing;
a strong decorative shadow to hide the change in level.
The transition should be immediately understandable from normal walking distance.
Treat Landings as Part of the Route
A landing is not simply empty space between two flights.
It is a transition point where people may:
turn;
change direction;
approach a door;
enter another corridor;
pause before continuing.
Landings therefore need their own usable illumination.
On an L-shaped or U-shaped staircase, the landing can also become an important visual anchor connecting the two flights.
Use the Wall to Help Define the Staircase
Where a staircase runs beside a wall, low-level or wall-mounted lighting can reinforce the direction of travel.
Depending on the architecture, this can include:
recessed wall lights;
shielded step lights;
wall sconces;
concealed linear light;
controlled light onto a textured stair wall.
These layers can make the staircase easier to read while reducing the amount of general ceiling light required.
Keep Step Lighting Controlled
Low-level stair lights should illuminate the walking surface without becoming bright points in the user's field of view.
Poorly positioned fittings can produce:
glare while walking upward;
visible light sources while descending;
excessive brightness on one side of the stair;
alternating dark and bright patches.
Good step lighting should feel integrated into the architecture rather than appearing as a row of glowing dots.
Check the Staircase in Both Directions
Always evaluate the lighting from:
the bottom looking upward;
the top looking downward;
across the landing;
and, for open stairs, through the stair void.
A fitting that appears perfectly comfortable from below may be directly visible from above.
That is why stair lighting should be judged as a moving experience, not from one fixed viewpoint.
The Practical Goal
A well-lit staircase should allow the eye to understand:
where the stair begins, where each level changes, where the route turns and where it finishes.
The next step is choosing which lighting approach should perform that job: step lights, wall lights, ceiling lights or a combination of all three.
Step Lights vs Wall Lights vs Ceiling Lights
There is no single fixture type that works best for every corridor or staircase.
The right choice depends on what needs to be illuminated, where the fixture can be installed and how the light will be seen while people move through the space.
In many projects, the strongest result comes from combining two or more lighting types rather than asking one fixture to do everything.
Step Lights
Step lights are useful when the priority is low-level guidance and clear visibility near the walking surface.
They can work especially well for:
stair treads and risers;
low-level night lighting;
long stair flights;
landings;
architectural staircases where ceiling lighting alone feels too detached from the steps.
The most important consideration is glare.
A step light should illuminate the route without becoming a bright point directly visible from above or below.
Poorly shielded fittings can create a row of distracting luminous squares rather than comfortable guidance.
Wall Lights
Wall lights can perform two jobs at once:
provide useful illumination for circulation;
add vertical brightness that makes the space feel more open and visually complete.
They are particularly useful in:
narrow corridors;
staircases with a continuous wall;
corridors with artwork;
decorative residential circulation spaces;
areas where a softer atmosphere is preferred.
A well-positioned wall light can contribute more to perceived brightness than another downlight aimed only at the floor.
Ceiling Lights and Spotlights
Ceiling-mounted lighting remains useful for general circulation and landings.
This can include:
recessed downlights;
surface-mounted ceiling lights;
adjustable spotlights;
broader ambient ceiling fixtures.
The key is to avoid treating the ceiling as a fixed grid.
Use ceiling lighting where it helps the route, rather than placing one fixture above every step or at identical intervals simply for symmetry.
Adjustable spotlights can also be useful when the corridor contains artwork, a textured end wall or another feature that deserves controlled directional light.
Concealed Linear Lighting
Concealed LED strip can work well where the architecture supports it.
Possible applications include:
under a handrail;
along a stair stringer;
inside a wall recess;
beneath a floating edge;
within a cove or architectural reveal.
This can create excellent low-level guidance, but the LED source itself should remain concealed.
If the strip, driver and cabling need to be sized, use the LED Strip Lighting Design Guide and the LED Strip Driver & Cable Calculator rather than treating the architectural detail as a simple decorative strip.
Which Type Should You Choose?
A practical way to decide is to ask what the space is missing.
If the steps are difficult to read, consider low-level step or wall lighting.
If the corridor feels narrow or dark, add useful vertical illumination.
If the route needs general visibility, ceiling lighting may provide the main ambient layer.
If the architecture includes handrails, recesses or floating stair details, concealed linear lighting may be appropriate.
Choose the fixture by the job it needs to perform—not by the empty space available on the ceiling or wall.
The Strongest Schemes Usually Combine Layers
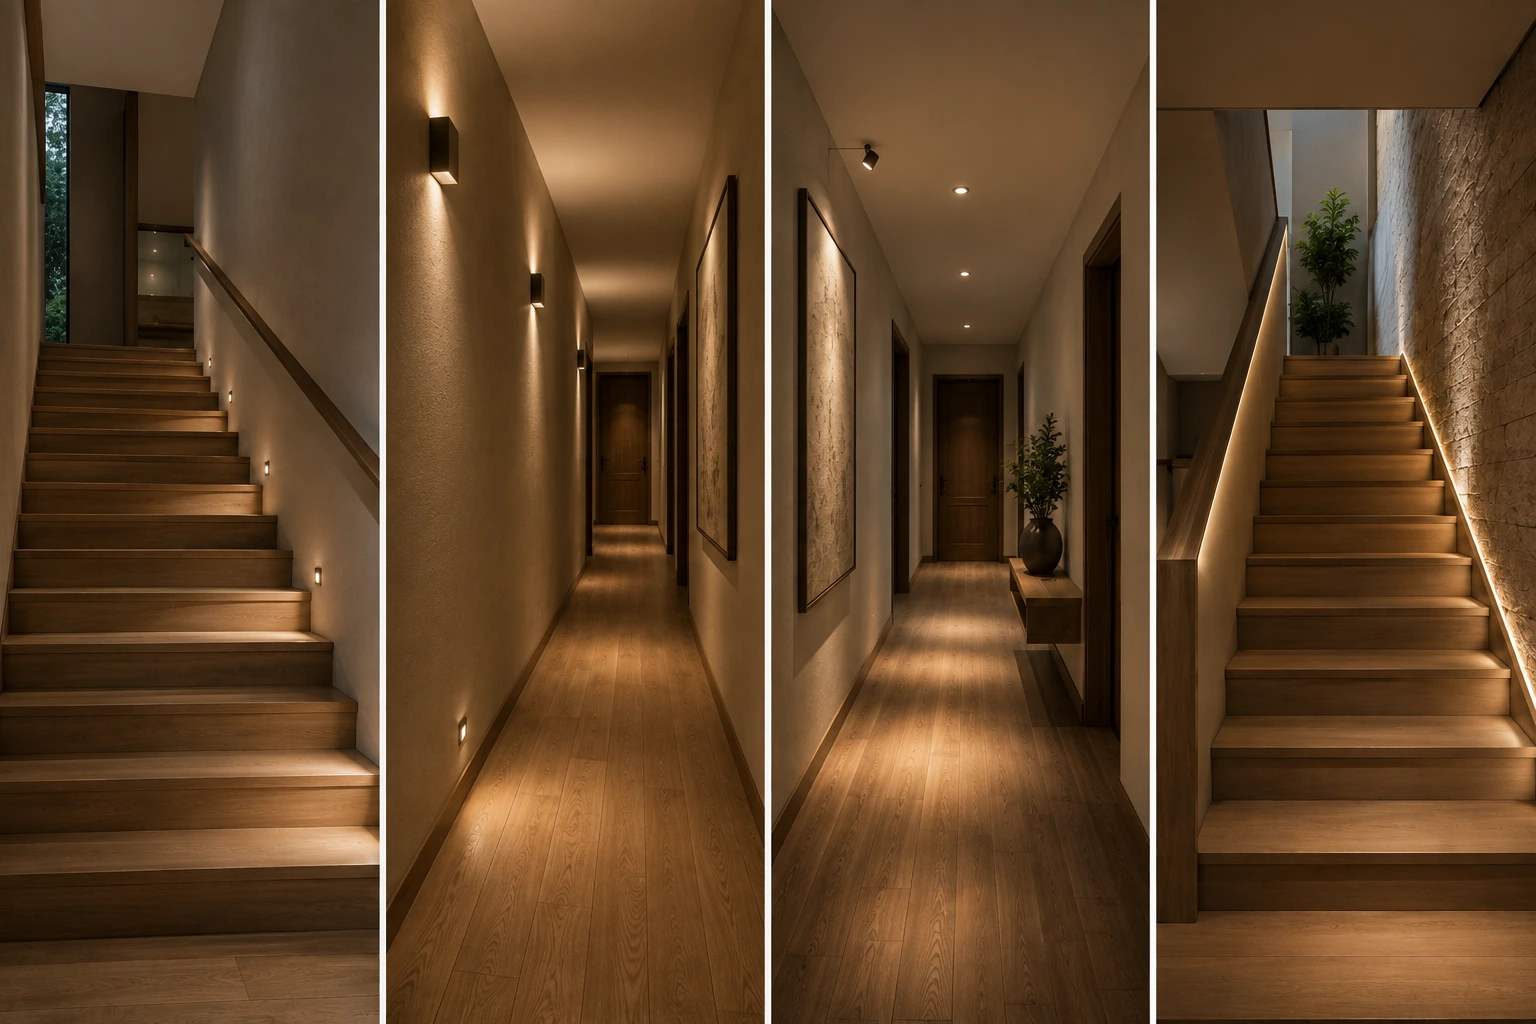
For example, a staircase might use:
restrained ceiling light at the landing;
low-level wall lights along the flight;
one decorative wall light or vertical accent;
concealed linear lighting only where it genuinely supports the architecture.
A corridor might use:
a small number of general ceiling lights;
selected wall lights;
one directional accent on artwork or the end wall.
The combination should remain visually quiet.
The next step is determining how much light the corridor or staircase actually needs.
How Much Light Does a Corridor or Staircase Need?
Corridors and staircases usually need less light than kitchens, offices or other task-heavy rooms, but that does not make the lighting unimportant.
For residential circulation areas, a practical starting range is approximately:
Corridors: 100–150 lux
Staircases: 100–150 lux
The exact target depends on the dimensions, surface colours, available daylight, age and needs of the occupants, fixture distribution and how the circulation space connects to adjacent rooms.
The objective is comfortable visibility rather than maximum brightness.
A corridor does not need to be extremely bright. It needs enough well-distributed light to make the route, doors, walls and changes in level easy to understand.
Start With the Basic Lux Calculation
The first calculation is:
Room Area × Target Lux = Basic Lumens Required
Consider a residential corridor measuring:
Length: 6m
Width: 1.2m
Ceiling height: 2.7m
The floor area is:
6 × 1.2 = 7.2m²
If we choose a design target of 120 lux:
7.2m² × 120 lux = 864 lumens
This is the basic theoretical amount of light reaching the working plane before real-world losses are considered.
Adjust for Real-World Conditions
Not every lumen produced by a fixture reaches the corridor floor effectively.
Light is affected by:
fixture optics;
beam direction;
ceiling height;
wall and floor reflectance;
fixture positioning;
normal depreciation over time.
Using the same methodology as the Saleh Deco Lux & Lumens Guide, we can apply a utilization factor and maintenance factor.
For example:
Basic requirement = 864 lm
Utilization Factor = 0.70
Maintenance Factor = 0.80
The preliminary initial luminaire output becomes:
864 ÷ 0.70 ÷ 0.80 ≈ 1,543 lumens
So for this 7.2m² corridor, approximately 1,500–1,600 lumens of initial fixture output is a more realistic planning starting point than simply selecting fixtures that total 864 lumens.
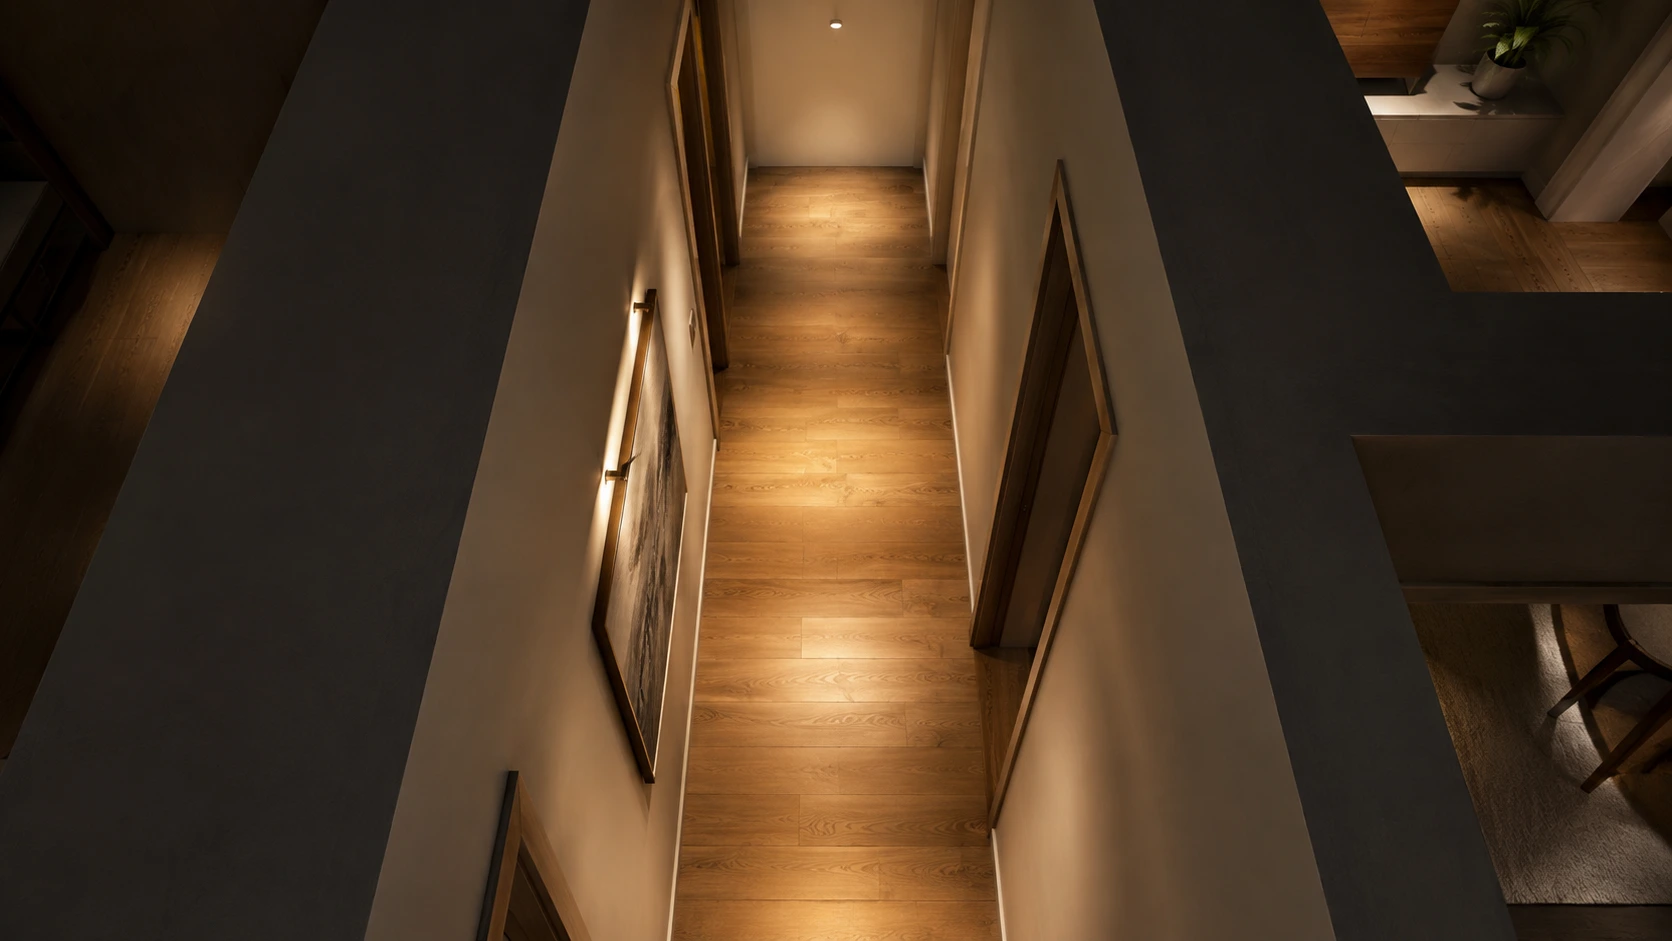
Do Not Put All 1,500 Lumens Into One Fixture
The calculated output does not mean one bright ceiling light should provide the entire scheme.
The lighting can be distributed between different layers.
For example:
restrained ceiling lighting for general circulation;
selected wall or artwork lighting;
light on the end wall;
low-level guidance where the corridor connects to stairs.
The exact split depends on the architecture.
Vertical or accent light aimed at walls also contributes to how bright and comfortable the corridor feels, but it should not simply be counted as if every lumen were reaching the floor.
What About Staircases?
The same 100–150 lux range is a useful residential planning starting point, but staircases require additional judgement.
Unlike a flat corridor, a staircase contains:
horizontal treads;
vertical risers;
changing viewing angles;
landings;
shadows created by the stair geometry.
This means fixture position and light direction can matter as much as the total lumen figure.
A staircase with enough calculated lumens can still perform poorly if the first step is dark or if one fixture creates strong shadows across several treads.
Use the Calculation as a Starting Point
For an actual project, use the Lux & Lumens Calculator to test the room dimensions, target illuminance, utilization factor and maintenance factor.
Then use the result together with the lighting layout.
Lux tells you how much light the route needs. The layout determines whether that light reaches the places where it is useful.
In the next section, we will apply that principle specifically to spotlight placement in narrow corridors.
Spotlight Placement in Narrow Corridors
Spotlights can work very well in corridors, but narrow spaces make poor placement more obvious.
A layout that looks neat on a ceiling plan can still produce:
repetitive bright circles on the floor;
dark walls;
uncomfortable glare;
unnecessary fixtures above doorways;
uneven lighting at turns and junctions.
The goal is not to fill the ceiling with spotlights. It is to place enough light where the route and surrounding surfaces actually need it.
Start With the Corridor Width
In a narrow corridor, the distance between the fixture and the walls is small.
This means a spotlight with a medium or wide beam can often illuminate a significant portion of the walking route without needing many fittings.
Before choosing spacing, consider:
corridor width;
ceiling height;
beam angle;
fixture lumen output;
whether the light is aimed straight down or toward a wall;
the required wall brightness.
Two corridors with the same length may therefore need different layouts.
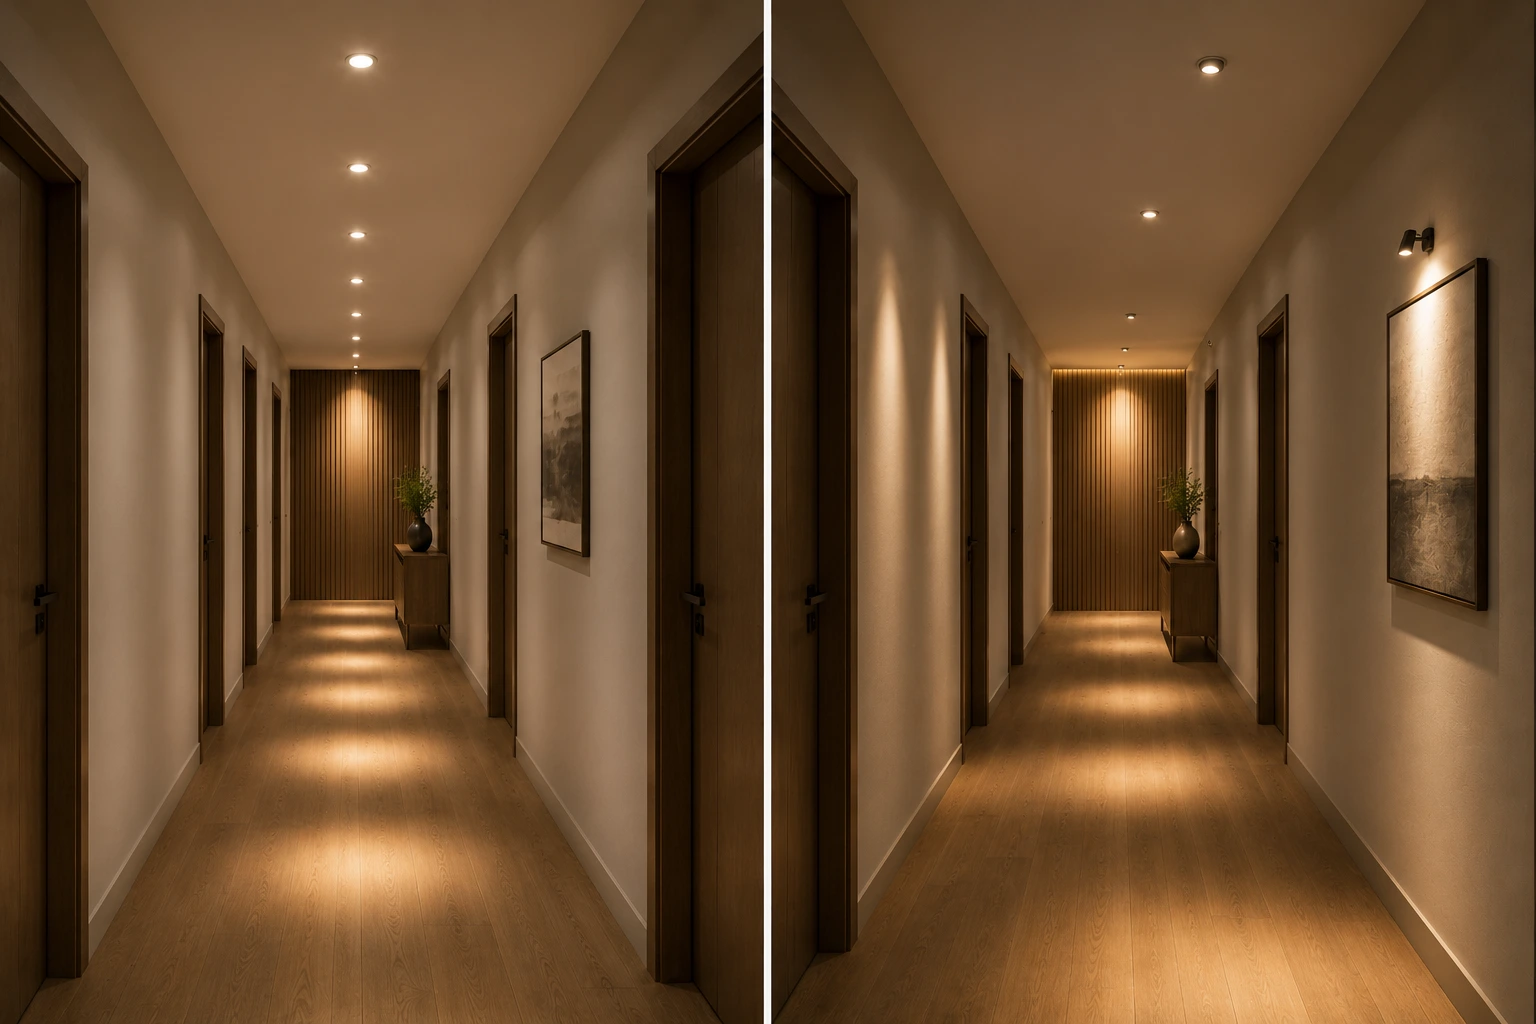
Do Not Automatically Centre Every Spotlight
A perfectly centred row is not always the strongest solution.
If one wall contains artwork or architectural detail, slightly offset or adjustable fixtures may create a more useful composition.
For example, a spotlight can contribute to circulation while also providing controlled light on:
artwork;
a textured wall;
a console;
a niche;
an end wall.
This gives each fitting a clearer job.
In a narrow corridor, every spotlight should earn its position.
Use Wall Offset Deliberately
If the objective is primarily floor illumination, the fixture may sit closer to the corridor centreline.
If the objective includes vertical illumination, the fixture may need to move toward the wall and use an appropriate beam or adjustable aiming angle.
The correct offset depends on:
ceiling height;
beam angle;
target height on the wall;
artwork dimensions;
the fixture's actual optical distribution.
There is no single wall-offset measurement that works for every corridor.
Avoid Fixtures Directly Above Every Door
Door positions are useful planning references, but they do not automatically require a ceiling light.
Placing one fitting above every doorway can create:
unnecessary fixture density;
an irregular ceiling rhythm;
bright patches that do little for circulation.
Instead, treat doors as part of the route and place fixtures according to overall visibility and visual balance.
Pay Extra Attention to Turns and Junctions
An L-shaped corridor should not be designed as two unrelated straight lines.
The turn itself needs to remain visually clear.
Similarly, a junction between a corridor and staircase should help the eye understand where the route continues.
At these points, lighting may need to respond to:
direction changes;
doorways;
stair openings;
landings;
end walls.
A slight change in fixture position can provide a stronger visual cue than simply adding another spotlight.
Allow Beam Overlap
Individual spotlight pools should normally work together rather than leaving obvious dark gaps between them.
The required overlap depends on beam angle, mounting height and the brightness distribution of the fixture.
Too little overlap creates isolated circles.
Too much fixture density can make the corridor unnecessarily bright and visually busy.
Use the Spotlight Layout Calculator to test fixture quantity, spacing, wall offset and beam footprints using the actual corridor dimensions.
For broader guidance on quantity and spacing, refer to How Many Spotlights Does a Room Need?
Check the Layout From Both Ends
Before finalising the ceiling plan, imagine standing at each end of the corridor.
Ask:
Does the route remain visually continuous?
Is the end destination clear?
Are artwork and walls balanced?
Are any fittings unnecessarily dominant?
Does the ceiling look calm rather than crowded?
The final layout does not need to be mathematically symmetrical.
It needs to feel visually balanced when the corridor is actually experienced.
Beam Angle & Light Distribution
Beam angle determines how concentrated or broad the light becomes by the time it reaches the floor, wall or staircase.
In corridors and staircases, that matters because the space is usually narrow, the mounting distances are relatively short and the lighting often needs to serve more than one surface.
A beam that is too narrow may create isolated bright spots.
A beam that is too wide may lose useful intensity or spill light onto surfaces that do not need it.
Choose the beam for the surface you want to illuminate—not simply for the fixture type.
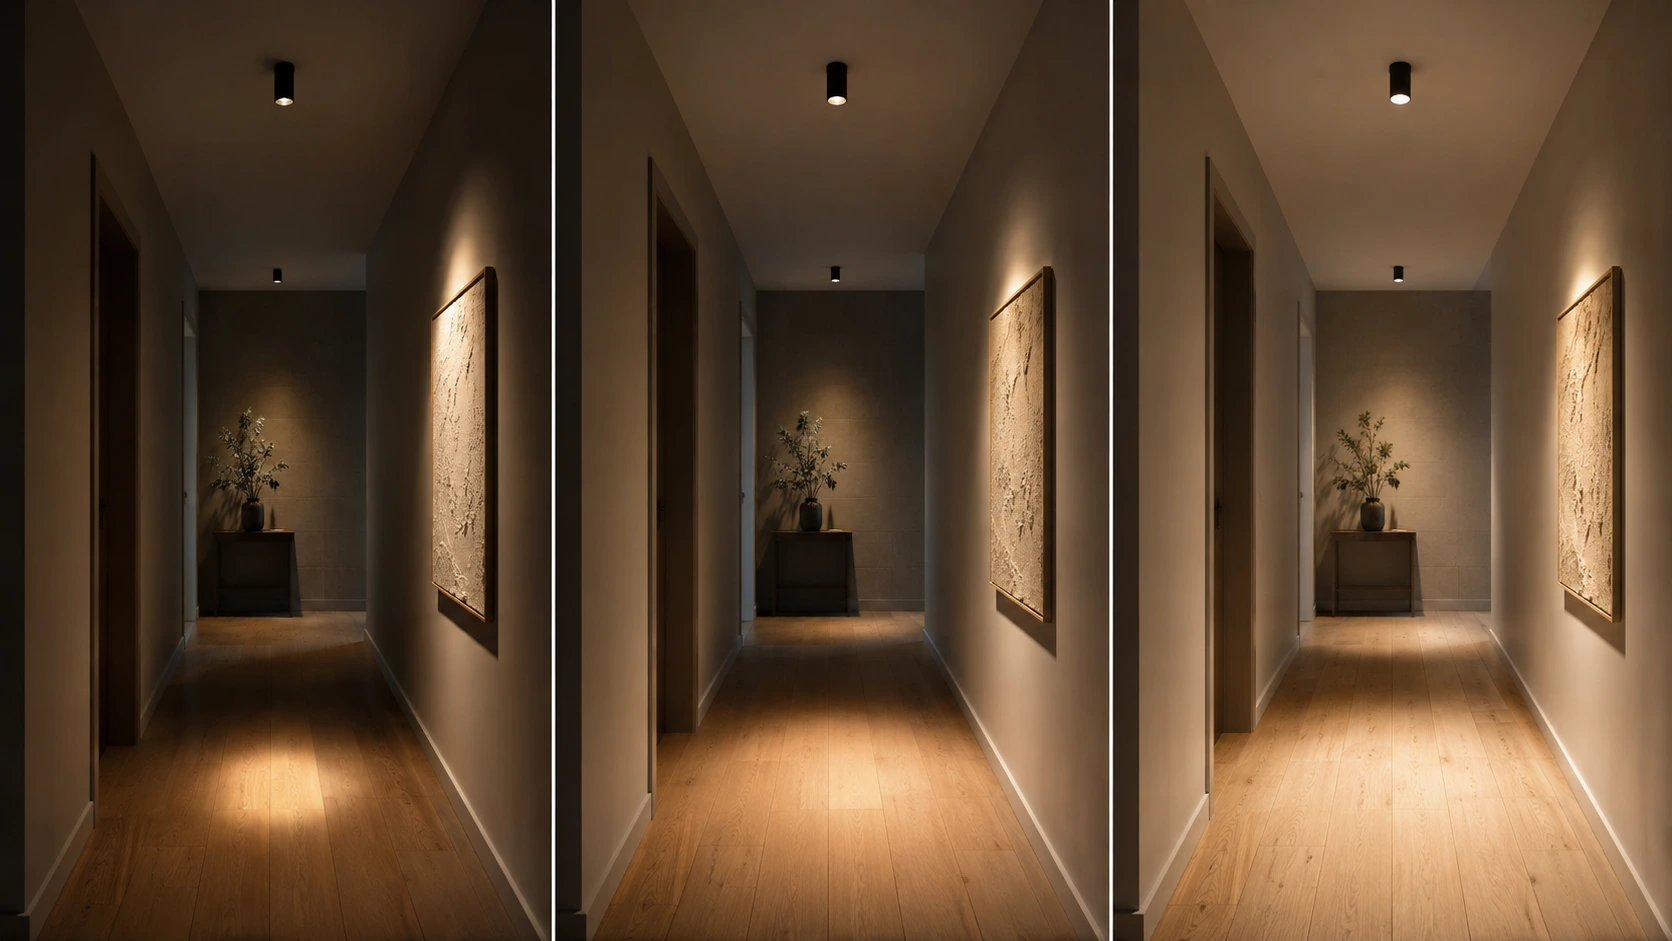
Medium Beams for Controlled Lighting
A medium beam is often useful when the objective is to create controlled illumination without producing very tight pools of light.
Typical applications include:
corridor artwork;
textured walls;
end walls;
consoles or niches;
stair landings;
directional ceiling spotlights.
A beam around 36° is often a practical residential starting point because it provides a balance between focus and coverage.
But the actual result still depends on mounting height and distance from the target.
Wider Beams for General Circulation
Wider beams can be useful where the goal is smoother general illumination.
They may work particularly well for:
low or moderate ceiling heights;
narrow corridors requiring broad floor coverage;
landings;
general staircase illumination;
layouts where fewer fixtures need to overlap smoothly.
A wider beam can reduce the appearance of isolated bright circles, but it should still provide enough useful intensity where people are walking.
Narrow Beams Are Usually for Accents
Narrower beams are more appropriate when the target is specific.
For example:
a small artwork;
a sculpture;
a narrow textured wall;
a decorative feature at the end of a corridor.
Using a narrow beam for general corridor lighting can create strong pools of light separated by darker areas unless the layout is carefully calculated.
Mounting Distance Changes the Result
The same beam angle produces a different footprint depending on the distance between the fixture and the target.
As the distance increases:
the beam becomes wider;
the illuminated area increases;
the light intensity is spread across a larger surface.
This is why a beam that works well on a 2.5m corridor ceiling may behave differently in a double-height stairwell.
The same principle applies when aiming a spotlight toward a wall rather than directly toward the floor.
Floor Lighting and Wall Lighting Need Different Thinking
A spotlight aimed vertically downward creates one type of footprint.
A spotlight aimed toward artwork or a wall creates another.
For vertical surfaces, also consider:
how far the fixture sits from the wall;
the aiming angle;
the target height;
whether the beam should reveal texture or create broad wall brightness.
The objective is not always to create a visible circle of light.
Often, the strongest corridor lighting feels softer because the beam edges overlap or disappear into the surrounding illumination.
Avoid Mixing Beam Angles Without a Reason
Different beam angles can work in the same corridor, but each should have a clear purpose.
For example:
wider beams for general circulation;
medium beams for selected wall lighting;
narrower beams for artwork.
Randomly mixing optics can create uneven brightness and an unnecessarily complicated ceiling plan.
Calculate the Actual Spread
For numerical beam width, use the Beam Angle & Light Spread Calculator.
For a deeper explanation of 24° vs 36° vs 60°, use the Beam Angle Guide.
Those tools should determine the exact beam footprint.
This guide should determine what the light needs to illuminate and why.
The best beam angle is the one that places useful light on the route or surface without creating unwanted glare, dark gaps or excessive spill.
Glare: Check the Staircase From Above and Below
Staircase lighting is unusually sensitive to glare because people see the same fixtures from constantly changing heights and angles.
The light quality and glare guide explains the technical terms. Here, check the actual views from the upper landing, lower landing and along the flight.
A fitting that looks comfortable from the bottom of the stairs may become directly visible when viewed from the landing above.
The same problem can happen in reverse.
That is why staircase lighting should never be judged from only one fixed position.
Every stair-lighting scheme should be checked while looking up, looking down and moving across the landing.
Why Staircases Create More Glare Risk
Unlike a flat corridor, a staircase changes the viewer's eye level continuously.
As someone climbs or descends:
wall lights move into and out of the normal field of view;
low-level step lights may become directly visible;
ceiling spotlights can appear brighter from certain positions;
suspended decorative fixtures may be seen from several floors;
reflected light can appear differently on glossy stone, glass or metal surfaces.
The problem is often not the amount of light.
It is the visibility of the source.
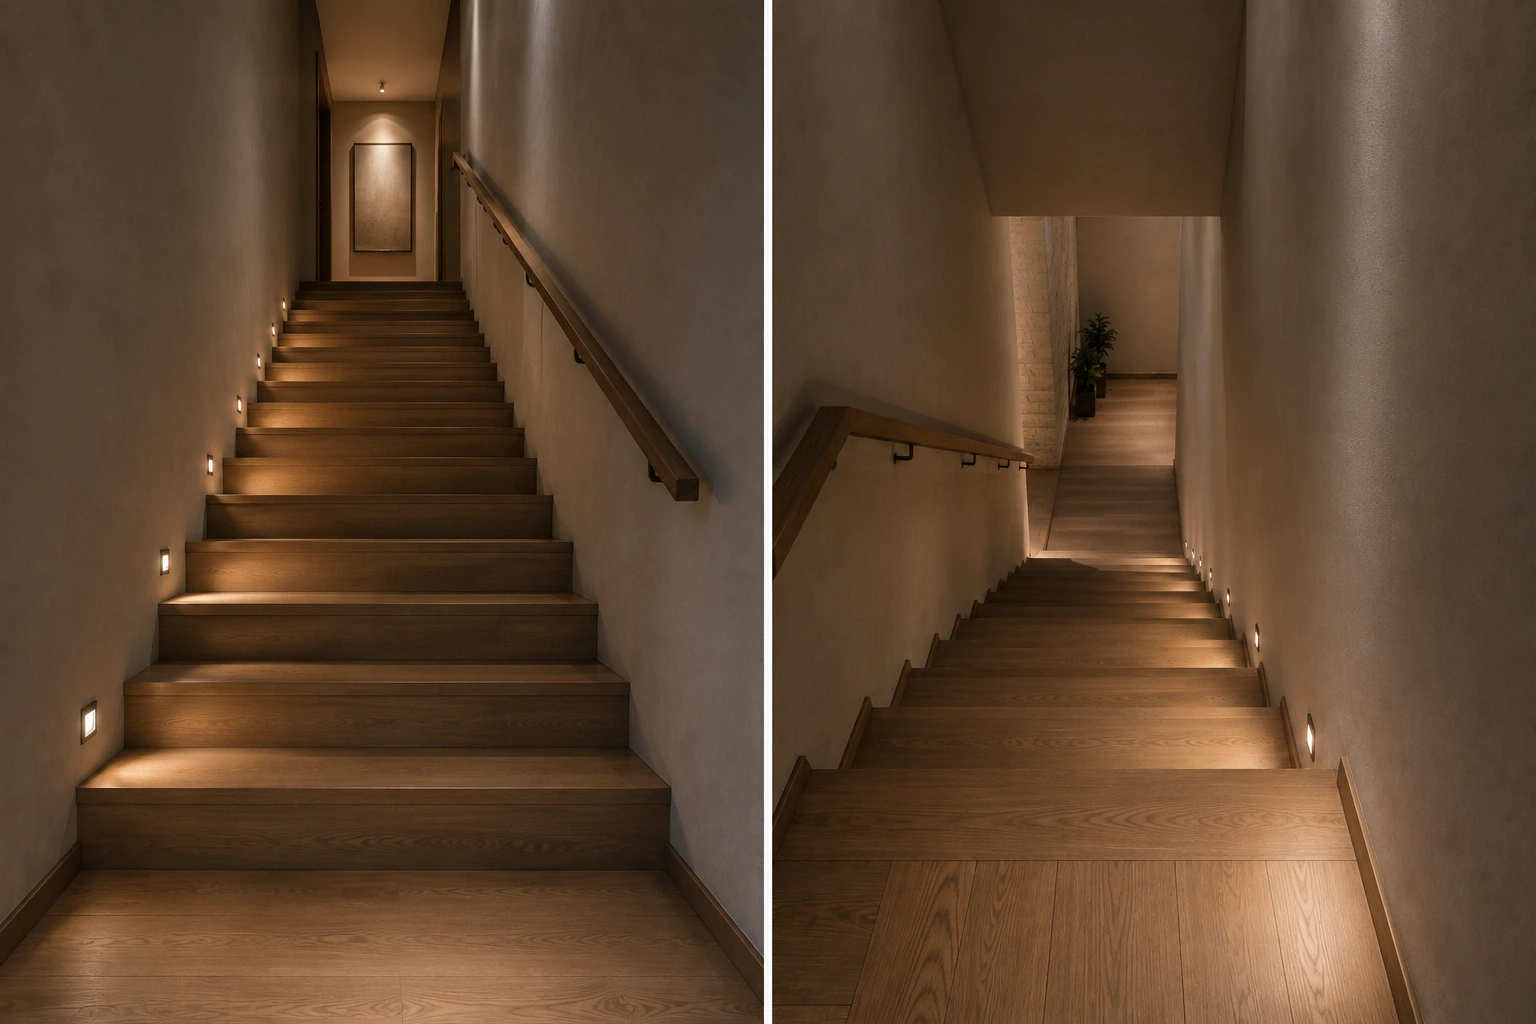
Check Low-Level Lights From Above
A recessed wall light may look perfectly shielded while standing below it.
But from the top of the staircase, the lamp or LED source may become visible.
This can create a sequence of bright points along the wall.
Good low-level stair lighting should:
direct most of its light toward the tread or walking surface;
conceal the LED or lamp where possible;
avoid a strong upward component;
remain comfortable when viewed from above.
Check Wall Lights From Below
Wall-mounted fixtures can provide excellent vertical brightness, but their mounting height and optical design matter.
When looking upward, make sure the fitting does not expose:
a bright lamp;
an unshielded LED module;
a harsh opening in the bottom of the fixture.
Up/down wall lights can work well, but the downward component should remain comfortable at the viewing angles created by the staircase.
Be Careful With Ceiling Spotlights
A downlight or spotlight positioned near the top of a stair flight may become visible when someone approaches from below.
Deep-recessed, shielded or carefully positioned optics can help reduce this effect.
Avoid placing bright fixtures where normal movement naturally directs the eye toward the light source.
The objective is to illuminate the staircase—not make the fixture itself the brightest object in the view.
Open Staircases Need Extra Attention
Open staircases and double-height stairwells create even more viewing directions.
A person may see the lighting:
from the lower floor;
from the upper landing;
through the balustrade;
from an adjacent corridor;
across the stair void.
For these spaces, decorative and functional lighting should be considered together.
A beautiful suspended fixture can become uncomfortable if bright lamps or LED elements are exposed directly toward upper-level sightlines.
Reflections Can Also Create Glare
Not all glare comes directly from the fixture.
Highly reflective materials can produce distracting highlights, including:
polished stone;
glossy stair treads;
glass balustrades;
mirrors;
polished metal details.
Aiming and beam intensity should therefore be checked on the finished materials, not only on the architectural drawing.
The Seated Test Becomes the Moving Test
In the Dining Room guide, fixture comfort is checked from seated eye level.
For stairs, the equivalent is a movement test.
Walk the complete route:
approach the first step;
look upward while climbing;
cross the landing;
look downward before descending;
check the view through any open stair void.
If one fixture repeatedly becomes the brightest object in the field of view, its position, shielding or output may need adjustment.
Good staircase lighting lets you see the route clearly without constantly noticing the light sources themselves.
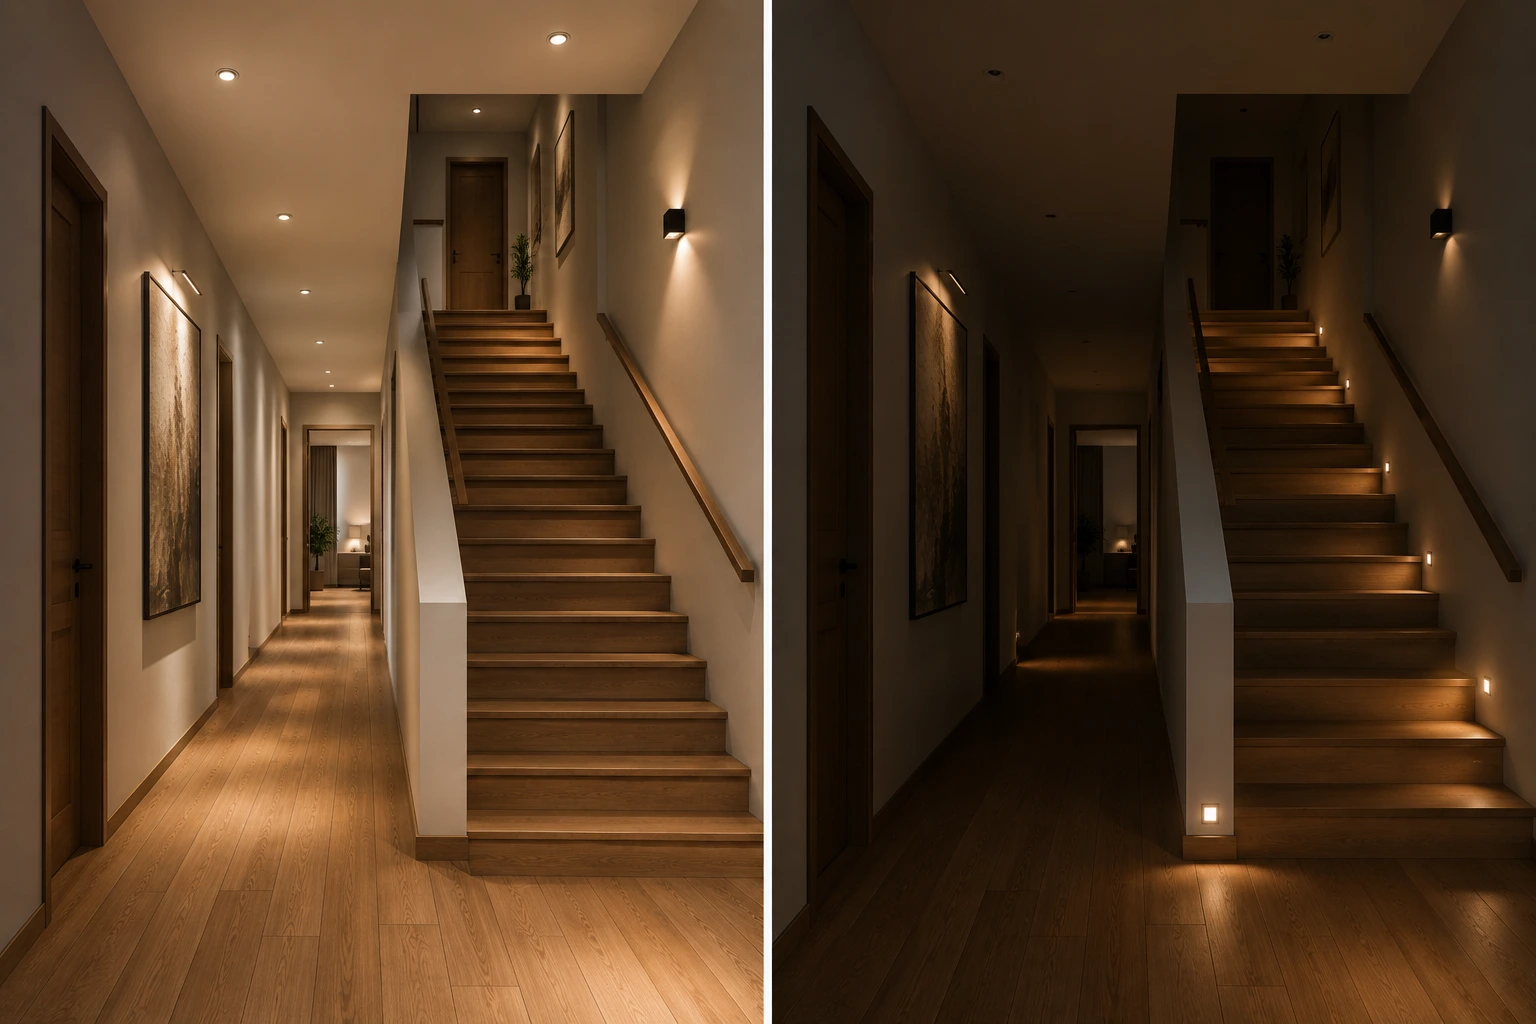
Night Lighting & Low-Level Guidance
Corridors and staircases often need to work very differently at night than they do during normal evening use.
During the day or early evening, the full lighting scheme may include ceiling lights, wall lights and decorative layers.
At night, that same level of brightness can feel excessive.
A better approach is to provide enough light for safe movement without suddenly illuminating the entire circulation space.
Night lighting should reveal the route without turning the corridor or staircase into the brightest part of the home.
Keep the Light Low
Low-level lighting is especially effective at night because it places useful illumination close to the walking surface.
This can include:
recessed wall lights;
shielded step lights;
concealed lighting along a handrail or stringer;
low-level wall washing;
a dimmed wall-light circuit.
The goal is to reveal the route rather than provide full daytime brightness.
Avoid Sudden Brightness Changes
A person leaving a dark bedroom may find a fully illuminated corridor uncomfortable.
The same applies when moving from a softly lit living area into a much brighter staircase.
A lower nighttime lighting level can make these transitions more comfortable while still preserving visibility.
This is particularly useful near:
bedrooms;
children's rooms;
bathrooms;
upper-floor corridors;
staircases used during the night.
Make the First Step Easy to Find
At night, the beginning of the staircase becomes especially important.
The first tread should be visible before someone reaches it.
The same applies to:
the last step;
intermediate landings;
changes in direction;
the point where the stair meets a corridor.
A small amount of carefully placed low-level light can provide a stronger visual cue than a bright ceiling fixture located farther away.
Do Not Create a Row of Bright Dots
Night lighting should remain visually quiet.
If every step light becomes a bright luminous square, the eye may notice the fixtures more than the staircase itself.
This can be distracting and may create glare when looking along the stair flight.
Prefer fittings that:
shield the source;
direct light toward the walking surface;
produce soft overlap;
remain comfortable from both directions.
Separate Night Lighting From General Lighting
Where the project allows it, consider controlling low-level lighting separately from the full circulation scheme.
For example:
Normal mode
general ceiling lighting;
wall lighting;
decorative or accent layers.
Night mode
low-level step or wall lighting;
reduced output;
only the fixtures needed to understand the route.
This gives the same architecture two different lighting behaviours without changing the fixture layout.
Dimming Can Be Useful
If compatible fixtures and controls are installed, dimming can allow the circulation lighting to operate at a lower level during late-night use.
However, dimming should not reduce the light so far that:
steps become difficult to distinguish;
landings disappear;
the first or last tread becomes unclear.
The objective remains visibility first.
Think About What the Light Reaches
At night, spill light into adjacent rooms can matter.
A staircase light that throws strong light through an open bedroom door may be technically useful in the stairwell but disruptive elsewhere.
Likewise, a very bright upper landing may illuminate the stair void and nearby rooms unnecessarily.
Night lighting should therefore be judged both from the circulation space and from adjoining rooms.
The Nighttime Goal
A strong nighttime scheme should let someone:
enter the corridor;
identify the direction of travel;
find the staircase;
distinguish the steps and landing;
reach the destination without needing the full lighting scheme.
The best nighttime circulation lighting feels almost unnoticed—until you need it.
Controls, Two-Way Switching & Motion Sensors
Good corridor and staircase lighting is not only about fixture placement.
The controls should also match the way people move through the space.
A corridor or staircase is usually entered from more than one direction, so the lighting should be convenient to operate from the points where people actually arrive.
If a route can be entered from two ends, the lighting should normally be controllable from both ends.
Control the Route From Both Directions
For a straight corridor, this may mean control near both entrances.
For a staircase, it commonly means control at:
the bottom of the stairs;
the upper landing;
and sometimes an intermediate landing where the route changes direction.
The user should not need to walk through a dark circulation space just to reach the switch.
In conventional installations, this is often achieved with two-way or multi-point switching.
In smart-control systems, the same behaviour may be created electronically.
Separate General and Night Lighting Where Useful
If the project includes low-level stair or corridor lighting, consider keeping it separate from the main general lighting.
For example:
General circuit
ceiling lights;
brighter wall lighting;
decorative or accent lighting.
Night / guidance circuit
low-level stair lights;
selected wall lights;
concealed guidance lighting.
This allows the circulation space to operate at a reduced level when full illumination is unnecessary.
Motion Sensors Can Be Useful
Corridors and staircases are often occupied only briefly.
This makes motion or occupancy control useful in some projects.
A sensor can activate lighting when someone enters the route and switch it off after the space is no longer occupied.
This can be particularly practical for:
internal corridors;
secondary staircases;
upper-floor circulation;
utility routes;
late-night movement.
However, automatic lighting should still feel predictable.
The light should activate before the person reaches a dark step or turn.
Sensor Position Matters
Poor sensor placement can create frustrating behaviour.
Avoid situations where:
someone has to enter the dark corridor before being detected;
the sensor cannot see movement on part of the staircase;
the light switches off while someone is still using the stairs;
doors or walls block the sensor's detection area.
For staircases, detection may need to consider both the upper and lower approach.
The control strategy should follow the route just as carefully as the lighting layout itself.
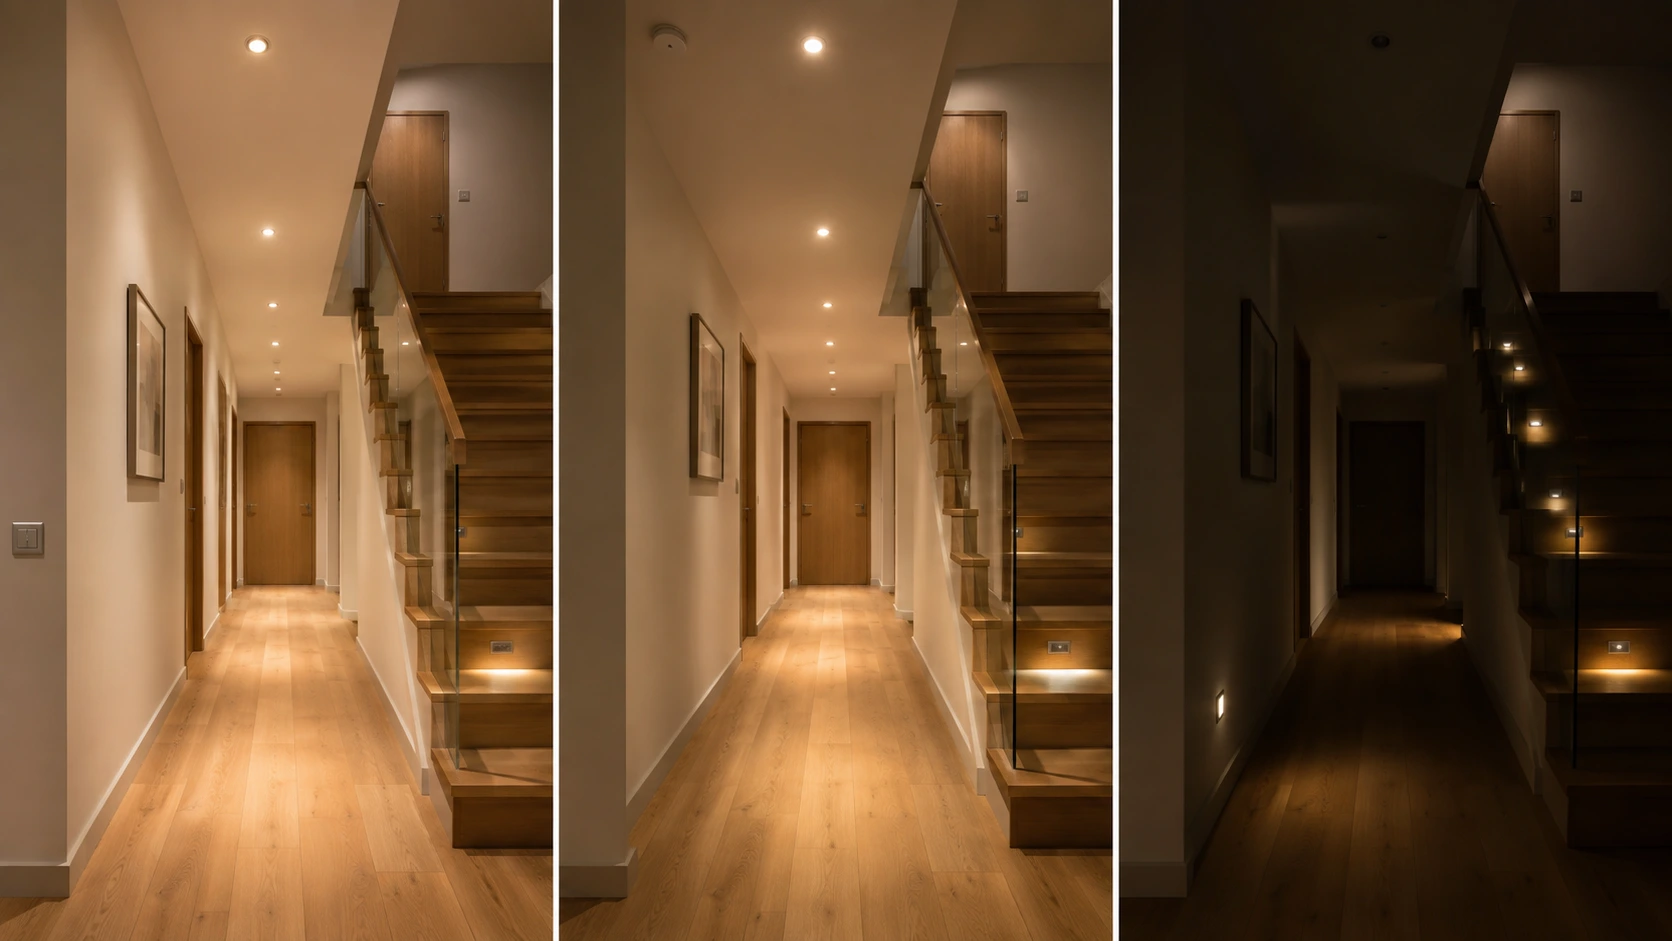
Avoid Unnecessarily Bright Automatic Lighting at Night
A motion sensor does not have to activate the entire lighting scheme at full output.
Where the system allows it, nighttime activation can use:
a reduced dimming level;
only the low-level guidance circuit;
selected wall or step lights.
This can provide enough visibility without producing a sudden change from darkness to full brightness.
Dimming and Compatibility
If dimming is part of the plan, verify that the complete system is compatible.
This includes:
LED lamps or integrated LED modules;
drivers;
dimmers;
control systems;
sensors where they are part of the same circuit.
A fixture described as dimmable does not automatically mean it will work correctly with every dimmer.
Keep the User Experience Simple
A sophisticated control system is not useful if nobody understands how to operate it.
For a residential corridor or staircase, the controls can often remain very simple:
General
Night
Accent, where needed
or an automatic sensor strategy with manual override where appropriate.
The best control system makes the lighting easier to use without making the user think about the control system itself.
Double-Height Staircases & Decorative Lighting
Open staircases and double-height stairwells create an opportunity for decorative lighting, but the decorative fixture should not be expected to perform the entire lighting job.
For decorative fixture proportions, see the chandelier sizing guide. Keep the staircase sightlines, headroom and useful tread lighting central to the final choice.
A chandelier, pendant cluster or cascading suspension can become the visual centre of the space, while separate functional lighting keeps the steps, landings and circulation route easy to use.
In a double-height staircase, decorative lighting should create the focal point while functional lighting protects the route.
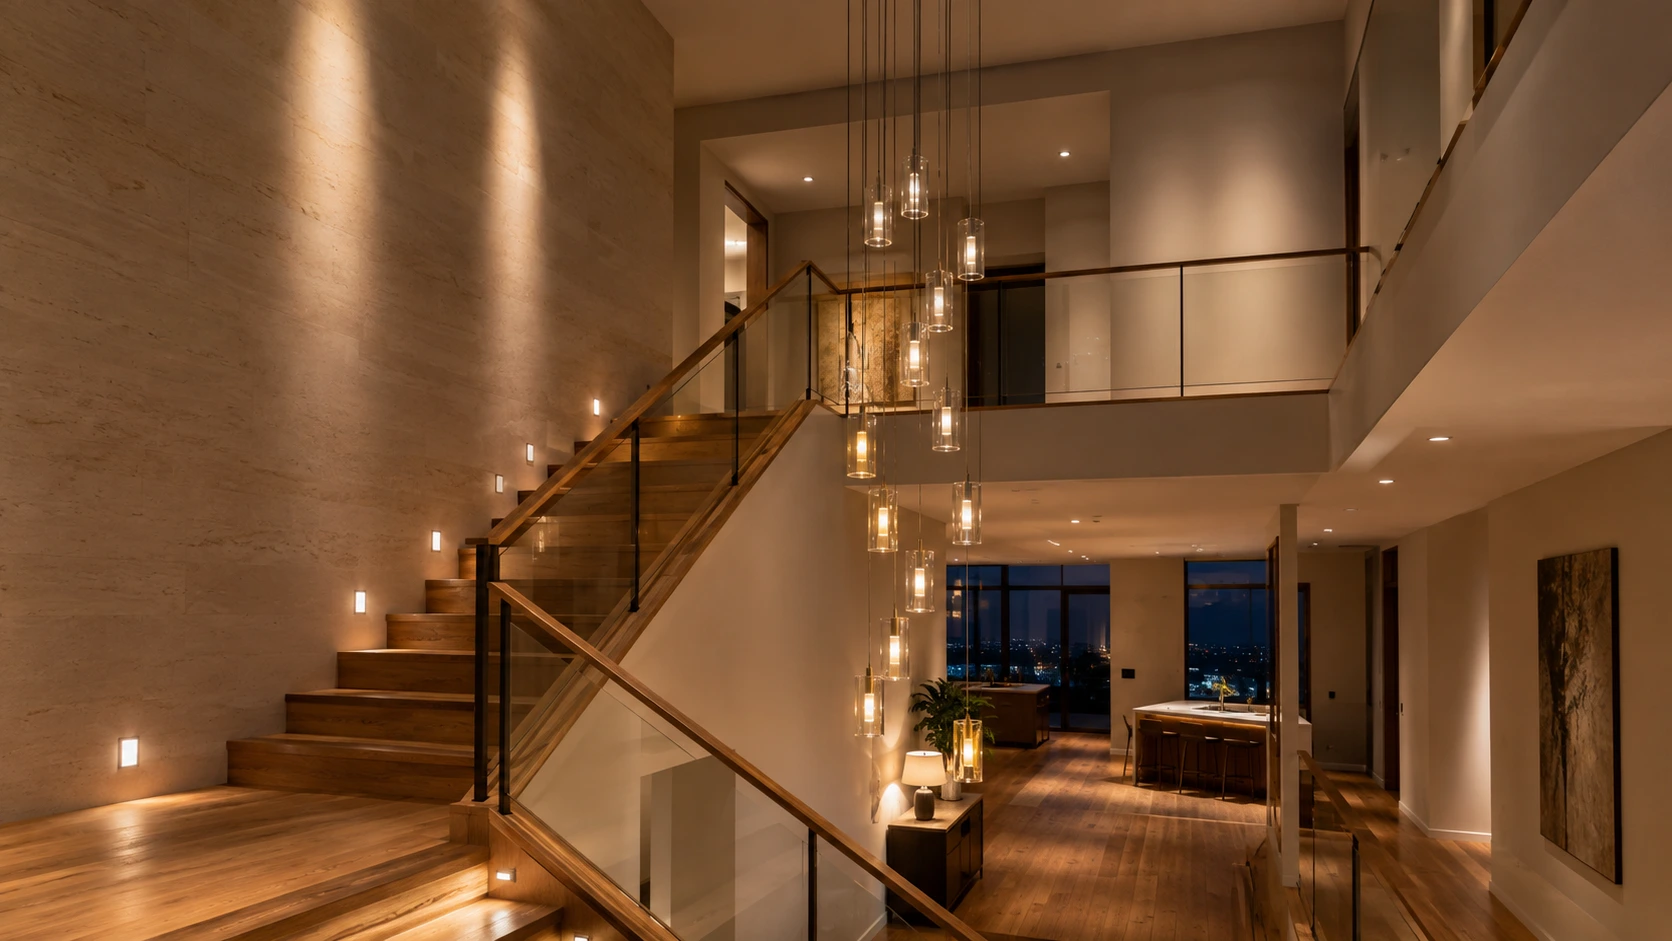
Start With the Staircase, Not the Fixture
Before choosing a suspended decorative light, identify:
the height of the stairwell;
number and position of landings;
where the staircase is viewed from;
the open void dimensions;
ceiling fixing point;
upper-floor sightlines;
handrail and balustrade positions.
A fixture can look perfectly proportioned from the ground floor and still appear awkward or glaring from the upper landing.
This is why the staircase should be evaluated as a three-dimensional space.
Use Decorative Light as the Vertical Layer
A suspended fixture can help connect several levels visually.
Suitable approaches may include:
a single elongated pendant;
a cascading multi-light composition;
a chandelier;
a cluster of pendants at different heights;
a sculptural vertical fixture.
The decorative layer should relate to the height and openness of the void rather than simply filling empty space.
For detailed fixture proportions and suspended-light sizing, use the Chandelier Size Guide rather than applying generic staircase dimensions here.
Keep Functional Stair Lighting Separate
Even a large decorative fixture may not provide useful light on every tread.
The staircase may still need:
low-level wall or step lighting;
landing lights;
wall lights;
controlled ceiling or recessed lighting.
This makes it possible to dim the decorative fixture for atmosphere while maintaining safe circulation.
The functional layer should still work if the chandelier or pendant is switched off.
Check the Fixture From Every Floor
Double-height fixtures are visible from multiple heights.
Review the design from:
the bottom of the staircase;
the intermediate landing;
the upper floor;
adjacent corridors;
nearby rooms that look into the stairwell.
Pay particular attention to exposed lamps, LED modules and very bright diffusers.
A fixture that is comfortable from below can become much brighter when viewed horizontally from an upper landing.
Do Not Hang the Fixture Into the Walking Zone
The decorative composition should remain visually connected to the staircase without interfering with the route.
Keep clear of:
handrails;
landings;
headroom;
normal movement through the stairwell.
For cascading fixtures, the lowest element should be positioned according to the actual staircase geometry, not simply by repeating a decorative spacing pattern.
Let the Architecture Guide the Composition
A straight vertical void may suit an elongated fixture.
A broader open stairwell may suit:
a larger chandelier;
several suspended elements;
a more sculptural composition.
An L-shaped or U-shaped staircase may require the decorative fixture to relate to the central void rather than one individual flight.
The fixture should feel connected to the overall volume.
Coordinate Decorative and Functional CCT
The decorative and circulation layers should usually feel visually related.
For residential stairwells, coordinated warm white lighting around 2700K–3000K often creates a comfortable result. For a deeper comparison of warm-white colour temperatures, see our 3000K vs 4000K Lighting Guide.
A very warm decorative chandelier beside much cooler stair lighting can make the layers look unrelated.
Consistency matters especially because both types of light are visible simultaneously across the large vertical space.
Control the Layers Separately
Where practical, separate:
Decorative layer
chandelier;
pendants;
cascading suspension.
Functional layer
step lights;
wall lights;
landings;
ceiling or recessed lighting.
This allows several useful scenes.
For example:
Everyday
functional lighting on;
decorative fixture at moderate output.
Entertaining
decorative fixture emphasized;
functional lighting reduced but still sufficient.
Night
decorative fixture off;
only low-level circulation lighting active.
A successful double-height staircase still works when the decorative fixture is dimmed or switched off.
Worked Corridor + Staircase Lighting Plans
The principles become easier to apply when they are translated into an actual layout.
Below are two residential examples: one long corridor and one U-shaped staircase.
The exact fixture quantity will vary with the products selected, but the planning logic should remain the same.
Worked Example A — 6m × 1.2m Residential Corridor
Assume a corridor with:
Length: 6m
Width: 1.2m
Ceiling height: 2.7m
Floor area: 7.2m²
bedrooms and doors along both sides;
one artwork wall;
a feature wall at the end of the corridor.
For a practical design target of 120 lux, the basic requirement is:
7.2m² × 120 lux = 864 lumens
Using:
Utilization Factor = 0.70
Maintenance Factor = 0.80
the preliminary initial fixture output becomes:
864 ÷ 0.70 ÷ 0.80 ≈ 1,543 lumens
This gives us a realistic starting point of approximately 1,500–1,600 lumens of initial fixture output.
Step 1 — Define the Route
The walking route runs continuously through the full 6m length.
Doorways are treated as part of the architecture, but they do not each need their own ceiling light.
The end wall is used as a visual destination.
Step 2 — Add General Circulation Lighting
Instead of installing a dense row of identical downlights, use a restrained number of medium- or wide-beam fixtures with sufficient overlap.
The exact quantity should be tested using the Spotlight Layout Calculator and the actual lumen output of the selected product.
The objective is:
no obvious dark gaps;
no repetitive runway effect;
enough light along the complete walking route.
Step 3 — Add Vertical Light
One adjustable fitting can be aimed at the artwork wall.
Another layer can softly illuminate the end wall.
These vertical surfaces make the corridor feel brighter without requiring the floor itself to become excessively bright.
Step 4 — Check the Final View
Stand mentally at both ends of the corridor.
The finished layout should show:
a continuous route;
visible door locations;
one clear artwork feature;
a softly illuminated destination;
a calm ceiling rather than a line of identical bright points.
The corridor calculation establishes the amount of light. The architecture determines how that light should be distributed.
Worked Example B — U-Shaped Residential Staircase
Now consider a residential staircase with:
approximately 18 risers;
two flights;
one intermediate landing;
a wall along one side;
open balustrade toward the stair void;
warm timber treads;
approximately 2.7–3m floor-to-floor height.
For residential circulation, 100–150 lux remains a useful planning range, but the staircase should not be designed from the lumen total alone.
The priority is ensuring that each change in level remains visually clear.
Step 1 — Identify the Critical Points
Before choosing fixtures, mark:
the first step;
the first flight;
the intermediate landing;
the change in direction;
the second flight;
the final step;
the upper landing.
These are the locations where visual guidance is most important.
Step 2 — Add Low-Level Stair Lighting
Use shielded recessed wall or step lights along the stair flights.
They should:
illuminate the tread surface;
help define the stair rhythm;
remain comfortable when viewed from above and below;
overlap gently rather than producing isolated bright patches.
There is no requirement to install one light beside every tread.
The spacing should be based on the fixture output, optical distribution and stair geometry.
Step 3 — Give the Landing Its Own Light
The intermediate landing is a change-of-direction point.
Give it enough general or wall illumination that the user can immediately see:
where the first flight ends;
where the route turns;
where the next flight begins.
Do not rely solely on step lights from the flights to illuminate the landing.
Step 4 — Add General or Vertical Lighting
A restrained ceiling or wall fixture can support the overall stairwell.
If the staircase has an attractive wall, artwork or textured surface, vertical illumination can add depth while also improving perceived brightness.
The functional lighting should remain usable even without any decorative suspended fixture.
Step 5 — Create a Night Mode
For late-night movement, the full stairwell does not need to operate at normal evening brightness.
A separate low-level circuit can keep:
the first step;
stair treads;
intermediate landing;
final step
visible while most general lighting remains off or dimmed.
Step 6 — Check Both Viewing Directions
Walk the route conceptually from bottom to top, then from top to bottom.
Look for:
visible light sources;
glare from low-level fittings;
dark tread edges;
poorly lit landings;
reflections from glass or polished surfaces.
If one fixture becomes visually dominant from either direction, revise its position or shielding.
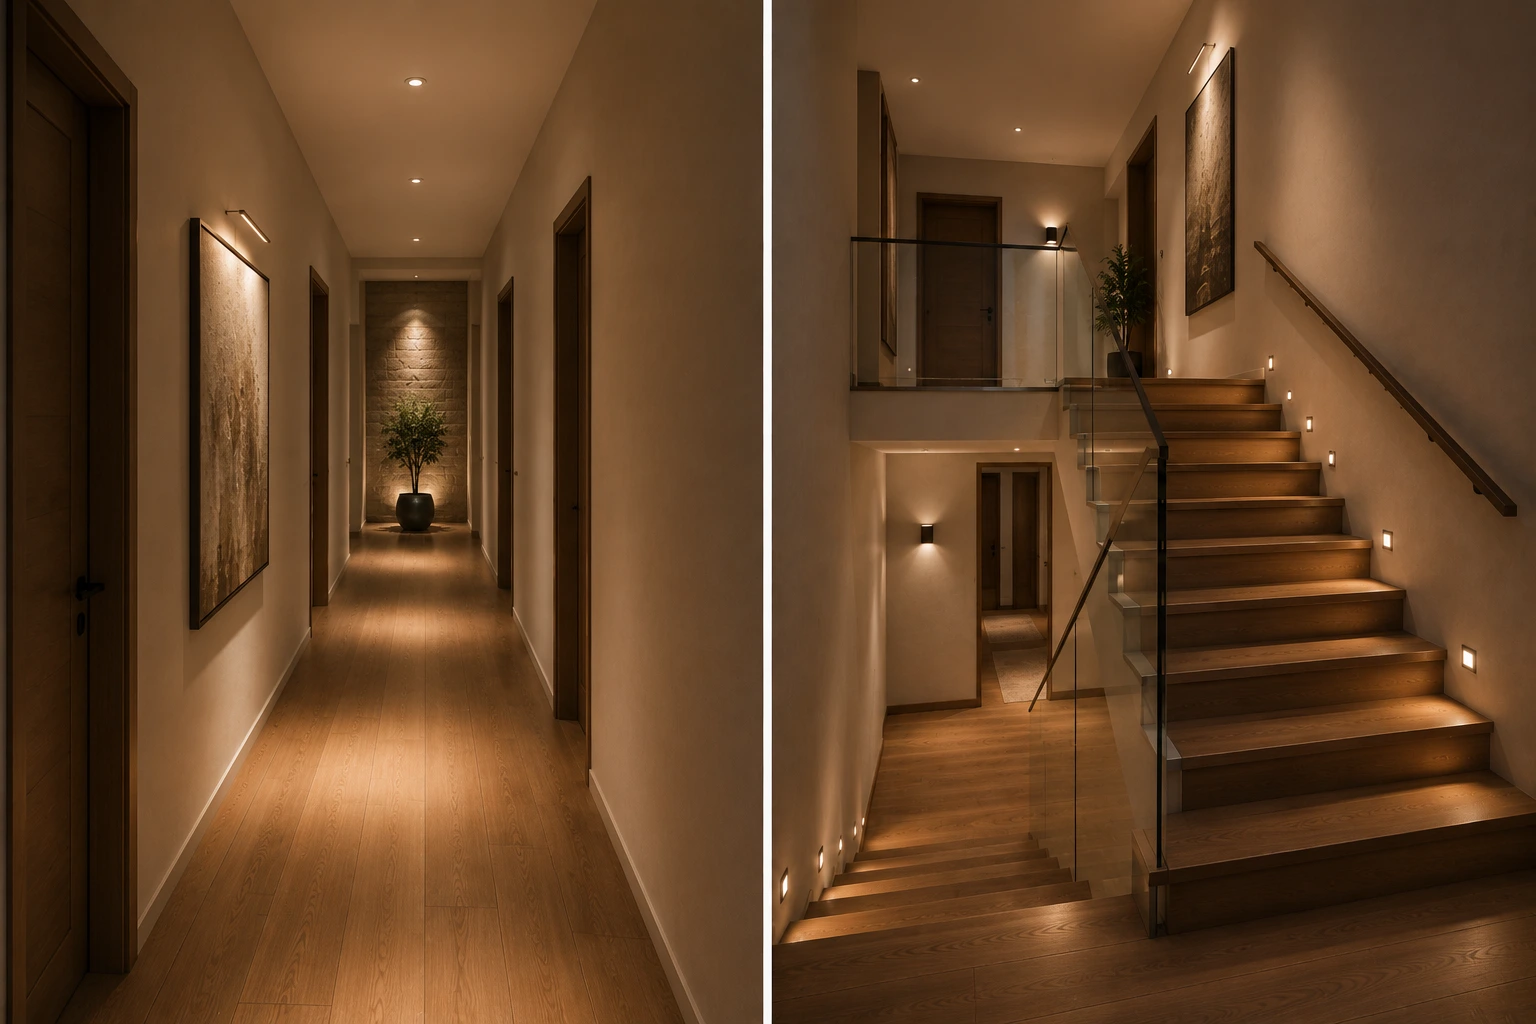
A Practical Combined Scheme
For a home where the corridor connects directly to the staircase, the two areas should feel like one circulation route.
A balanced system might use:
Corridor
restrained ceiling spotlights for general movement;
one artwork accent;
softly lit destination wall.
Staircase
low-level wall or step lighting;
dedicated landing illumination;
one restrained wall or ceiling layer.
Controls
general circulation lighting from both ends;
separate low-level night circuit;
motion control where appropriate.
Light Character
approximately 2700K–3000K throughout;
compatible brightness between corridor and staircase;
no abrupt change from a warm corridor to much cooler stair lighting.
The strongest corridor and staircase plan feels continuous: the lighting changes according to the architecture, but the route remains visually connected from beginning to end.
Six Common Corridor & Stair Lighting Mistakes
Most circulation-lighting problems are not caused by using the wrong fixture type.
They usually come from placing the right fixtures in the wrong places, ignoring how people move through the space or relying too heavily on one lighting layer.
1. Turning the Corridor Into a Runway
A perfectly straight row of equally spaced downlights may look tidy on plan, but it can create repetitive bright pools and leave the walls visually flat.
A better layout responds to:
door positions;
artwork;
corridor turns;
wall features;
the destination at the end of the route.
The ceiling pattern should support the corridor, not dominate it.
2. Making the Stairwell Bright but the Steps Hard to Read
A staircase can have plenty of light and still perform poorly if the treads, risers and landings visually blend together.
Good stair lighting should make changes in level immediately understandable.
The aim is not maximum brightness.
It is clear step definition with comfortable contrast.
3. Installing Step Lights That Cause Glare
Low-level stair lights are useful only if the light source remains visually controlled.
Poorly shielded fixtures may become bright points when viewed:
while climbing;
while descending;
across a landing.
Always check the fitting from both directions before finalising the layout.
4. Forgetting About Landings and Turns
Landings are often treated as empty space between stair flights.
In reality, they are important transition points.
The lighting should clearly reveal:
where one flight ends;
where the route changes direction;
where the next flight begins.
The same applies to L-shaped corridor turns and stair-to-corridor connections.
5. Using Only One Full-Brightness Lighting Mode
A circulation route does not need to behave the same way all day.
Full lighting may be useful during normal evening use, while late-night movement may need only subtle low-level guidance.
Where practical, separate:
general circulation lighting;
low-level night lighting;
decorative or accent lighting.
This gives the space useful flexibility without changing the fixture layout.
6. Expecting a Decorative Staircase Fixture to Do Everything
A chandelier or pendant cluster can transform a double-height stairwell visually.
But it may not provide useful light on:
every tread;
the first and last step;
intermediate landings;
the complete circulation route.
Decorative lighting should therefore work with, not replace, the functional stair-lighting layer.
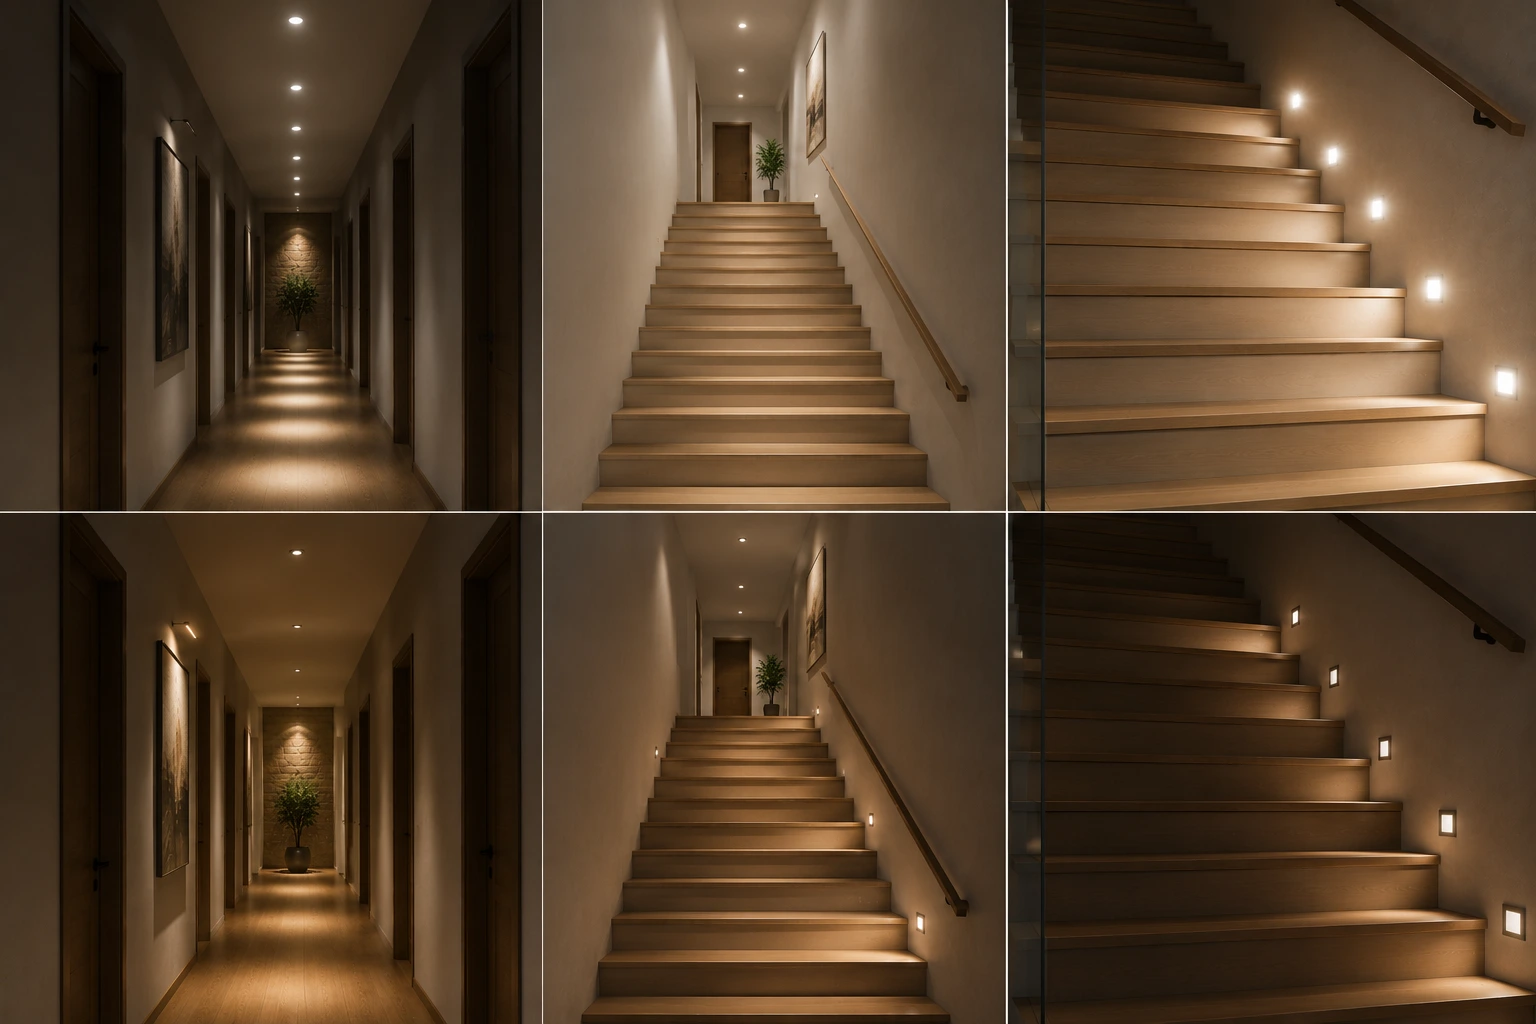
The most common mistake is treating corridors and staircases as ceiling plans instead of routes that people actually move through.
Build Your Corridor & Stair Lighting Plan
Once the circulation route, lighting layers and control strategy are clear, use the appropriate Saleh Deco planning tools to refine the actual layout.
Different questions require different tools.
I Need to Know How Much Light the Route Needs
Use the Lux & Lumens Calculator.
This is the starting point when you need to estimate:
the approximate light requirement;
initial luminaire output;
whether the selected fixtures are likely to provide enough light;
the effect of utilization and maintenance factors.
For corridors and residential staircases, approximately 100–150 lux is a useful planning range, but the final layout still needs to make the route and level changes visually clear.
For the full calculation method, refer to the Lux & Lumens Lighting Guide.
I Am Planning Corridor Spotlights
Use the Spotlight Layout Calculator.
It can help test:
spotlight quantity;
spacing;
wall offset;
beam overlap;
parallel corridor layouts;
floor-level circulation coverage.
Use the calculator after deciding which parts of the corridor actually need light.
Do not use it simply to create the most symmetrical ceiling pattern.
For broader spacing principles, refer to How Many Spotlights Does a Room Need?
I Need to Check the Beam Spread
Use the Beam Angle & Light Spread Calculator.
This is useful when comparing:
narrower accent beams;
medium directional beams;
wider circulation coverage;
artwork lighting;
wall lighting;
stair-landings and double-height distances.
The important input is not only the beam angle. The distance from the fixture to the target surface also changes the final footprint.
Beam Angle & Light Spread Calculator
For detailed guidance on 24°, 36° and 60° optics, refer to the Beam Angle Guide.
I Am Using Concealed LED Strip
For handrails, stair stringers, recesses or other architectural linear details, use the LED Strip Driver & Cable Calculator.
It can help check:
total strip load;
suitable driver capacity;
current;
cable distance;
voltage-drop considerations.
LED Strip Driver & Cable Calculator
For complete LED-strip planning, use the LED Strip Lighting Design Guide.
Explore the Most Relevant Lighting Categories
Once the lighting strategy is defined, browse products according to the job each fixture needs to perform.
Wall Lights
A primary category for:
corridor wall illumination;
staircase walls;
vertical brightness;
decorative circulation lighting;
selected low-level applications.
Explore Wall Lights
Technical Spotlights
Useful for:
general corridor lighting;
landings;
adjustable artwork lighting;
end walls;
controlled directional illumination.
Explore Technical Spotlights
Ceiling Lights
Consider ceiling-mounted solutions where a broader ambient layer is preferred instead of—or in combination with—spotlights.
Explore Ceiling Lights
LED Strip Lights
Relevant for architectural details such as:
handrails;
stair stringers;
concealed recesses;
indirect linear lighting.
Explore LED Strip Lights
Chandeliers & Pendant Lights
These are secondary categories for open or double-height stairwells, where a decorative suspended fixture is part of the design.
The functional staircase lighting should still be planned separately.
Explore Chandeliers
Explore Pendant Lights
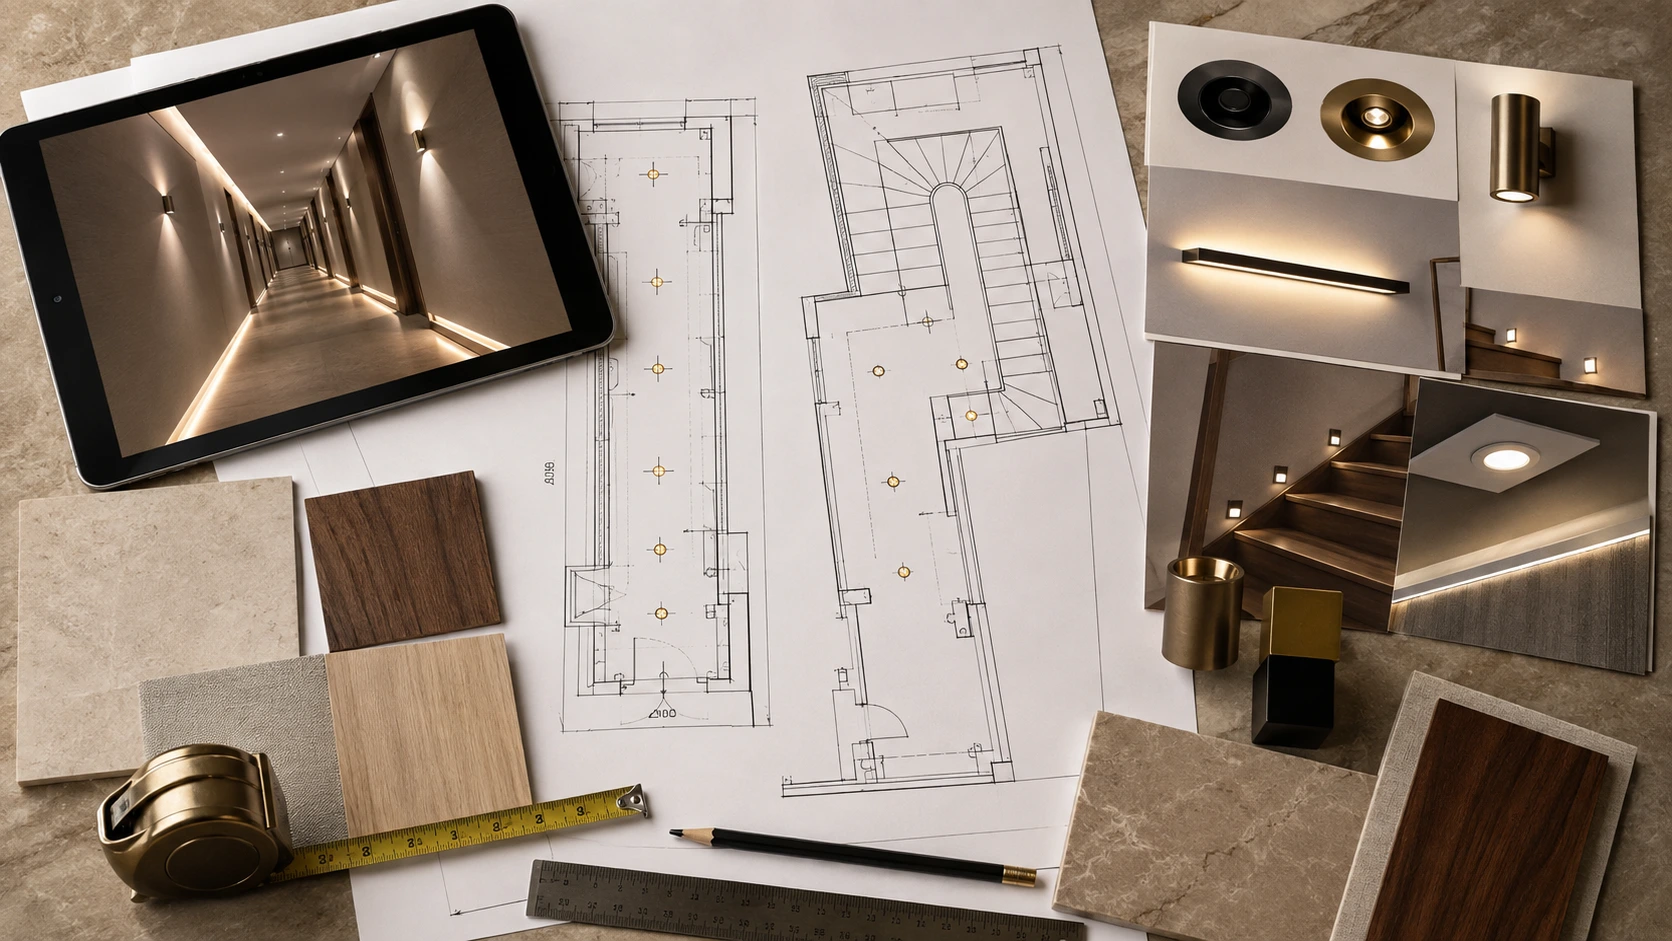
A Practical Planning Sequence
For most residential corridor and staircase projects, use this order:
map the complete circulation route;
identify stairs, landings, turns, doors and visual destinations;
estimate the required light level;
decide which surfaces need general, vertical or low-level lighting;
position the fixtures according to their function;
test spotlight spacing and beam spread;
check glare from every normal viewing direction;
define normal and nighttime controls;
choose products only after the lighting strategy is clear.
Plan the route first, calculate the light second and choose the fixtures third.
The final step is a complete checklist before the ceiling points, wall positions and controls are fixed.
Corridor & Staircase Lighting Checklist
Before finalising the ceiling points, wall positions and electrical controls, review the complete route from beginning to end.
Route & Layout
The full corridor and staircase route is confirmed.
Doors, turns, junctions and landings have been considered before placing fixtures.
Ceiling lights respond to the architecture rather than forming an unnecessary repetitive grid.
The end of a long corridor has a clear visual destination where appropriate.
Corridor and staircase lighting feel connected where the two spaces meet.
Stair Visibility
The first and last step are easy to identify.
Individual treads and risers remain visually distinct.
Intermediate landings have their own usable illumination.
Changes in direction are clearly visible.
Step lighting produces comfortable overlap rather than isolated bright patches.
Glare
Low-level fittings have been checked while walking both up and down the stairs.
Bright LED sources or lamps are not directly visible from normal viewing positions.
Ceiling fixtures near the staircase do not create uncomfortable glare from below.
Wall lights remain comfortable when viewed from different heights.
Glass, polished stone and reflective surfaces have been checked for distracting reflections.
Light Levels & Distribution
The approximate corridor or staircase light requirement has been calculated.
100–150 lux has been considered as a practical residential starting range.
Fixture output has been checked using the actual product specifications.
Walls and vertical surfaces receive useful light where needed.
The route is not dependent on one excessively bright fixture.
Spotlights & Beam Angles
Spotlight quantity is based on the actual corridor dimensions and fixture output.
Beam overlap has been checked.
Wall offset is intentional rather than arbitrary.
Artwork and feature walls use suitable directional lighting.
Narrow, medium and wide beams are used only where their distribution suits the target surface.
Night Lighting
The route remains understandable at reduced nighttime brightness.
The first step and landings remain visible in night mode.
Low-level lighting does not become a distracting row of bright points.
Light spill into bedrooms or adjoining rooms has been considered.
Controls
The lighting can be operated from the practical entry points to the route.
Stair lighting can be controlled from both the upper and lower levels where appropriate.
General and low-level night lighting are separated where useful.
Motion or occupancy sensors detect movement before the user reaches a dark section.
Automatic lighting does not switch off while the route is still occupied.
Dimmers, LED drivers, lamps, sensors and controls are electrically compatible.
Decorative Staircase Lighting
A chandelier or pendant does not replace the functional stair-lighting layer.
Suspended fixtures remain clear of landings, handrails and required headroom.
The decorative fixture has been checked from the lower floor and upper landing.
Decorative and functional lighting use visually compatible colour temperatures.
The staircase remains usable if the decorative fixture is dimmed or switched off.
Final Installation Check
Fixture dimensions and installation depths have been confirmed.
Ceiling and wall positions match the final architectural layout.
Driver and control locations remain accessible for maintenance.
Concealed LED strip installations use suitable profiles, drivers and cabling.
The complete lighting route has been reviewed before ceilings and wall finishes are closed.
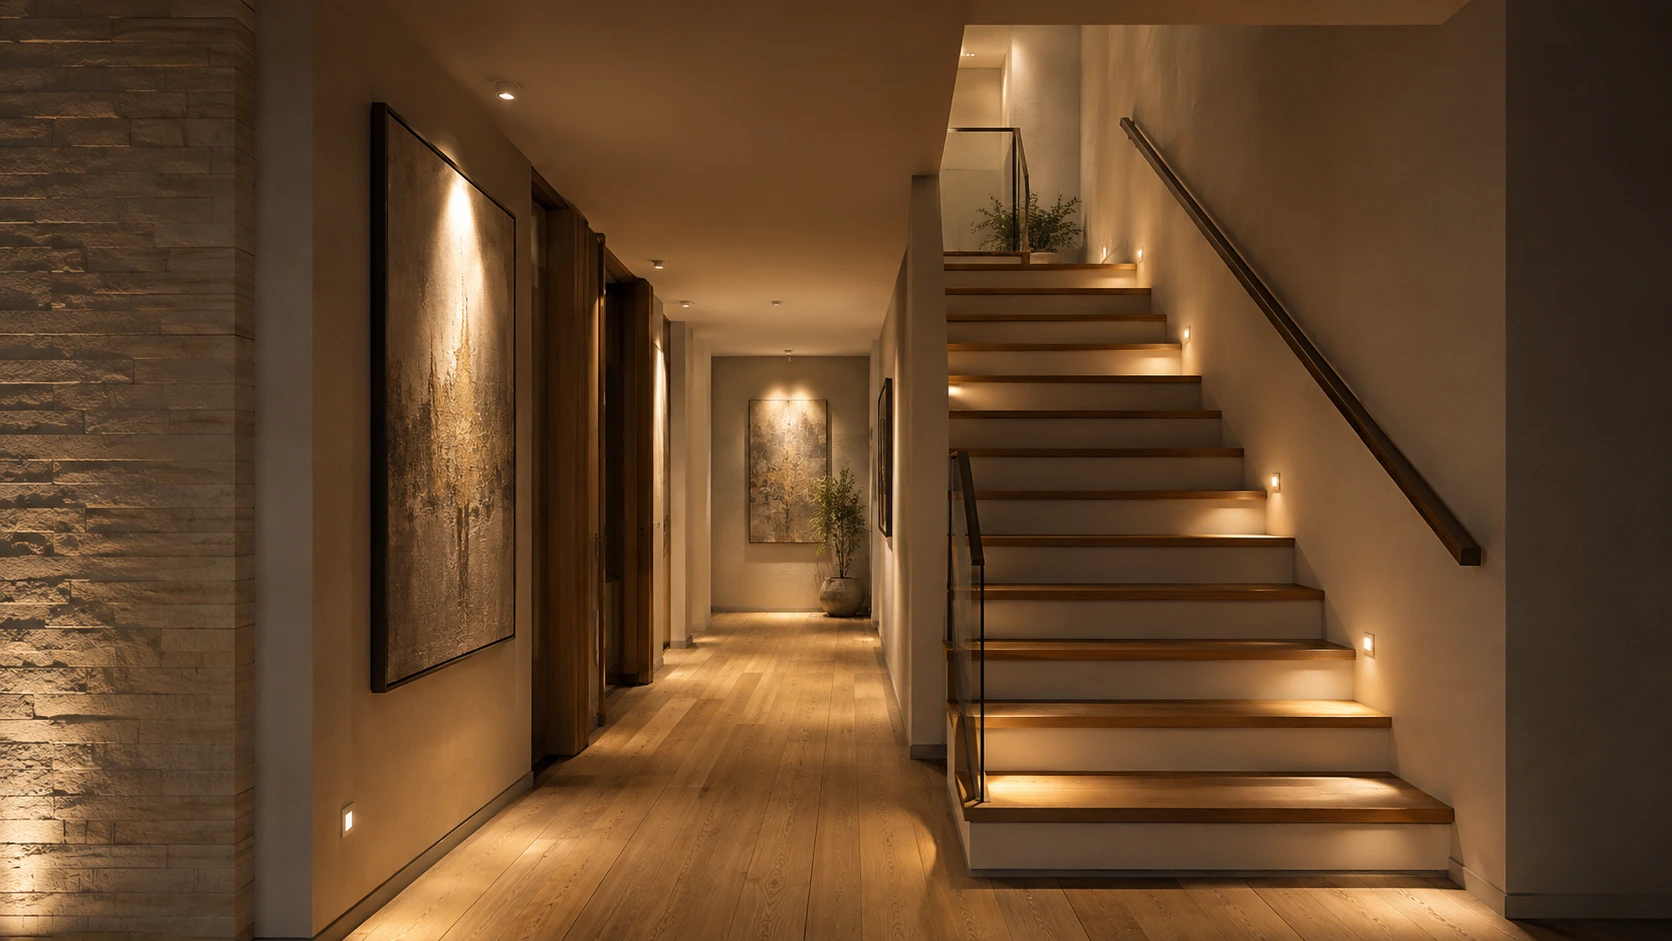
A successful corridor and staircase lighting plan should make movement feel natural: the route is clear, the steps are readable, the walls provide orientation and the light sources themselves remain visually quiet.
Need Help Planning Your Corridor or Staircase Lighting?
If you are comparing lighting options for a corridor, staircase or double-height stairwell, prepare the basic project information before selecting products.
Useful information includes:
corridor length and width;
ceiling height;
staircase type and number of flights;
number of risers;
landing dimensions;
photos or architectural plans;
wall and floor finishes;
locations of artwork or architectural features;
whether low-level night lighting is required;
whether the stairwell includes a chandelier or suspended decorative fixture.
Saleh Deco can help you compare suitable decorative and technical lighting options based on the space and intended lighting strategy.
Explore:
You can also use the Saleh Deco Lighting Tools to calculate light levels, test spotlight layouts, check beam spread and size LED-strip drivers before finalising the project.
Saleh Deco — Achrafieh, Beirut
Safety Note
This guide covers normal residential corridor and staircase lighting. Public, commercial and designated escape routes may require separate emergency or egress lighting designed to the applicable project and safety requirements.